Peakboard has always focused on UI-centric, local applications—unlike other systems like Tulip or Mendix. With Peakboard, all the processing happens on a local device (a Box or a BYOD instance), so you don’t need to have a central server or a cloud to host your applications. This is a big advantage over the alternative solutions, and it’s one of the main reasons why so many companies and developers choose Peakboard.
But there are some use instances where it makes sense to have a central server host an application. That’s why the Peakboard development team recently launched Peakboard Hub Flows.
This article is the first in a series of articles that explain how to use Hub Flows. This article serves as a starting point and explains all the basic information about Hub Flows that you need to know. We will use a Hub Flow to historize MQTT messages in a Hub list.
Here’s an overview of the topics we’ll cover in this series:
- Getting started and learning how to historize MQTT messages
- Cache Me If You Can - Data Distribution and caching for SAP Capacity Data
- One PLC to Feed Them All: Using Peakboard Flows to Share and Distribute Siemens S7 Values
- Peakboard Flows in Production: Asynchronous SAP Confirmation Processing
- Condense, Archive, Optimize: Use Hub Flows to Pre-Aggregate and Archive High-Volume Transaction Data
Understand the idea of Hub Flows
To build a Hub Flow, you use the Peakboard Designer. And to host and run a Hub Flow, you use Peakboard Hub. Before you build a Hub Flow, you must first connect Peakboard Designer to a Peakboard Hub instance.
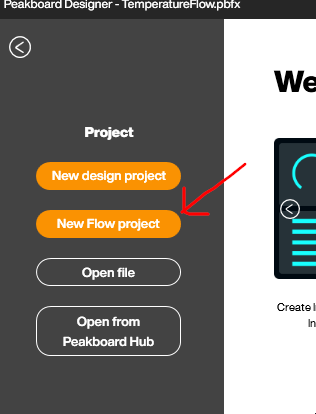
Starting with Peakboard Designer version 4, there’s a new project type called a Flow project:
A Flow project doesn’t have screens, because Hub Flows don’t have UIs. But, Flow projects do share many similarities with regular Designer projects:
- Flow projects use data sources and dataflows to retrieve and process data from connected systems.
- Flow projects use functions (either LUA code or with Building Blocks) for complex application logic
- Flow projects use Hub Flows to coordinate actions and to control the application. Unlike standard Designer projects, data sources, dataflows, and functions are never executed automatically. And there are no automatic reload scripts. So you always need a Hub Flow to trigger actions. This makes Hub Flows the sole tool for defining and coordinating what a Flow project does and under what conditions.
The final thing you need to know about is the role of Hub lists. You can use Hub lists just like a regular table, to store and read data. And it’s particularly easy to store data in Hub lists, within a Flow project. There’s built-in functionality to store data into Hub lists that come from data sources or dataflows. We’ll take a look at, later in this article.
Historize temperature data Hub Flows
For our first example project, we will build and deploy a Hub Flow that historizes temperature data. To get started, we open Peakboard Designer and select New Flow project.
Temperature data source
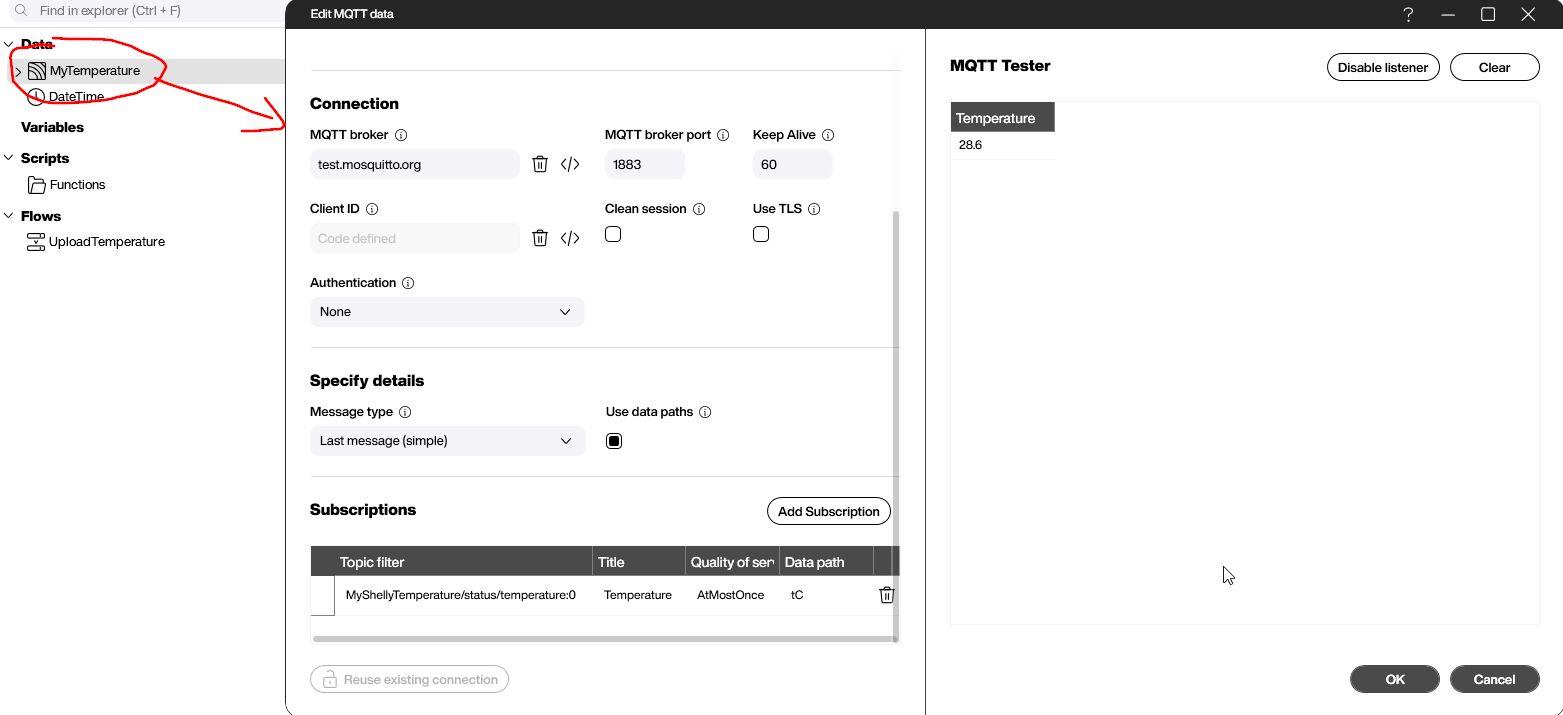
First, we create an MQTT data source to accept a temperature value. The temperature values come from a Shelly sensor. We discussed how this works in previous article, so we won’t go into the details here.
As you can see, our MQTT data source is subscribed to a single MQTT node, which is what provides the temperature:
Timestamp dataflow
We want to add a timestamp to our temperature value. To do this, we add a dataflow to our data source. The dataflow contains two steps:
- Add a column with the current time stamp.
- Change the order of the columns to have the timestamp appear before the temperature. This looks a little bit nicer.

Build the Hub Flow
Finally, we build our Hub Flow:
- Create a new Hub Flow.
- Add a trigger. We want our Hub Flow to run every time a new MQTT message is sent by our Shelly sensor and received by our data source. So, the trigger is the list refresh of our data source.
- Add the steps for the Hub Flow:
- Load our timestamp dataflow. Remember that in Flow projects, dataflows are not triggered automatically. That’s why we have to manually run the dataflow here, inside the Hub Flow. This step gives us the temperature and timestamp data.
- Store the output of the dataflow in a Hub list. There’s no more work to do in this step, because the Hub Flow automatically creates and names the Hub list, using metadata.

Deploy and monitor the Hub Flow
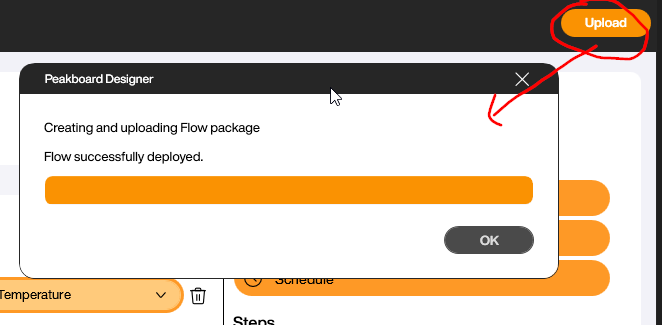
To deploy and activate our Hub Flow, we click the Upload button:
To monitor the Hub Flow, we open the Peakboard Hub portal. Then, we click on the Hub Flows tab and select our Hub Flow. We see the results the last execution, and we can also look through the log entries. The green status icons means that our last incoming MQTT message was successfully processed:
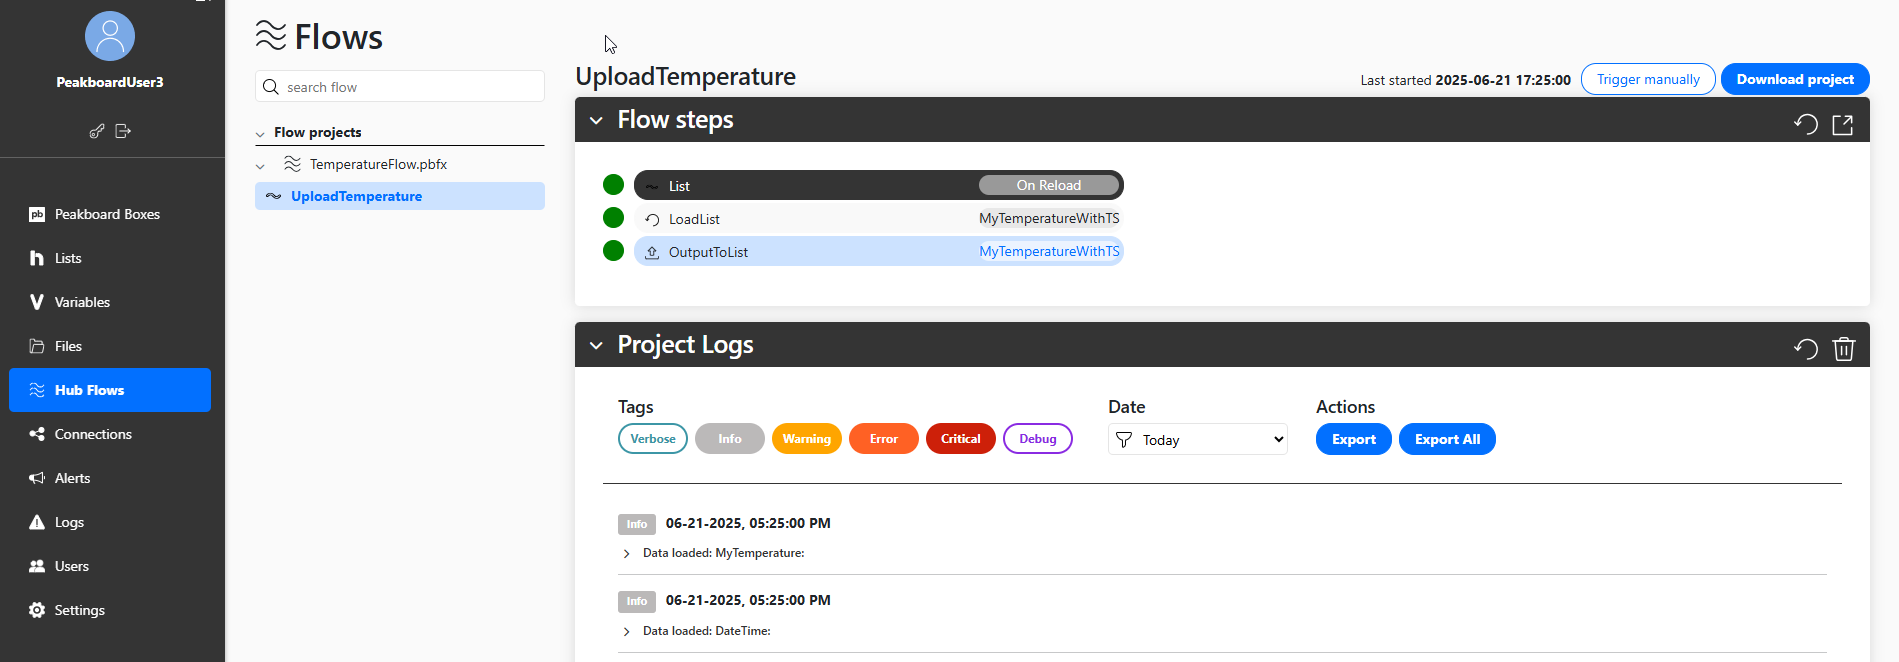
To view our temperature data, we click on the Lists tab. There, we can see the automatically generated list, along with all the data that has been uploaded to it so far. This shows how, with Hub Flows, we don’t need to manually create lists to store our data in—the Hub Flow does that for us automatically.

Result and conclusion
You’ve just finished out first Hub Flow walkthrough, and you now understand all the basic Hub Flow concepts. We can use traditional elements like data sources and dataflows, and then use Hub Flows to put everything together and handle the application logic. To store the data, we use a built-in function that uploads the data to a Hub list.