We’ve published many articles on how to integrate Office 365 with Peakboard. In this article, we’ll take a look at Office 365 again—but this time, we’ll explain how to integrate Microsoft Teams into Peakboard.
Example use cases
Companies often use Microsoft Teams to create a link between factory workers and office workers. So it makes sense to integrate Teams into a Peakboard application, in order to further improve communication between the office and factory.
You can also use Peakboard + Teams to let factory machines communicate with office workers. For example, suppose a machine—connected via OPC UA or another protocol—runs into an error. Then, it can use a Teams channel to notify the office workers automatically. The workers can analyze and discuss the problem, all within the same Teams channel.
And these are just two examples. The combination of Peakboard and Teams makes for an effective communications solution, useful in a wide range of scenarios.
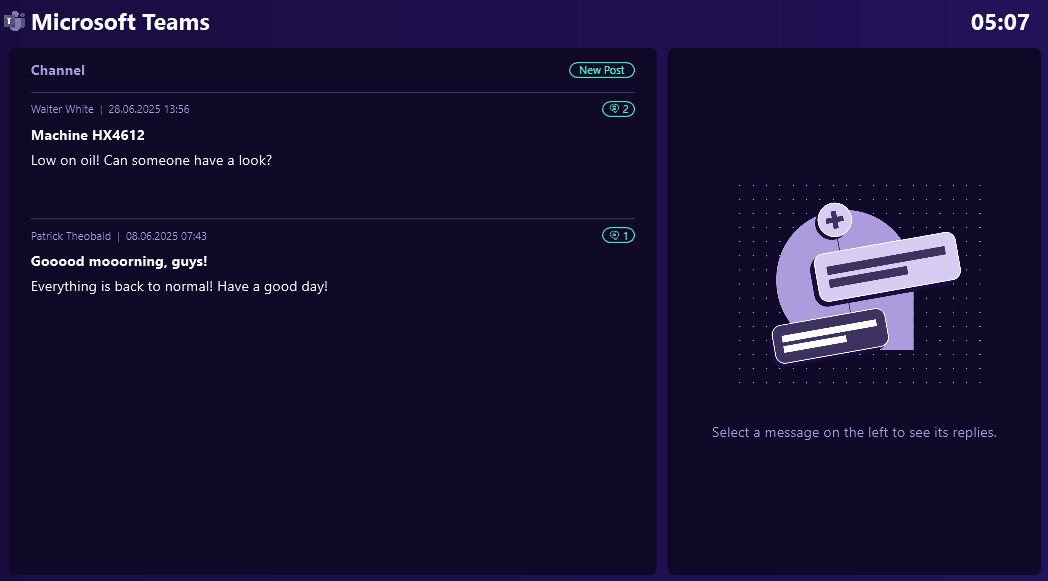
In this article, we’ll explain how to build a simple chat client that integrates into Teams. This chat client lets factory workers communicate with office workers. The factory workers can send messages, view responses, and respond to messages.
Set up the data source
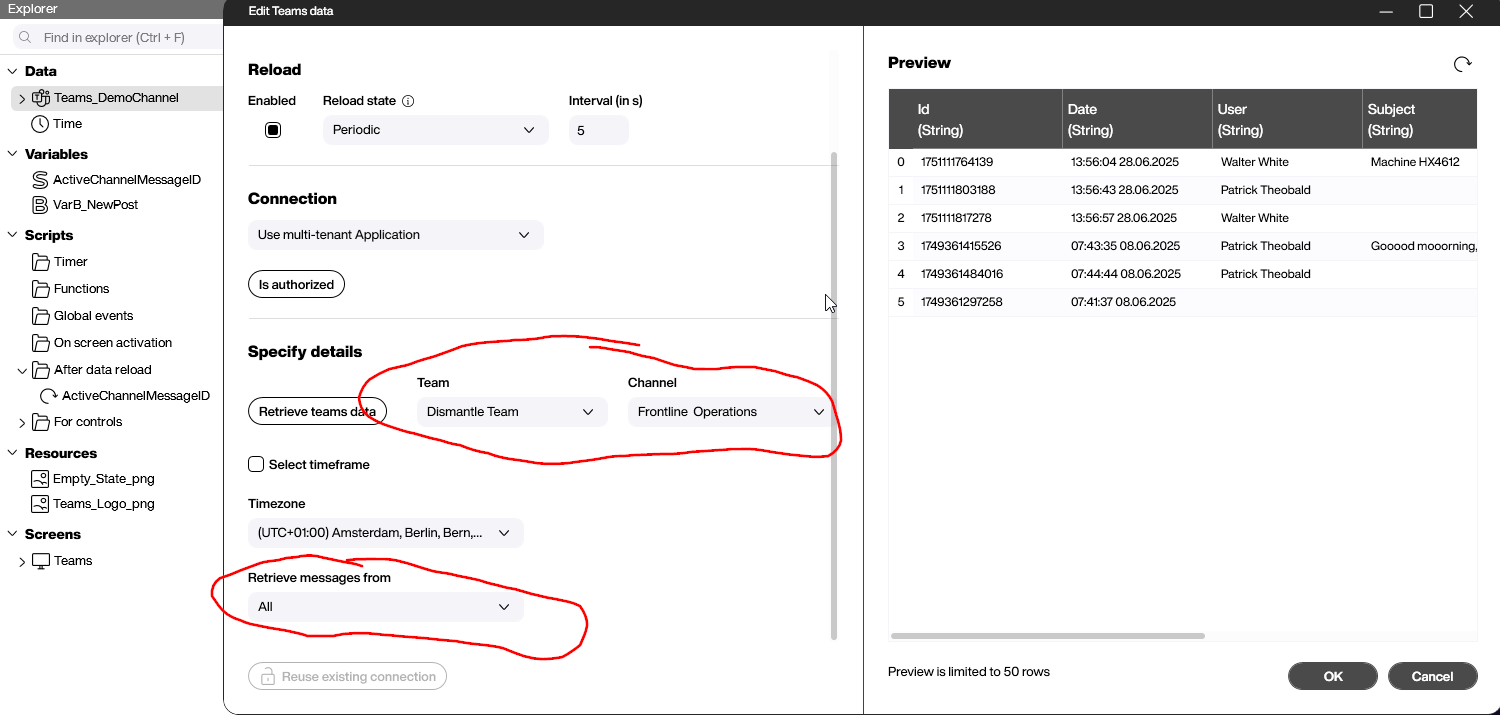
First, we create a new Teams data source. Then, we set up authentication for the data source. If you’re not sure how to do this, check out our Office 365 getting started guide. The authentication process is the same for every Office 365 data source.
Next we select the team and the channel that we want the factory workers to use. We select the Dismantle Team team and the Frontline Operations channel.
Then, we set the Retrieve messages from setting. There are three modes that we can choose from:
- Get all messages: top-level messages and replies.
- Get top-level messages.
- Get the replies for a specific top-level message.
For our example, we choose the first option. That way, the factory workers can see all the messages in the channel, including the replies.
Build the data flows
Next, we build some data flows to process the data source’s output.
Clean up data source output
First, we build a data flow that cleans up the raw output from the data source:
- Format the date.
- Filter out all message rows with empty messages.
- Create a new column that we can use later to display the messages in a styled list.

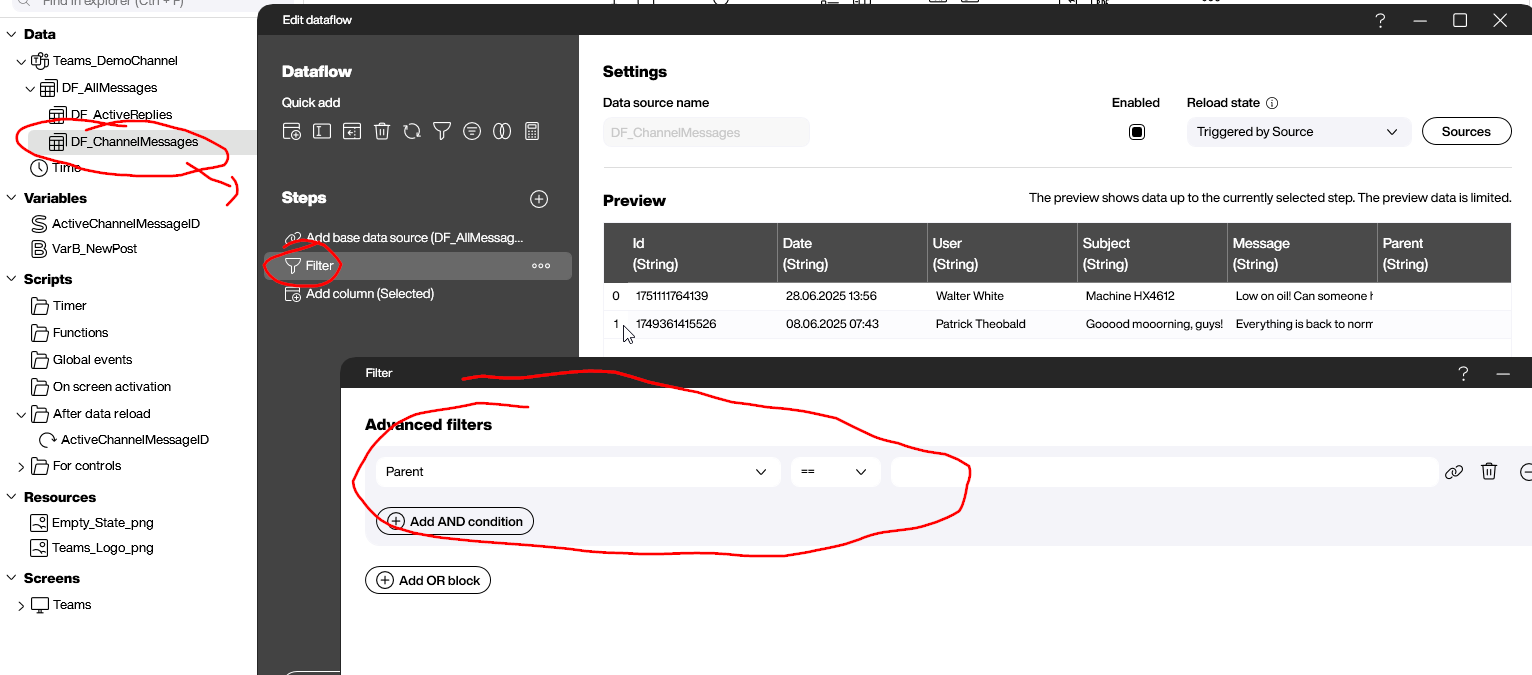
Get top-level messages
We want to be able to view only the top-level messages. To do this, we create another data flow. This data flow filters out all the replies, by removing any message that contains a parent.
Get replies to a message
We also want to be able to view the replies to a message. To do this, we create a variable called ActiveChannelMessageID. Whenever the user clicks the button to view the replies of a top-level message, this variable is filled with the message’s ID. Our data flow uses a filter to find the messages that have this message ID as their Parent value.

Build the UI
Now, let’s build the UI.
View top-level messages
To show the top-level messages, we use a styled list. We bind it to the data flow for the top-level messages.

View replies button
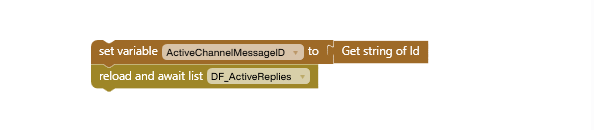
Next, we create a Building Blocks script for the view replies button. Here’s how it works:
- Set the
ActiveChannelMessageIDvariable to the ID of the message that the user wants to see the replies to. - Reload the data flow for the replies. That way, the data flow updates its output for the new
ActiveChannelMessageID.
Display replies
To display the replies, we use a second styled list. It automatically makes itself visible when the ActiveChannelMessageID variable is set. It does this by using conditional formatting. For more details, check out the PBMX for this example.
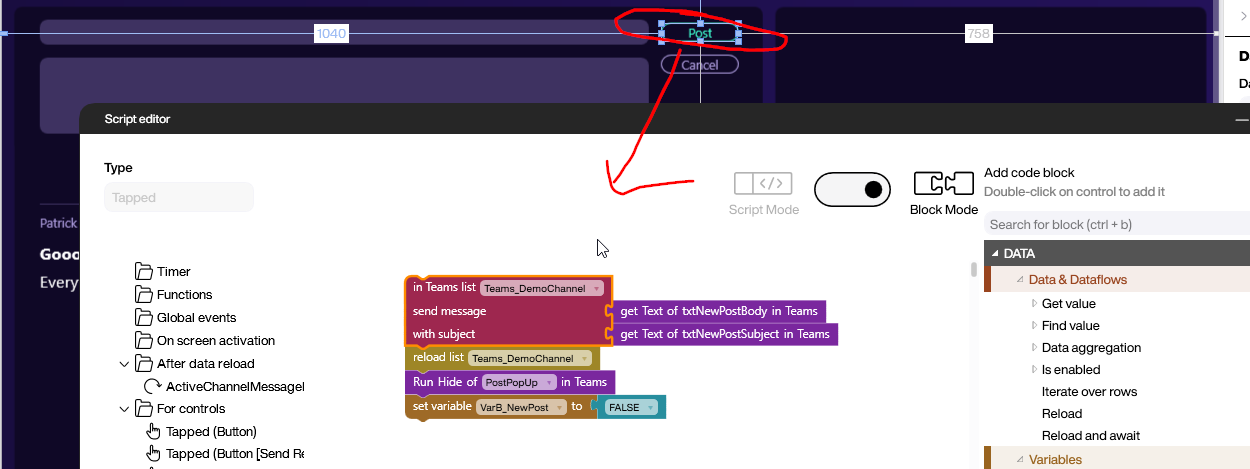
Send message
As soon as the user clicks the New post button, a group of controls make themselves visible. They function like a pop-up window. The user uses these controls to send their message.

To forward the new message to Teams, we use a Building Block that’s provided by the data source (listed under Controls > Teams). The user can send a top-level message (as in the following screenshot), or they can send a reply. If they want to send a reply, they need to provide the channel message ID.
Result
The following video shows the final product in action. The user clicks on the replies button and the thread opens up on the right side of the screen. Afterwards, the user sends a reply, which the app forwards to Teams.