
Office 365 is often used as a data backend for different applications within a company. In previous articles, we explained how to combine Peakboard and Office 365 apps. In this article, we explain how to use SharePoint lists to build a newsstand app that shows the latest company news.
Before continuing, make sure that you have read our Office 365 data sources guide. The authentication process is tricky, so it’s important that you understand it.
We also have another SharePoint lists guide that explains how to use SharePoint lists in Peakboard. That article is more general, while this article covers the following specialized topics:
- How to handle text with rich formatting.
- How to combine structured data from a SharePoint list with unstructured data (like images) from a SharePoint document library.
The big picture
We will create a Peakboard app that showcases the most recent company news. Here’s what the final result looks like:

Notice:
- There’s a list of the most recent news articles on the left.
- There’s a full article in the middle—the “active” article.
- There’s an image for the active article on the right.
The active article and associated image change automatically every 10 seconds, cycling through the list of news articles. Users can also manually select an article to display, if the app is running on a touch screen.
The app pulls the news articles from a SharePoint list. The idea is that this SharePoint list lets anyone take the news articles and publish them somewhere. For example, in a newsletter, an intranet portal, or a Peakboard app (either as part of other dashboards, or as a standalone tool).
For the images, the app pulls them from a SharePoint document library.
Configure SharePoint
Here’s what we need to do on the SharePoint side of things.
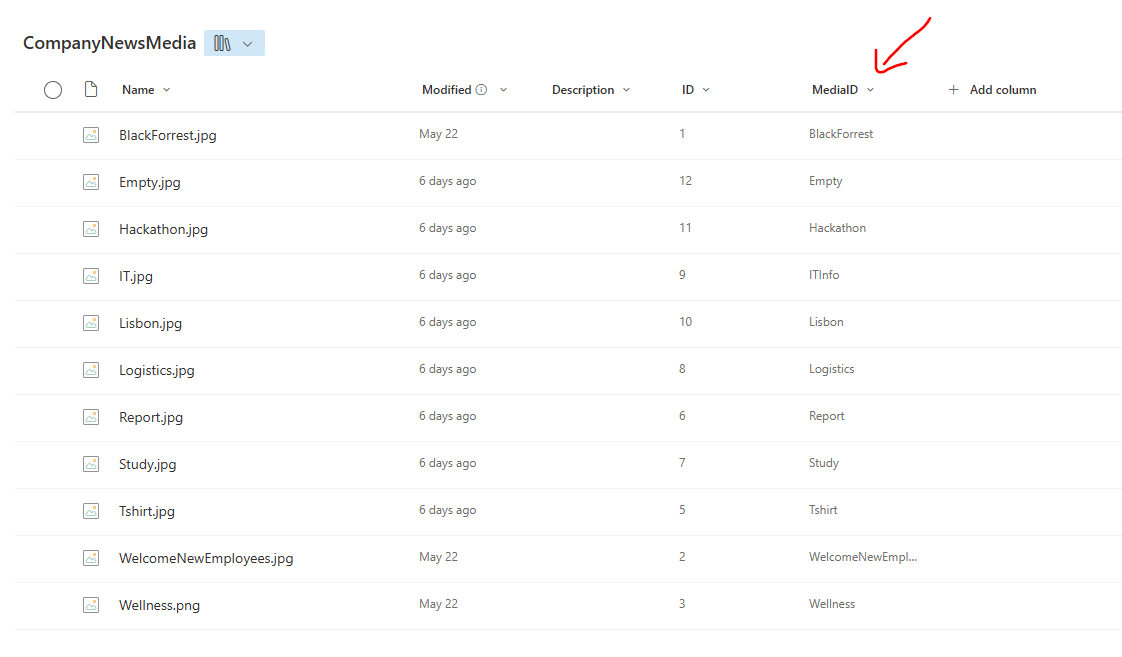
Store images
The first step is to create a document library to store the images for our news articles. A document library is like a standard SharePoint file library—but with one additional column: Media ID. This column contains a string that identifies the file (for example, a filename). We need this column to make it easy for admins to select an image to use with their news article.
Store news articles
Next, we create a standard SharePoint list to store our news articles. We need the following columns:
| Column name | Column type |
|---|---|
Title |
Single line of text |
Subtitle |
Single line of text |
ArticleText |
Multiple lines of text |
PublishDate |
Date and Time |
Media |
Lookup |
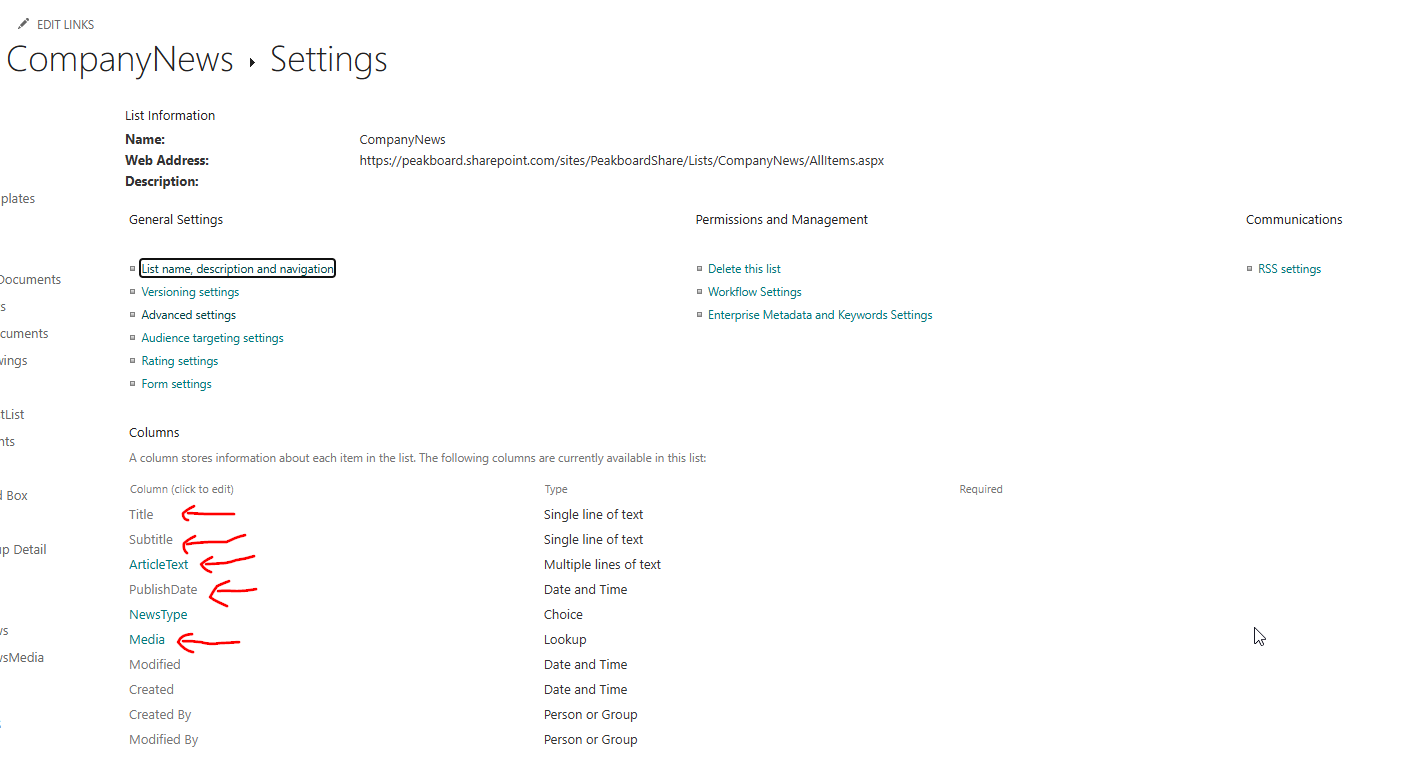
There are two important things to do when creating the columns.
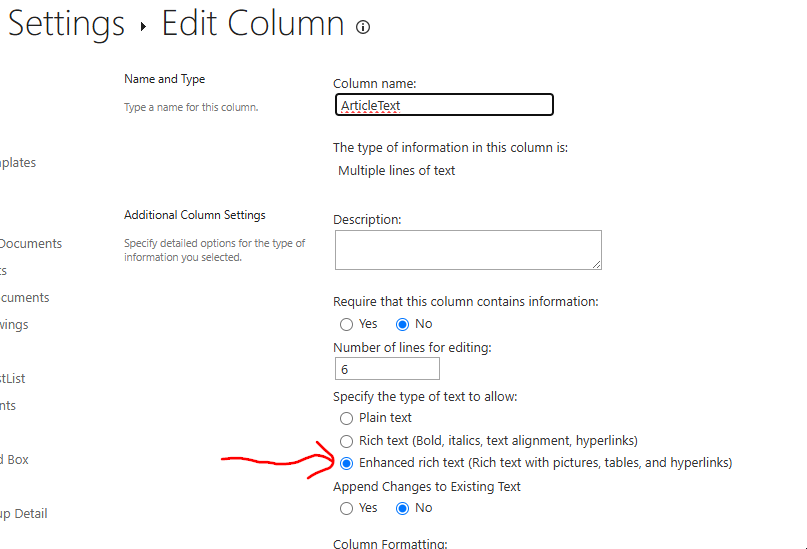
First, for the ArticleText column, we enable Enhanced rich text . That way, we support articles with formatted text, like italics or pictures or hyperlinks.
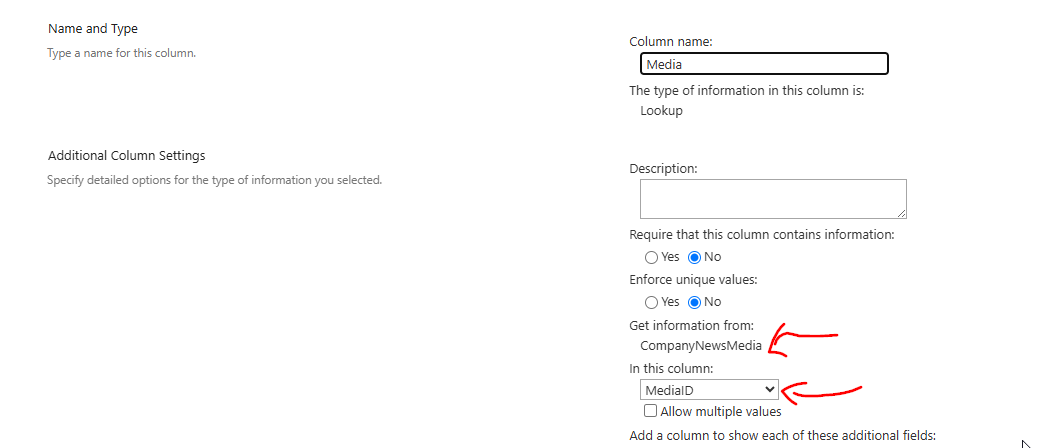
For the Media lookup column, we set the source to the MediaID column of our image document library (CompanyNewsMedia.MediaID).
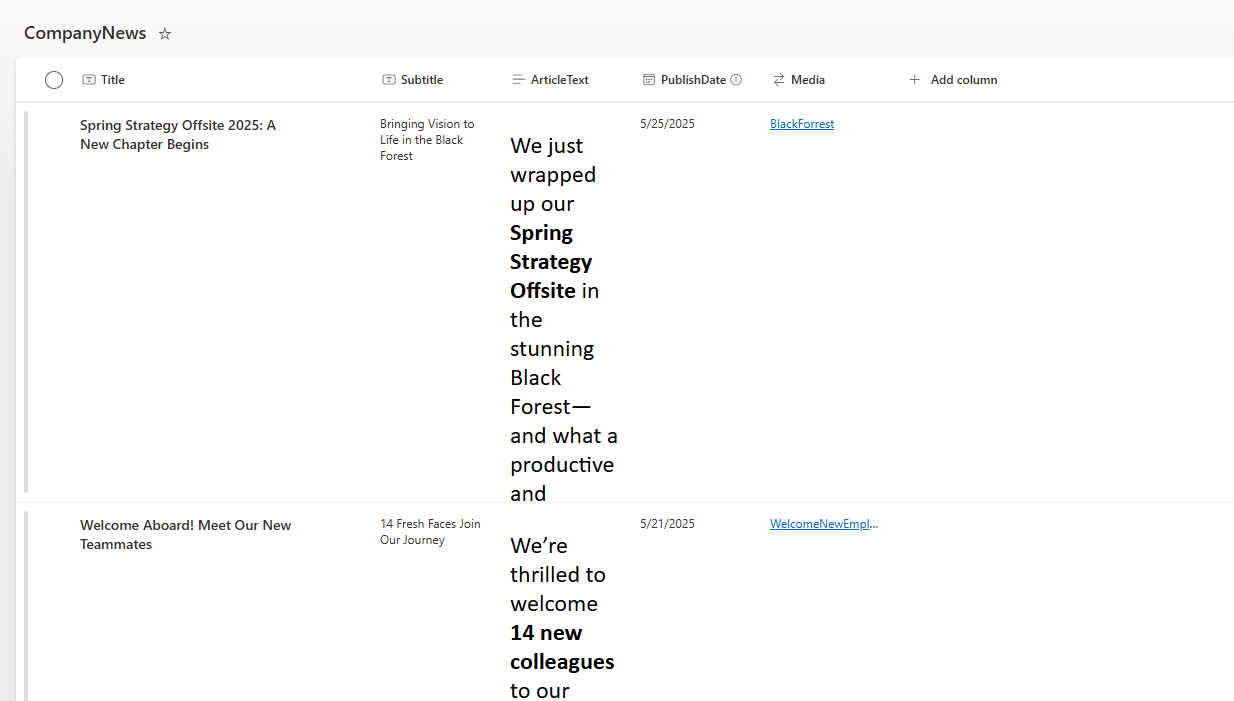
Here’s our list with some example data. You can see how we’re able to use bold text, because we enabled enhanced rich text.
Build the Peakboard app
Now, let’s take a look at the Peakboard side.
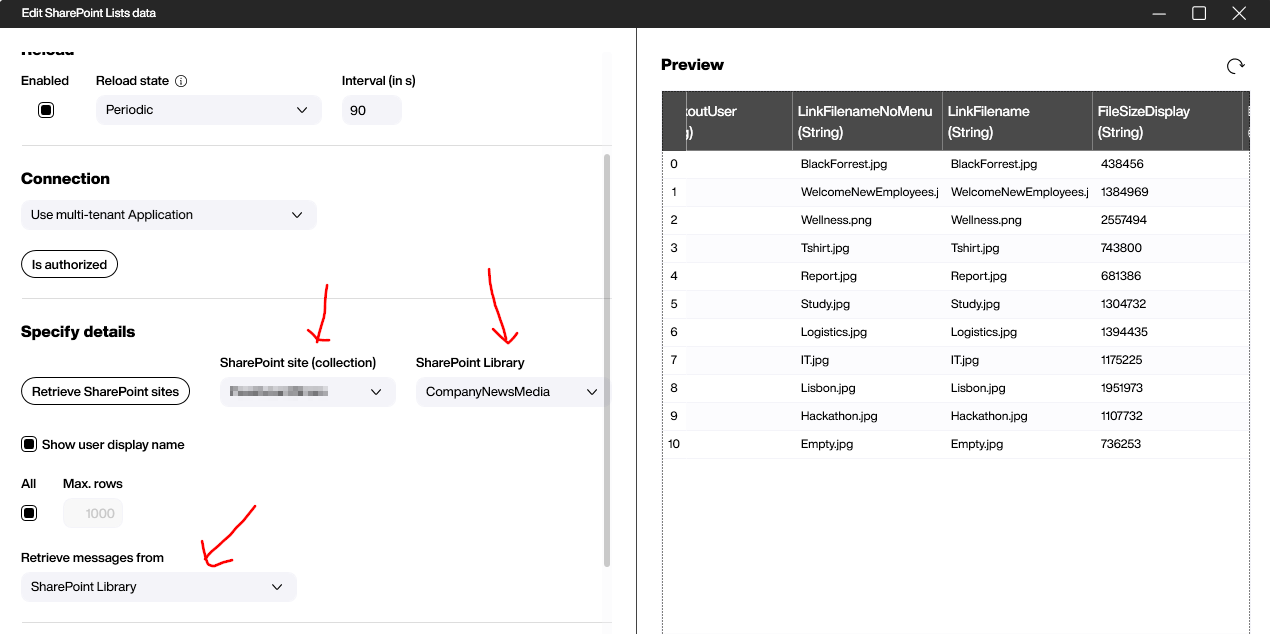
Create the document library data source
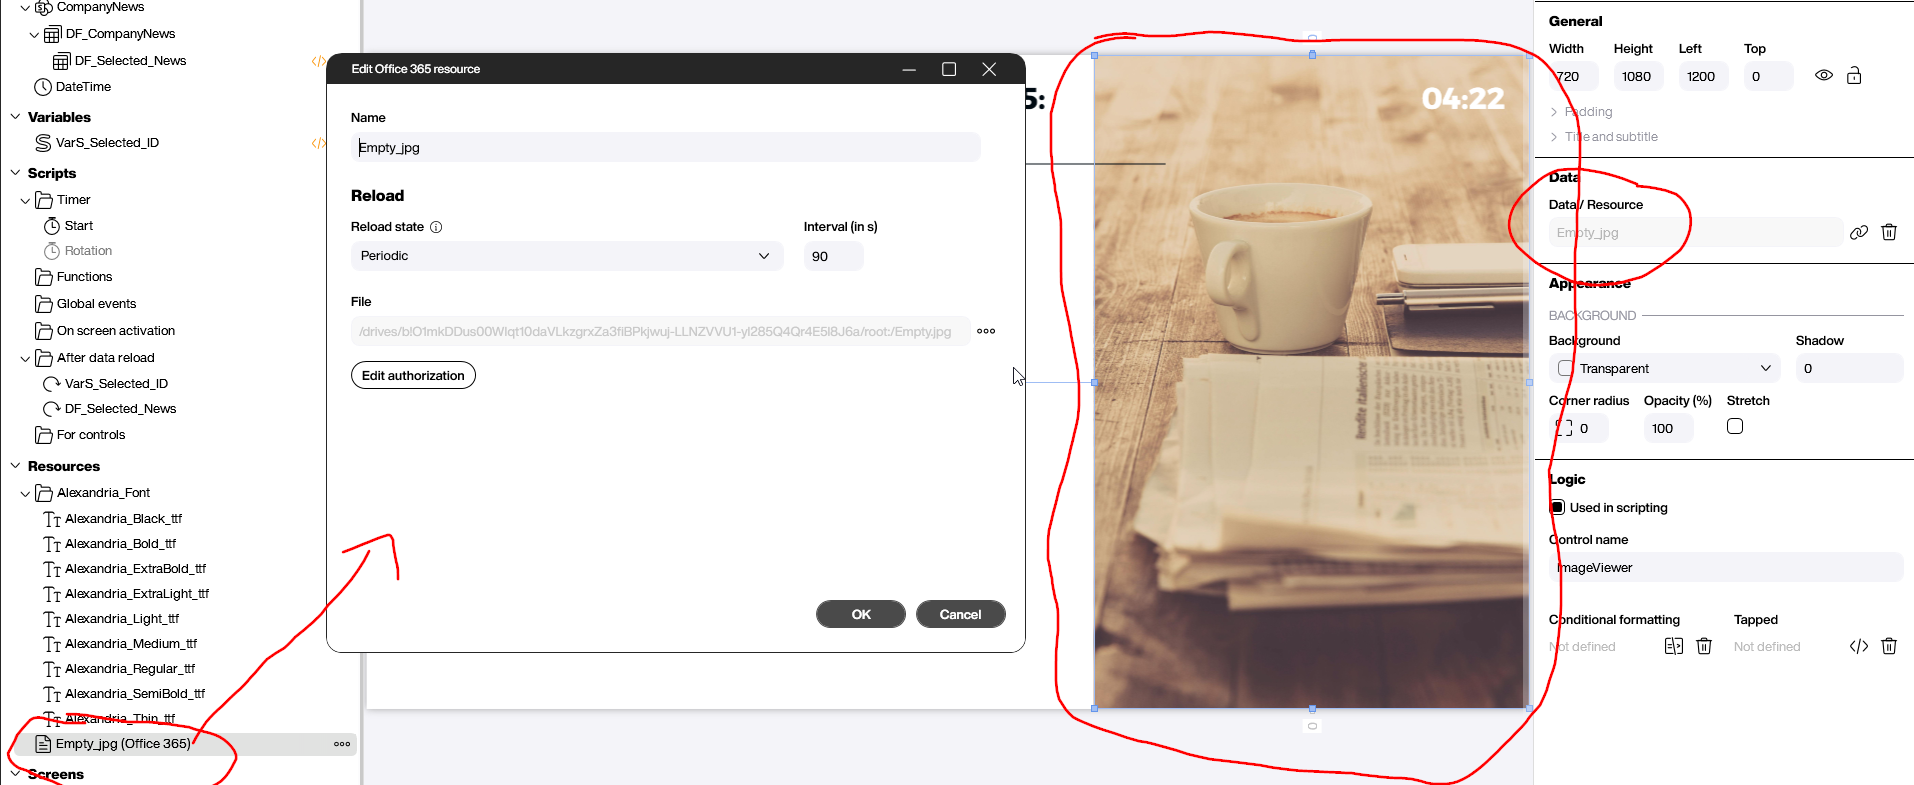
First, we create a SharePoint list data source that pulls images from our CompanyNewsMedia document library. We need this data source in order to translate a lookup ID into a filename.
Create the news articles data source
Next, we create a SharePoint list data source that pulls news articles from our CompanyNews SharePoint list.
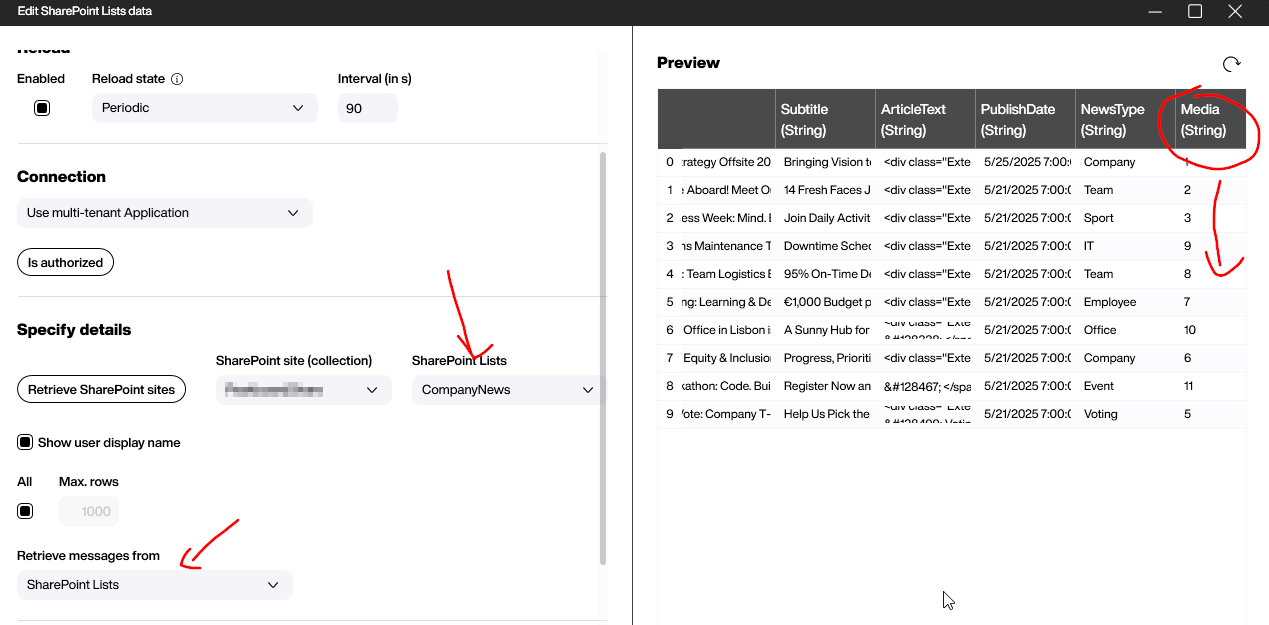
In the above screenshot, you can see that the Media column contains the ID of an image that’s in our document library. This alone is not usable, because it’s just an integer. That’s why we need to translate the ID into a filename.
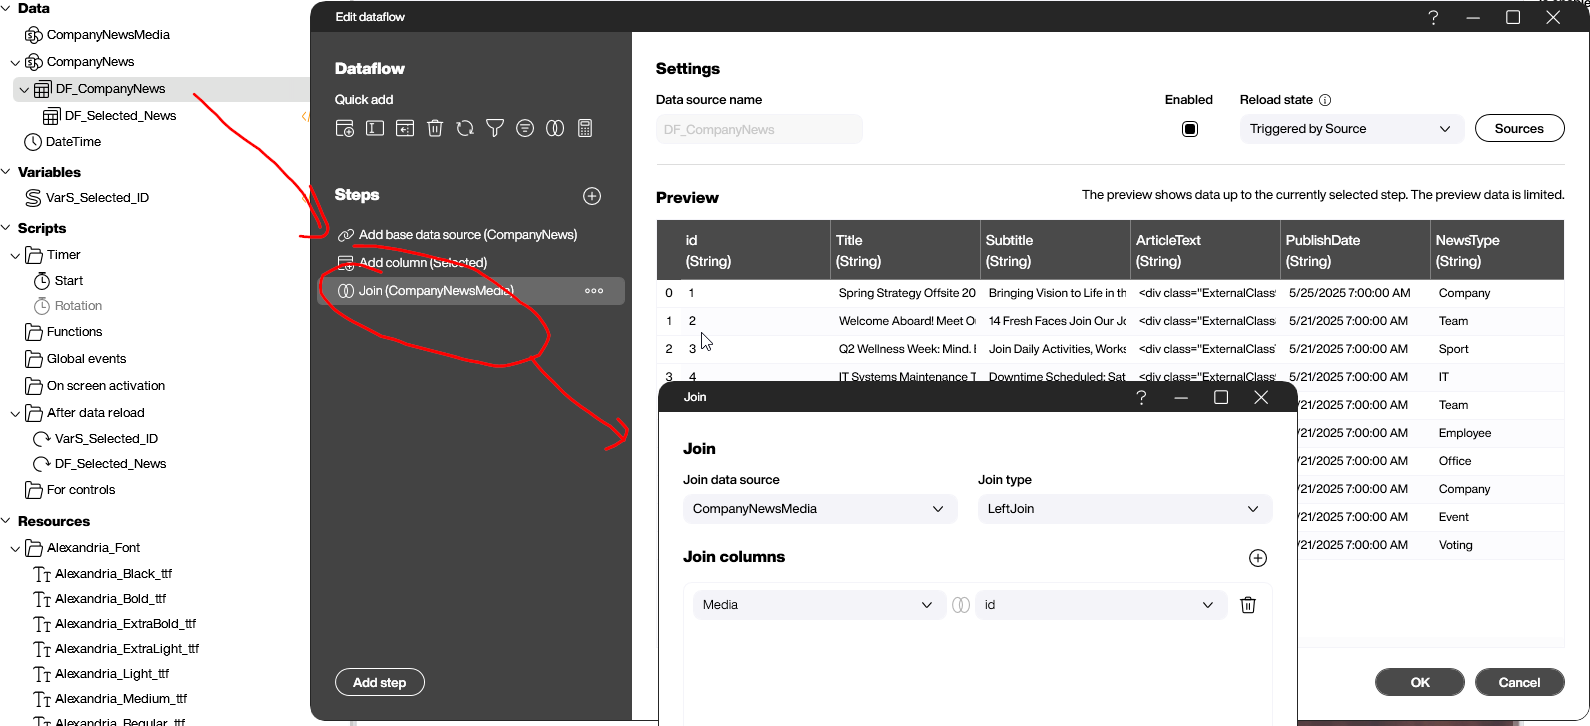
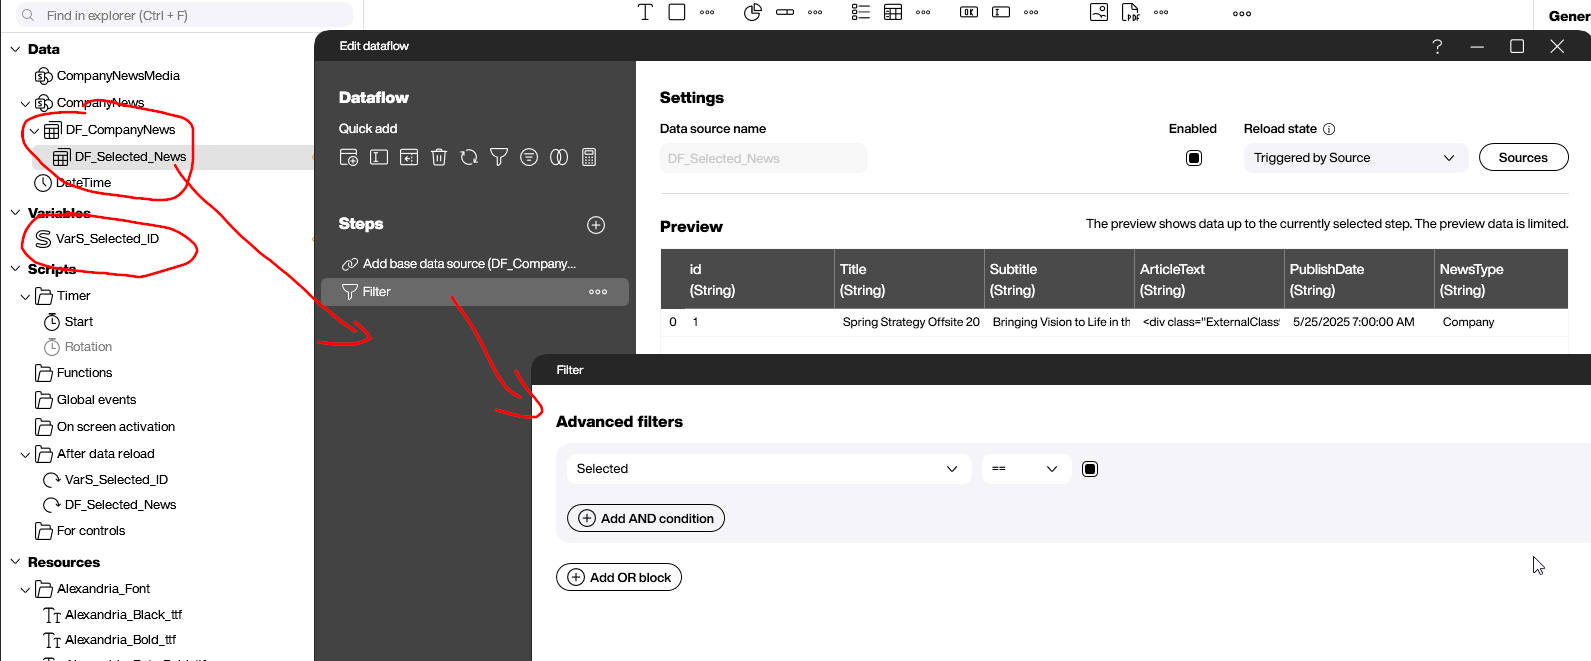
To do this, we create a data flow with a single join step. This step joins the list of news articles with the list of images:
Next, we create another data flow, built on top of the first one (so the output of the first data flow is the input of this data flow). We use this data flow to filter the list to only show the active news article. So each time we need to get the active news article, we run this data flow.
Build the user interface
We add a styled list to show the list of news articles, on the left side of the screen:
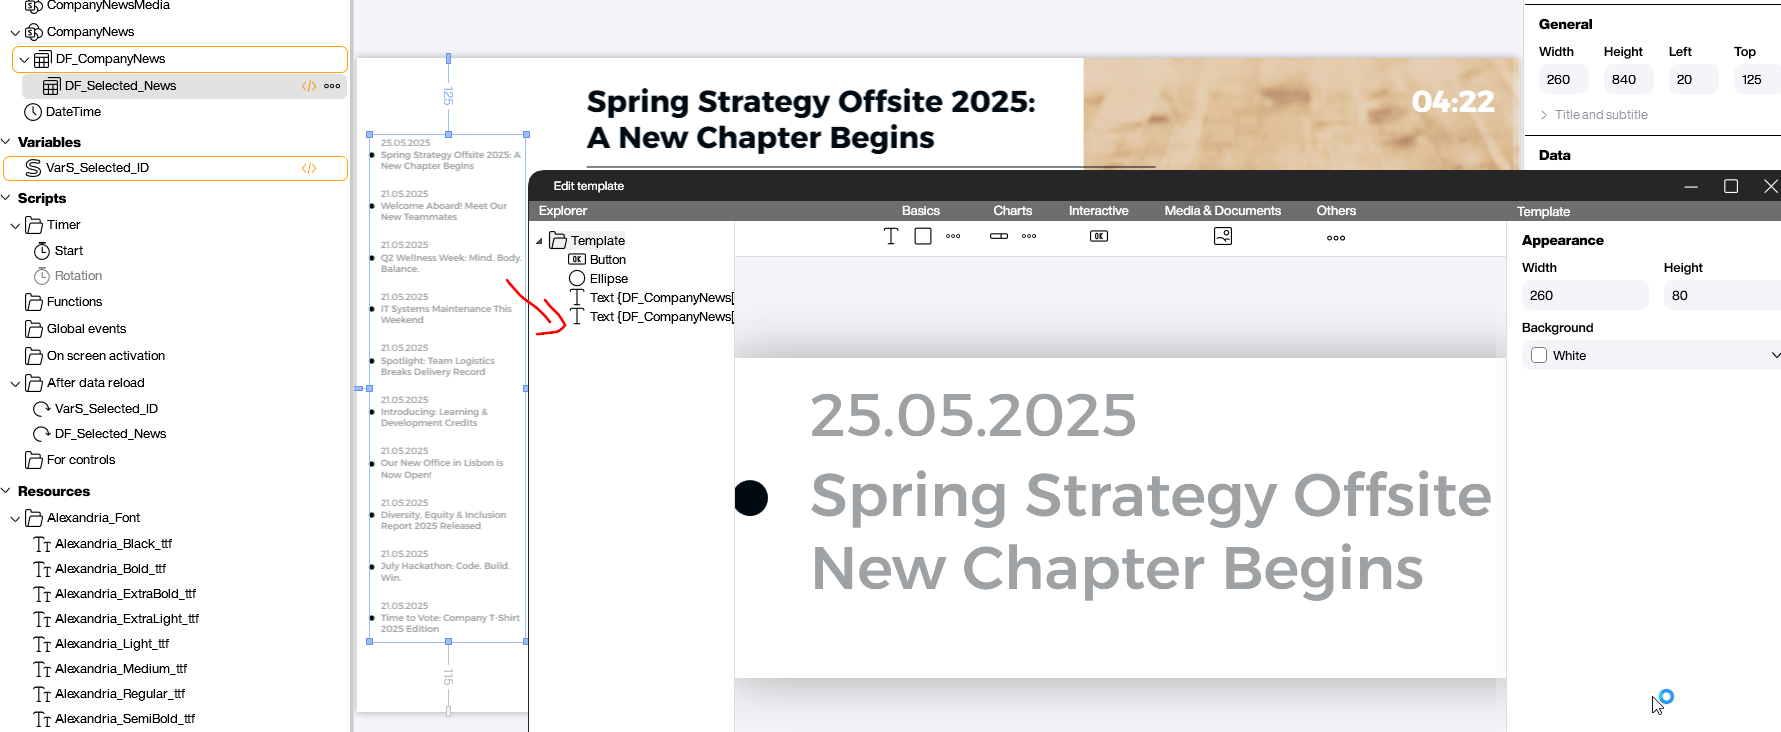
We add an image control to show the image for the active article, on the right side of the screen. This image controls gets its image from our document library data source. We also set a default image.
Implement article switching
There are two conditions that can cause the active article to switch:
- The 10 second timer expires.
- The user taps one of the news articles.
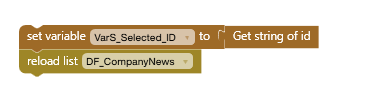
If either of these occur, we set the variable VarS_Selected_ID to the ID of the new active article (the next one in the list, or the one that the user tapped). We also reload the news articles data source, to trigger the data flow that filters for the active news article.
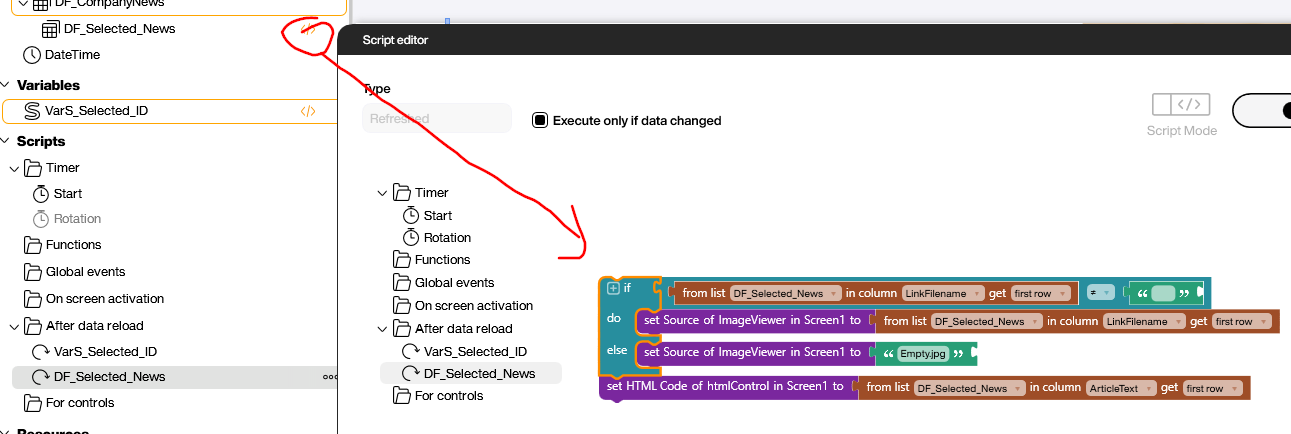
This then triggers the reload event of the data flow. So, in order to update the news article and image on screen, we create a reload event for the data flow.
Our reload event sets the news article’s text, and the image’s filename. We don’t need to handle the other on-screen elements—the title and subtitle—in this reload event. That’s because the title and subtitle use data binding to update themselves automatically. We only need this manual script for the formatted HTML text and the image source.
Result and conclusion
It’s easy to use basic SharePoint lists and documents. But in this article, we showed off some more sophisticated tricks:
- How to combine list entries with files, and how to handle this relationship in Peakboard.
- How to handle rich HTML text from SharePoint.