In this two-part article series, we discuss some best practices for integrating Peakboard with Node-RED applications.
Most of the time, communication between Node-RED and the outside world happens through MQTT or HTTP. We will use the HTTP option:
Part I - Real-time calculator - How to send information from Peakboard to Node-RED, do something with it, and then process the result in real-time.
Part II - Sending Alerts to a Peakboard application - How to send an alert from a Node-RED flow and visualize it in a Peakboard application.
Goals for this article
In this article, we build a Peakboard application that does the following:
- Take in two numbers from the user.
- Submit the two numbers to a Node-RED flow, which will add the numbers and return the sum.
The purpose of this exercise is to understand how to use Peakboard to submit and receive information from Node-RED.
Building the Node-RED flow
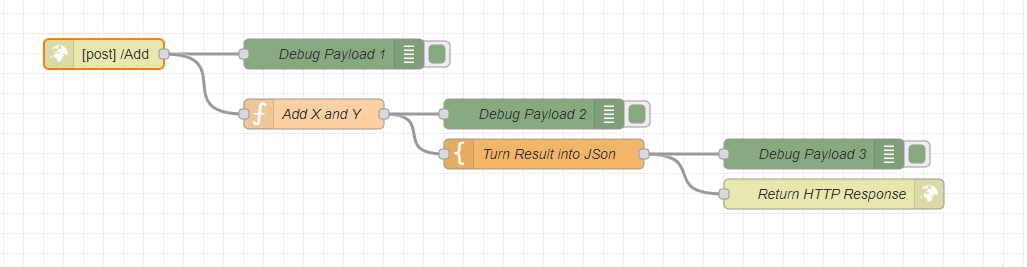
The following screenshot shows the flow we’re using. Here’s what the flow does:
- An
HTTP Innode receives the call. - A Function node adds the two numbers from the JSON payload of the call.
- A Template node creates the response.
- An
HTTP Responsenode returns the response to the caller.
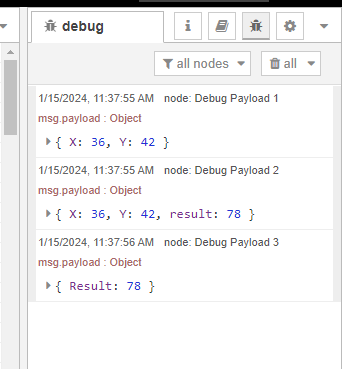
We also add Debug nodes so that we can follow the flow in the debug window, when it’s executed.
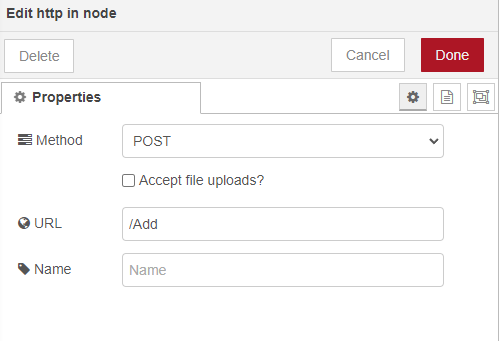
The HTTP In node listens at the /Add URL:
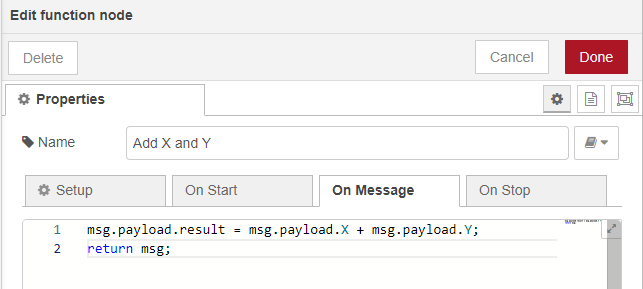
The Function node adds the two numbers, X and Y. It creates a third attribute in the payload, result, to hold the result:
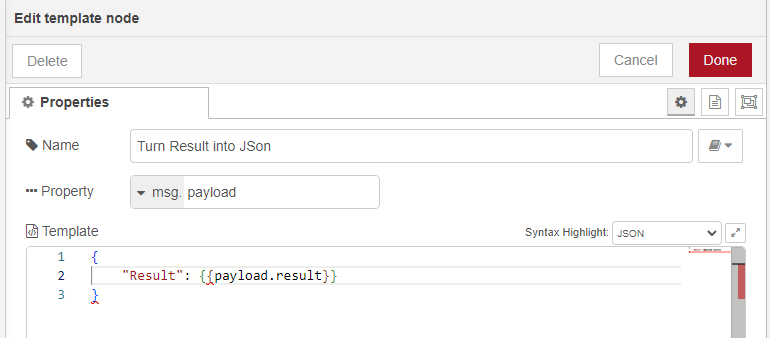
The actual response is created with a Template node. It’s a simple JSON object which has a Result property that points to the result we created in the last step:
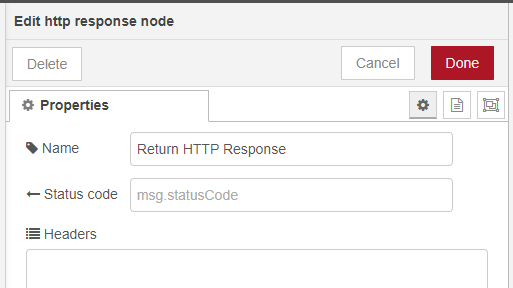
The HTTP Response node doesn’t need any additional configuration. It simply returns the payload to the caller:
Building the Peakboard app
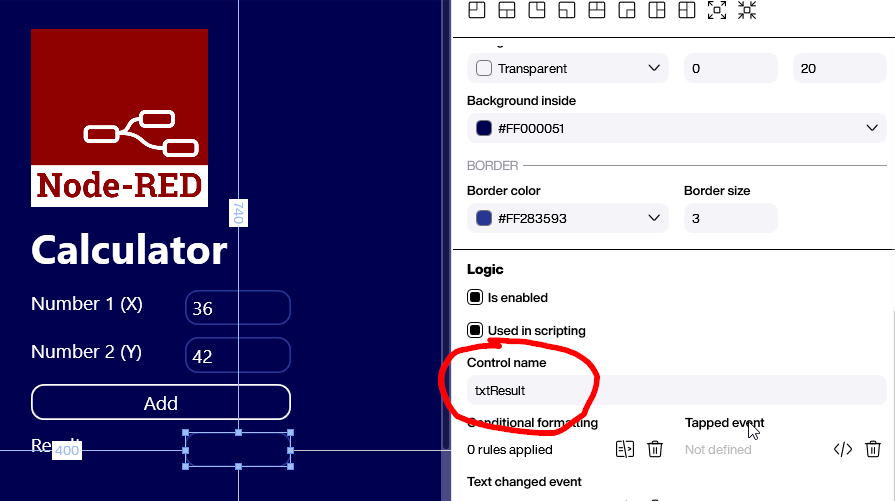
The Peakboard app is super simple. There are two text fields for the input, a button that sends the request, and a text field for the output. We also make sure to give the text fields proper names, so we can use them in scripting.
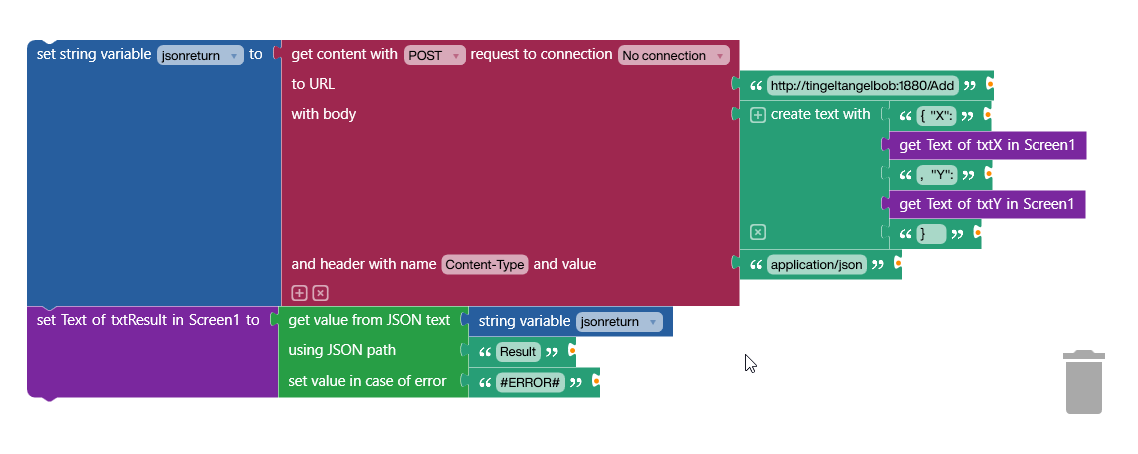
The actual script consists of two steps:
- Call the HTTP endpoint of the Node-RED flow.
- Concatenate the strings to build a proper JSON object with the two numbers from the text fields,
XandY.
Here’s what the JSON looks like:
{
    "X": 36,
    "Y": 42
}
We also set the Content-Type header to application/json. Otherwise, the flow won’t know that we’re sending a JSON object.
The call returns the JSON response. Here’s what it looks like:
{
    "Result": 78
}
To extract the result from the response, we use a JSON path block, and address the Result attribute. The value is put into the text field we prepared earlier.
Conclusion
Here’s the application in action, along with the debug window in Node-RED: