In this two-part article series, we discuss some best practices for integrating Peakboard with Node-RED applications.
Most of the time, communication between Node-RED and the outside world happens through MQTT or HTTP. We will use the HTTP option:
Part I - Real-time calculator - How to send information from Peakboard to Node-RED, do something with it, and then process the result in real-time.
Part II - Sending Alerts to a Peakboard application - How to send an alert from a Node-RED flow and visualize it in a Peakboard application.
Goals for this article
In this article, we show how to send a message from node-RED to a Peakboard box. This is commonly used to inform a Peakboard user about some event happening in the node-RED flow.
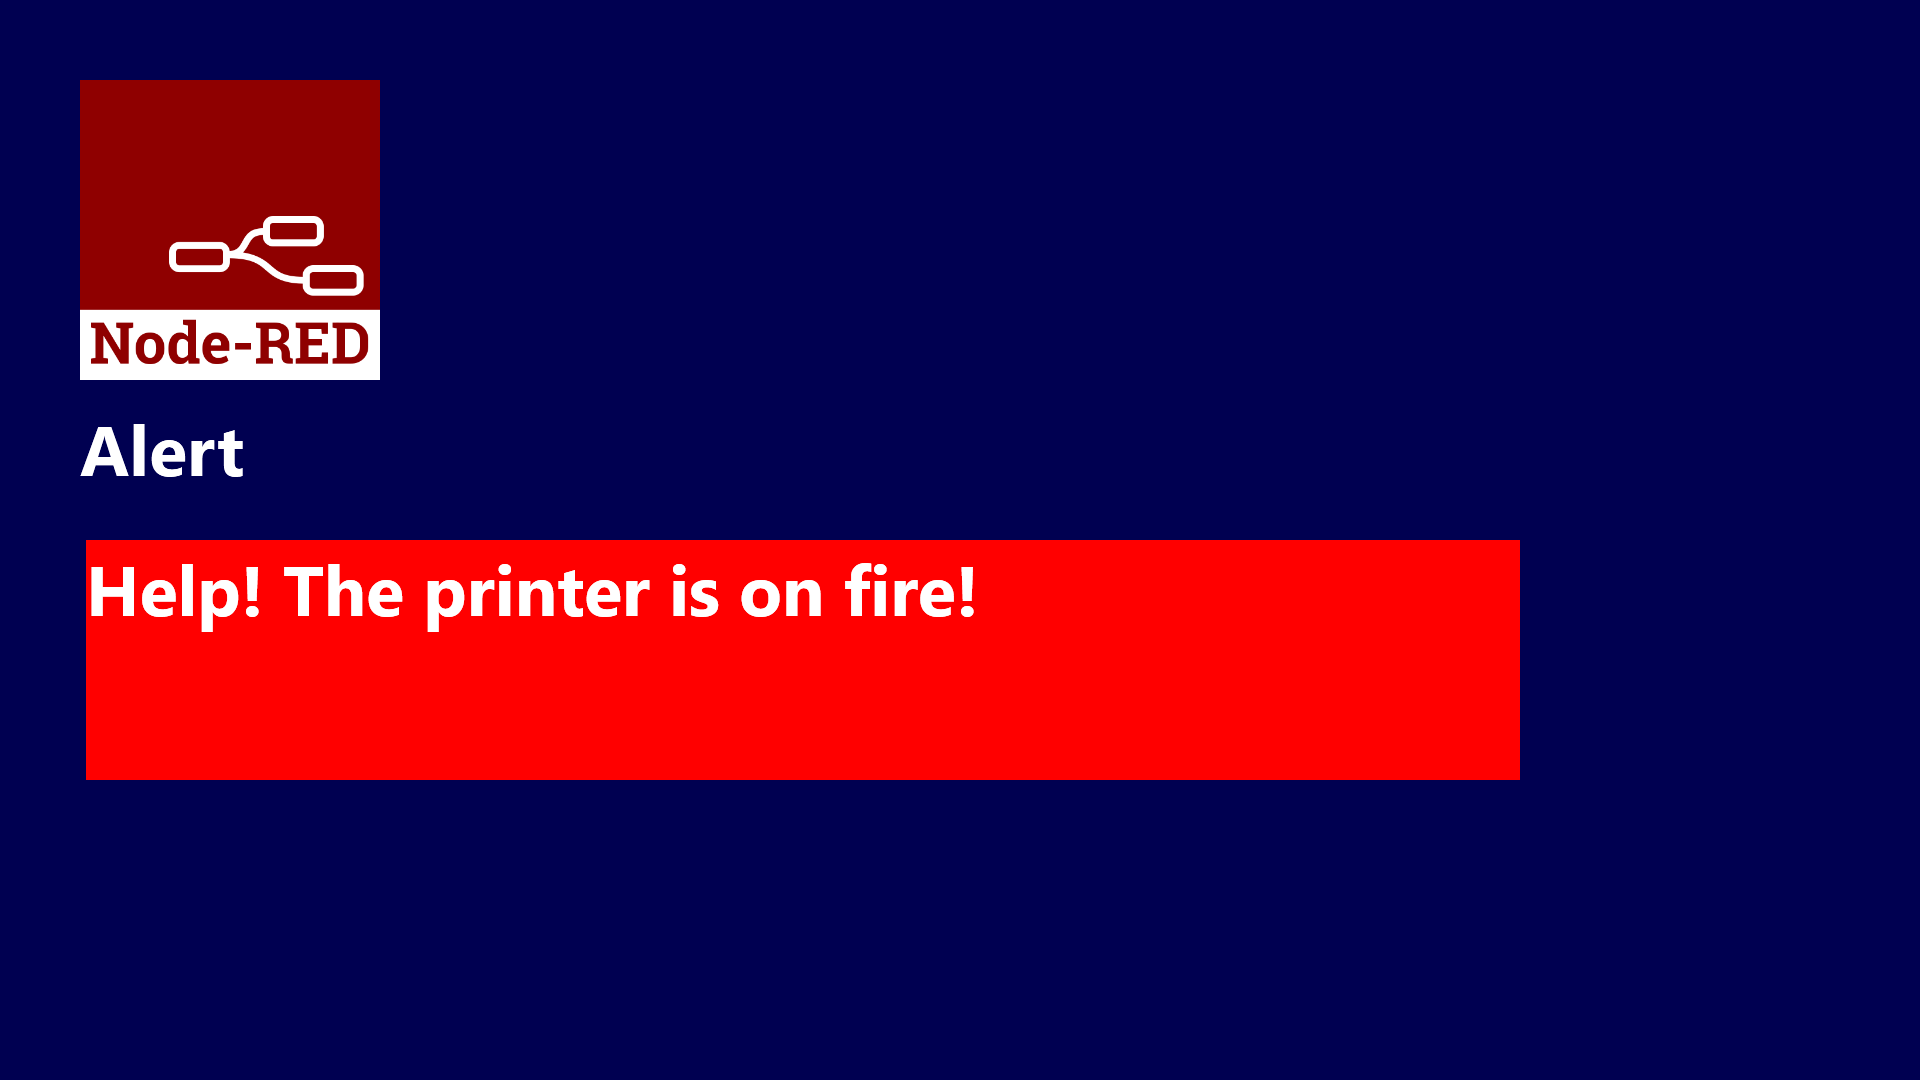
In our example, we send an alert that consists of a message and a priority field. The message is shown in the Peakboard application, and if the priority is A, then the background turns red.
Building the Peakboard app
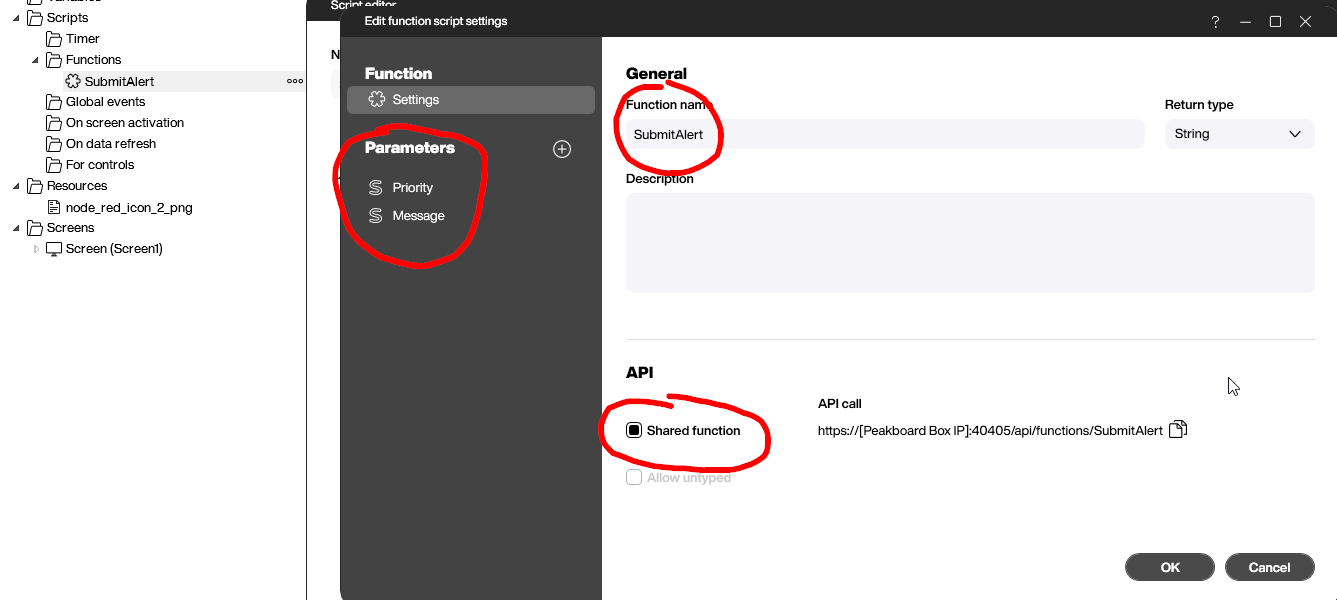
The first thing we need in the Peakboard app is a function called SubmitAlert. We add two parameters to the function: Priority and Message. We also need to select Shared function. That way, the function can be called from outside the app, by calling an HTTP endpoint on the box.
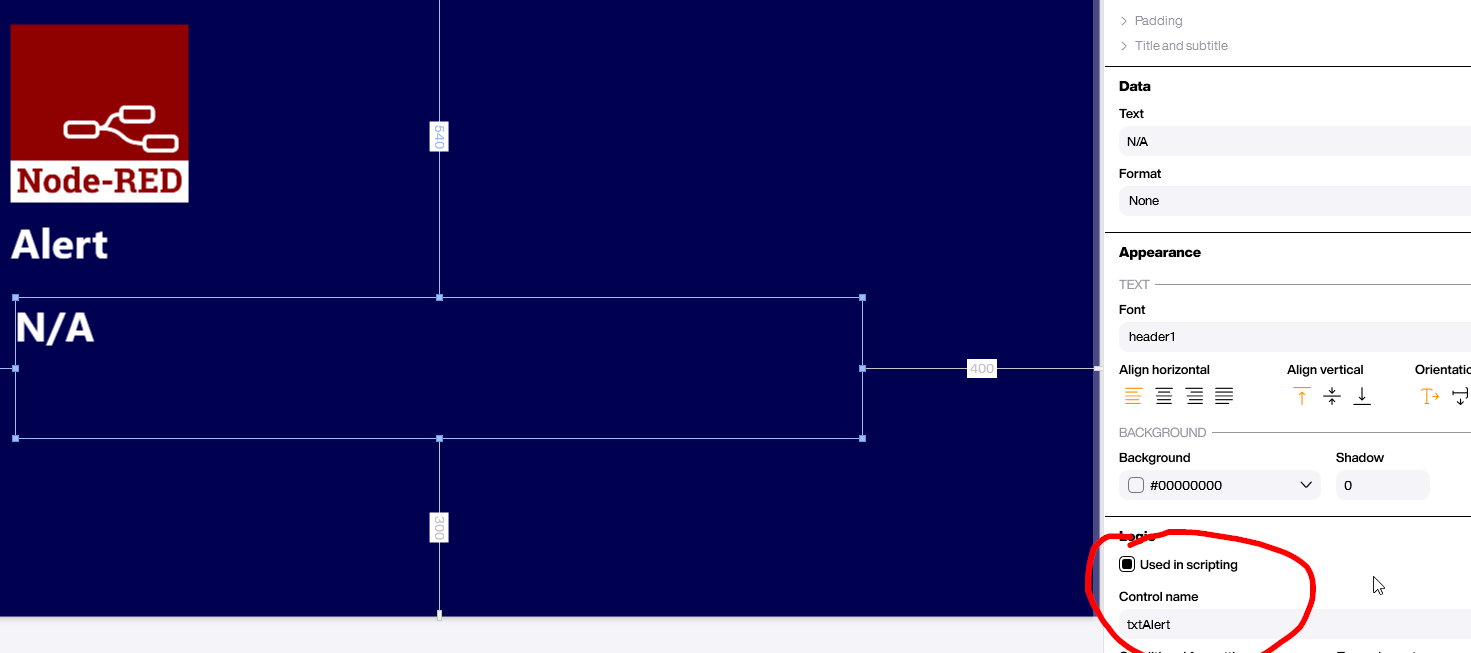
The canvas is pretty simple. The main element is a text field. We give it a name so that we can use it in our script later.
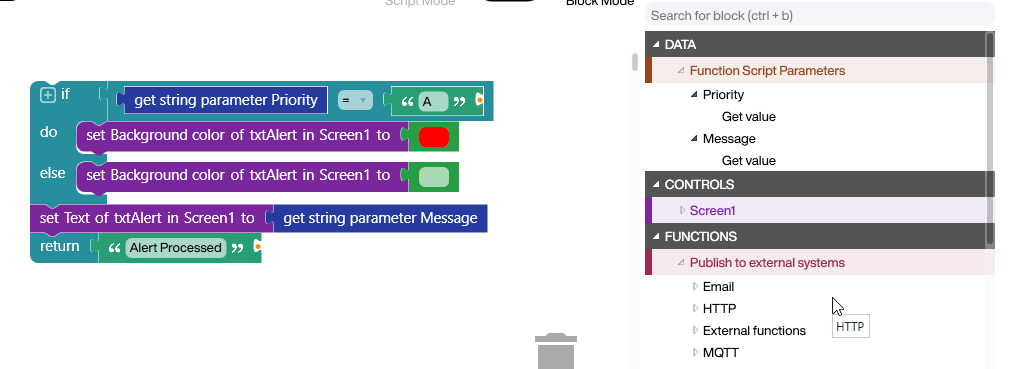
Let’s jump into the function. The two parameters are available in the block tree on the right side. Here’s what the script does:
- When the Priority value is
A, we make the background red. Otherwise, we make it transparent. - We assign the message value to the text field.
- We return an “Alert Processed” message to the caller.
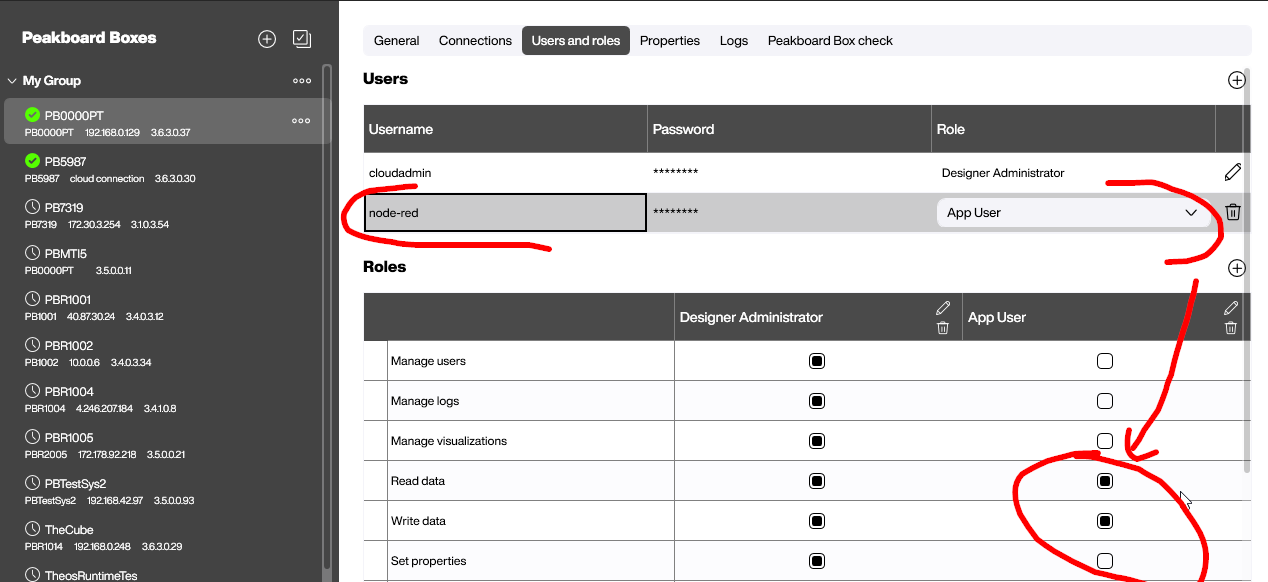
Preparing the box
Later, we will call the HTTP endpoint of the shared function on the box. Of course, this endpoint is protected with a username and password, to prevent unauthorized calls. But we also don’t want to put the box’s admin credentials into the node-RED flow.
That’s why we add an additional user with very limited rights to the box. This can be done in the User and roles section of the box administration.
Building the flow
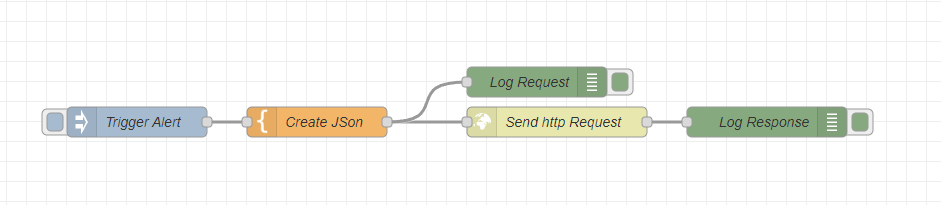
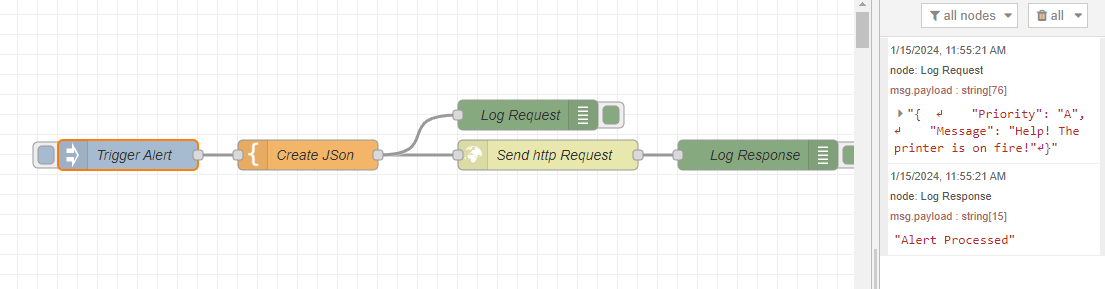
The following screenshot shows the node-RED flow. Here’s how it works.
- A manual starting point triggers the flow (just a click, because this is just a demo).
- A Template node creates the JSON body.
- An
HTTP Requestnode sends the request with the JSON body.
We also add Debug nodes so that we can follow the flow in the debug window, when it’s executed.
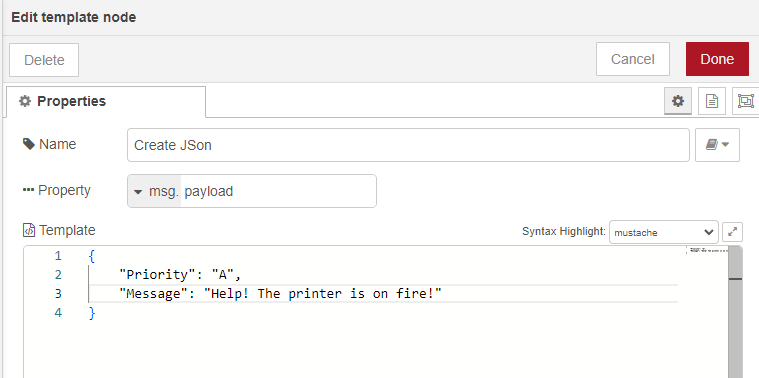
Let’s look at the Template node. The JSON built here needs to submit the parameters to our shared function from earlier.
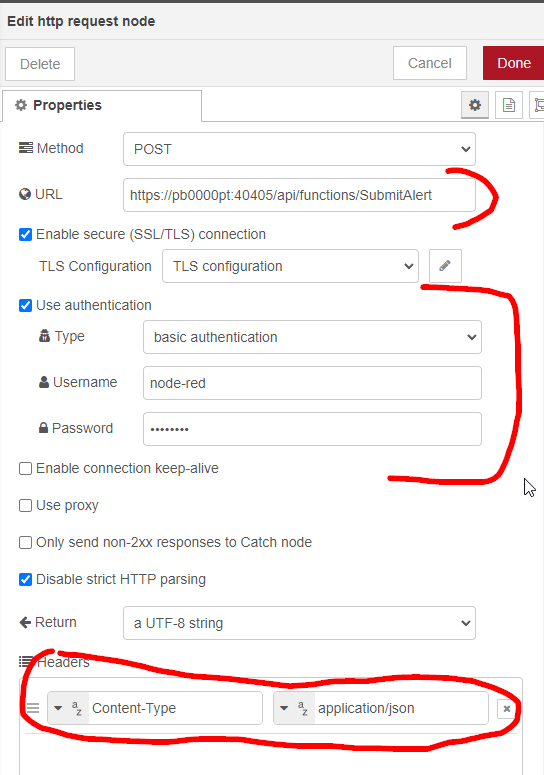
The tricky part is the HTTP Request node. Here’s what we need to do:
- Fill in the URL to the box endpoint for the shared function.
- Fill the authentication credentials for the user we created earlier.
- Add a
Content-Typeheader and set it toapplication/json, so the web server of the box knows what to do with it.
Action!
Here’s what the flow looks like when executed. We check the log messages on the right side. It shows the JSON, and more importantly, it shows what is returned by the box. The string “Alert processed” is created by the Peakboard shared function.
Here’s the result in the Peakboard app. The alert is shown, and the background is set to red because of the A priority.