In this article, we will learn how to read and write a Sharepoint list in an Office 365 environment. Before we start, make sure you understand the basics of the MS Graph API extension.
Peakboard offers native access to Sharepoint lists. However, the built-in data source does not support multifactor authentication. If you don’t need multifactor authentication, and you only need to read data, then you can use the built-in data source.
But if you do need multifactor authentication, then this article will teach you how to solve the problems with the MS Graph API.
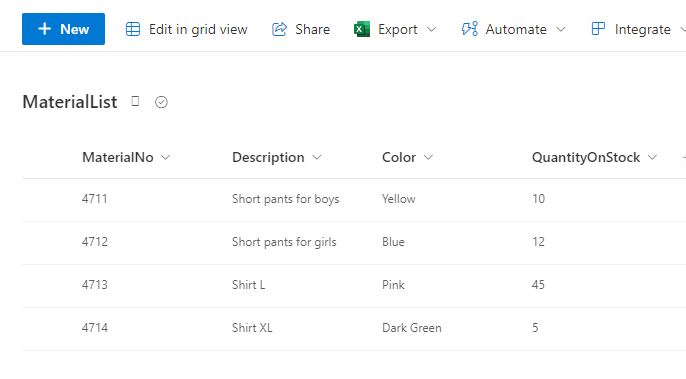
We will use a sample list, like the one shown in the screenshot. Beside the string columns, there is a numeric column for quantities. These are treated a little differently than strings.
Get the Sharepoint IDs
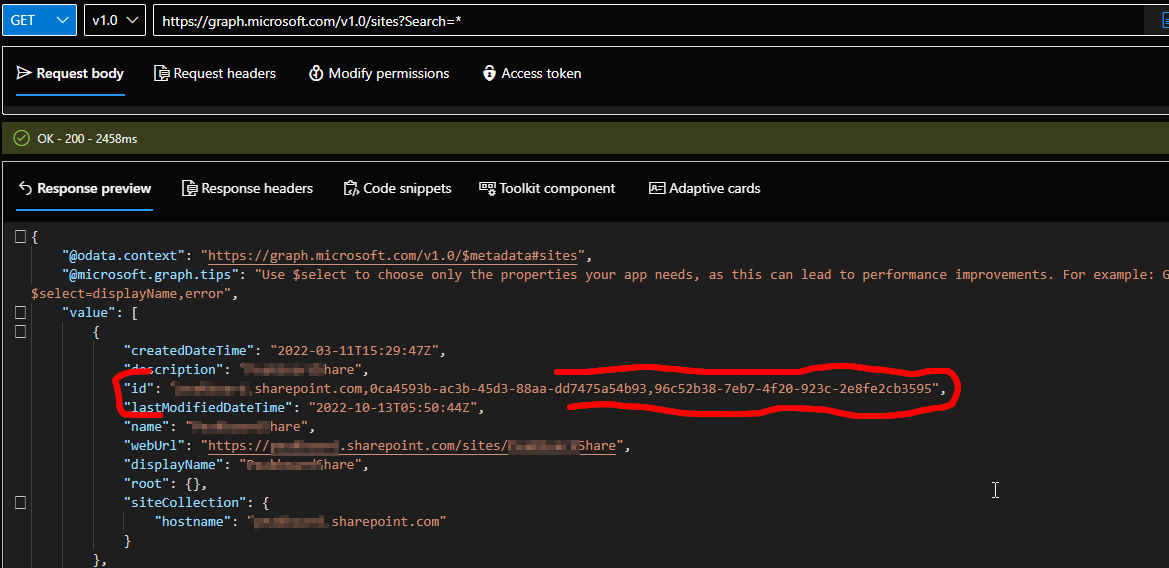
Before we can use the MS Graph API for Sharepoint lists in Peakboard, we first need to get the Sharepoint Site ID and Sharepoint List ID. This API call gets a list of all Sites in the Sharepoint instance. Here is the documentation.
https://graph.microsoft.com/v1.0/sites?Search=*If we execute the call in the Graph Explorer, we will find the ID inside the response.
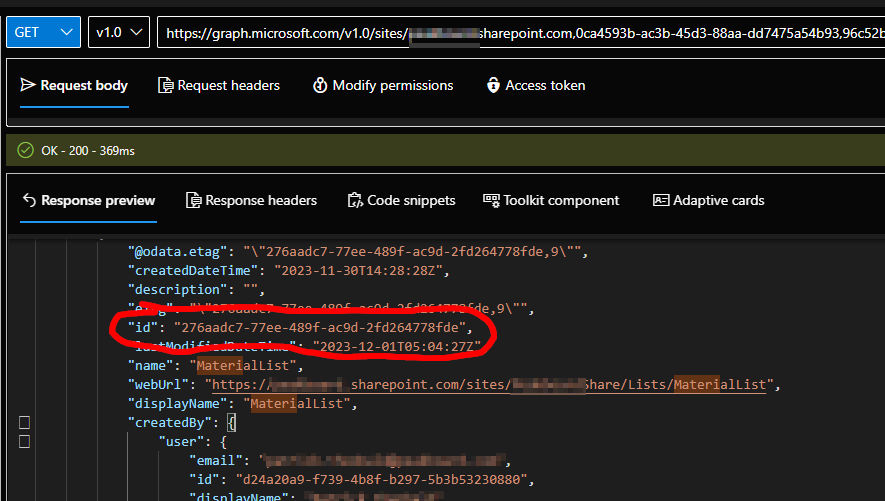
We can get all the available lists in the site, with the following call. We just need to plug in the Site ID. Here is the documentation.
https://graph.microsoft.com/v1.0/sites/{site-id}/listsThe following screenshot shows how to find the list ID within the response of the call.
Set up the data source
In Peakboard Designer, we need to understand the API to get the items of the list. Firstly, you can find the documentation here. The call looks like this:
https://graph.microsoft.com/v1.0/sites/{site-id}/lists/{list-id}/items?expand=fields(select=Column1,Column2)With the given Site ID and List ID, and the columns MaterialNo, Description, Color, and QuantityOnStock, this is the actual call:
https://graph.microsoft.com/v1.0/sites/xxx.sharepoint.com,0ca4593b-ac3b-45d3-88aa-xx75a54b93,96c52b38-7eb7-4f20-923c-2e8fe2cb3595
/lists/276aadc7-77ee-48xxxx-2fd264778fde/
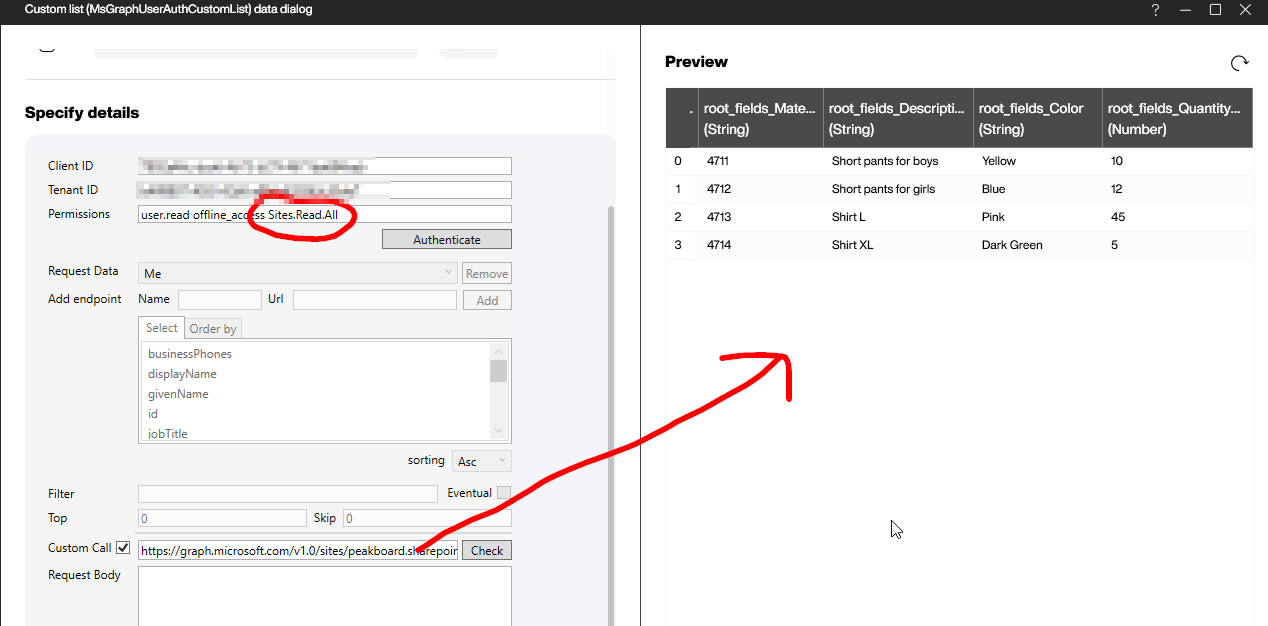
items?expand=fields(select=MaterialNo,Description,Color,QuantityOnStock)Here’s how it looks like in Peakboard Designer when using the UserAuthCustomList. Make sure to apply the Sites.Read.All permission before authenticating.
The columns we’re looking for are all on the right end of the columns list. The first 10-12 columns only contain administrative information (creation date, creation user, etc.).
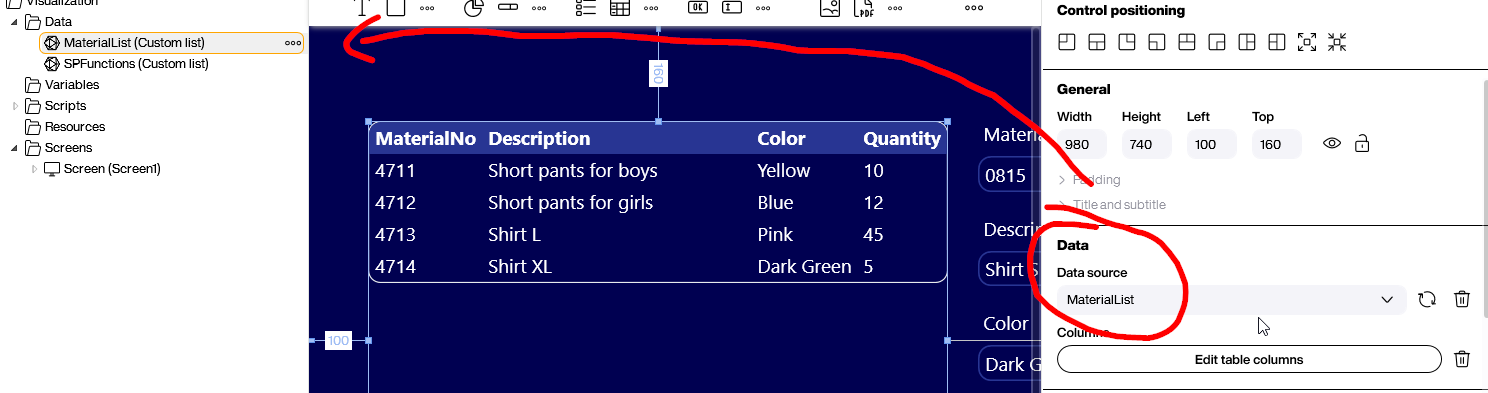
Finally, we can build a nice table control and bind the data source to it.
Writing to the list
To understand how to write data back to Sharepoint, read this documentation. The API expects a POST call to this endpoint:
https://graph.microsoft.com/v1.0/sites/{site-id}/lists/{list-id}/itemsIn the POST call, we need to send a JSON body that contains the names and values of the columns of the row we want to add to the list:
{
"fields": {
"MaterialNo": "0815",
"Color": "Black",
"QuantityOnStock": 90,
"Description": "Lady's Shirt"
}
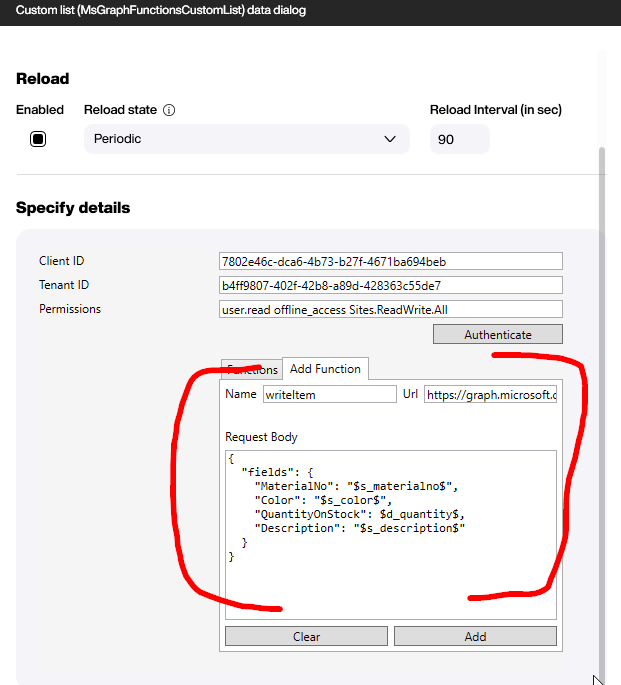
}Next, we create a MsGraphCustomFunctionsList data source. We add a new function to the list with the correct URL (replace Site ID and List ID with actual values). We also add our JSON object to the body.
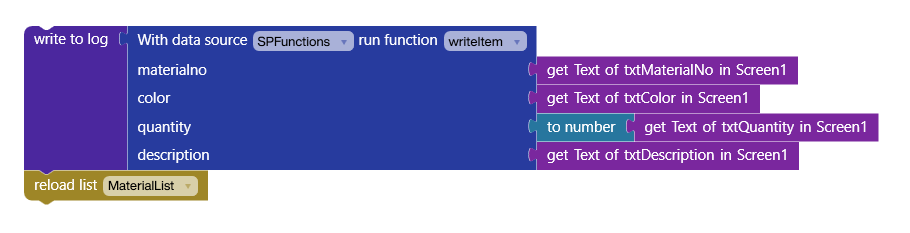
Note that we replaced the actual values with placeholders like $s_materialno$. Because the quantity column in our list is numeric, the placeholder must start with d (for double): $d_quantity$.
Next, we build a small form with input boxes that let the user provide the information for the row they want to add.
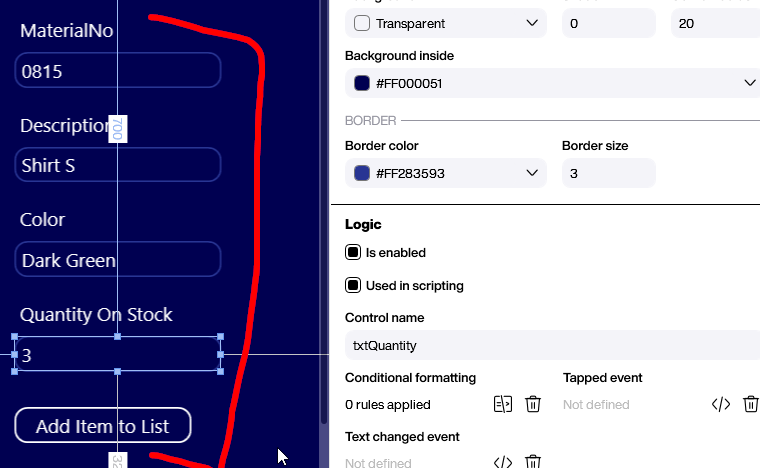
Now, let’s have a look at the code behind the Add… button. We use an Extension Functions block. Because we used placeholders in the JSON body, the Building Blocks editor automatically offers the right sockets for our dynamic string from the text box. After the submission, we reload the list to update the data. That’s it.
Here’s the final result in action: