This article covers the basics of using the MS Graph API with Peakboard. It’s boring, but it’s necessary. Sorry for this.
The extension
As of June 2023, Peakboard doesn’t support Graph calls natively, but there is an extension that adds this functionality. Please check out the extension’s website to find out more. You can download and install it like any other extension.
The lists
After installing the extension, there will be three types of lists available.

Here are the difference between these three lists.
User-Delegated Access
The Graph data is accessed in the name, and with the privileges of a dedicated user. Before you can use this list, you have to go through an authentication process. Most Graph calls require this kind of access type.
App-Only Access
The Graph data is accessed in the name of the application only. This is easier to handle than user-delegated access.
User Function
Using a User Function list is usually done when calling a certain function to perform some action, rather than querying a list. The authentication pattern is the same as with the user-delegated access.
The Graph Explorer
Microsoft offers quite a handy tool to browse and test Graph functions, called Graph Explorer. The best way to master a new task is to understand a call in Explorer first, and then use Peakboard to call it.
There is also excellent documentation available that offers lots of sample calls.
App registration in Azure
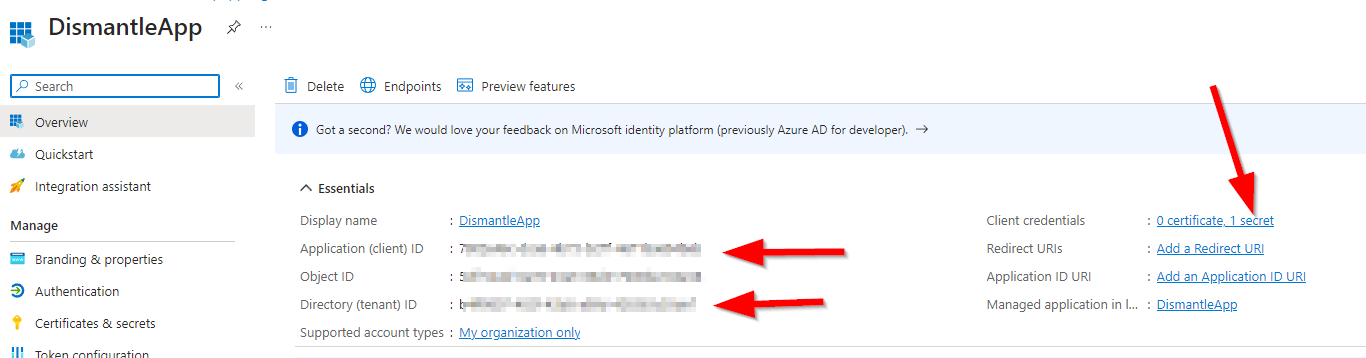
For any of the three kinds of access, the caller needs to identify themself. For this, an app registration is necessary in Azure AD. Provided that you have admin rights, go to the app registration section and create a new app. You need these three things later:
- Tenant ID
- Client ID
- Client Secret (if you use the App-Only list)
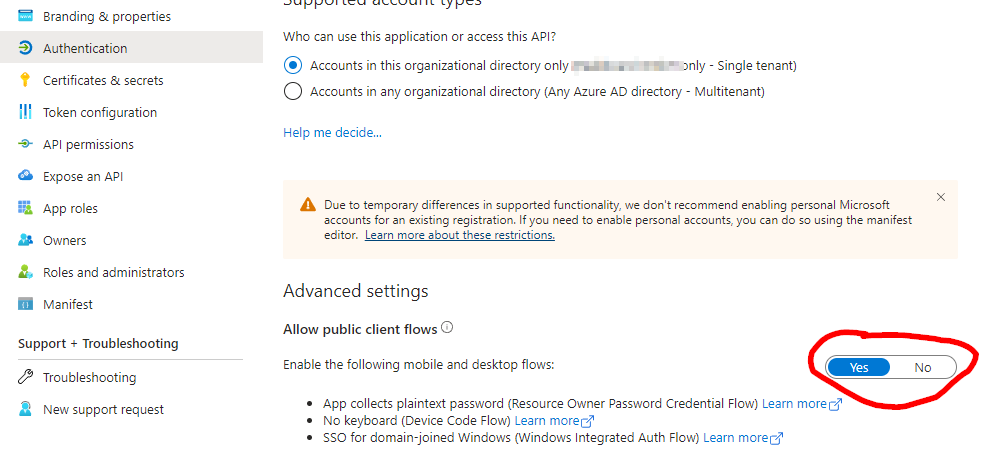
Make sure to allow public client flows.
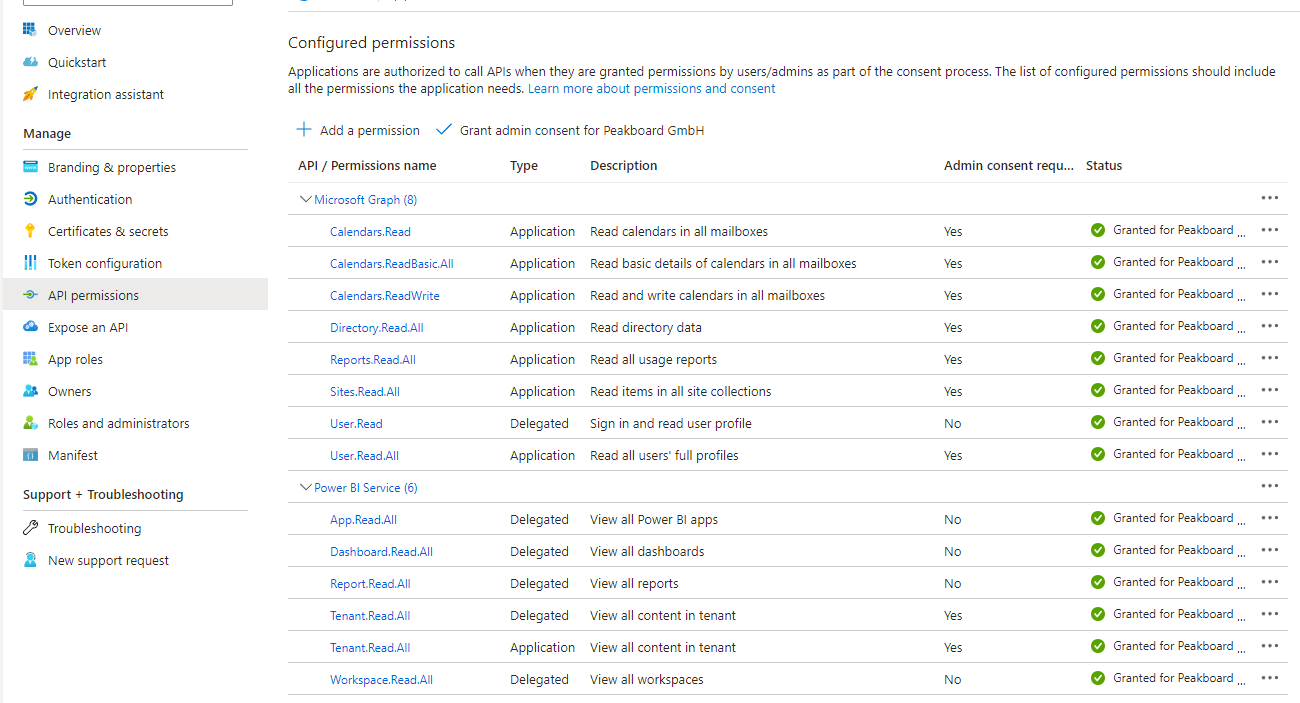
And also check the API permissions section. In this screenshot, you can see that the app has granted a lot of permissions. The permissions you need for each call is specified in the documentation of each Graph call.
The first call
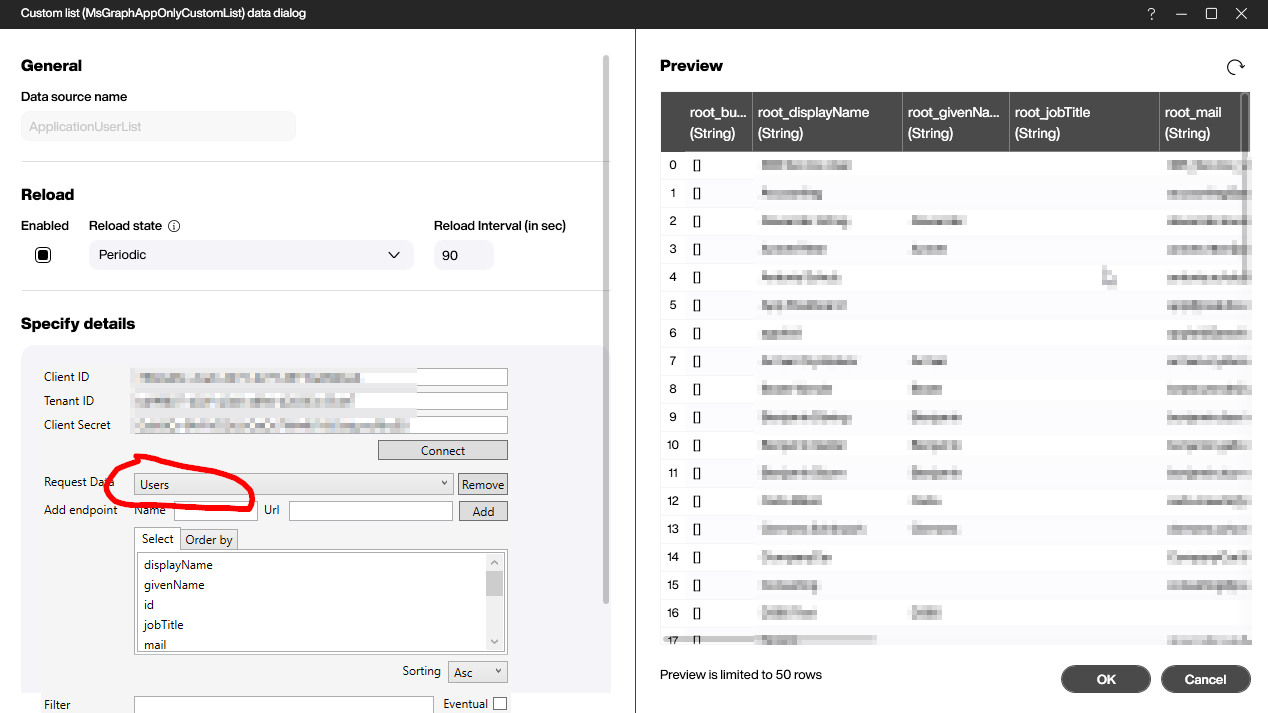
We go back to Peakboard Designer and add a simple app-only list to the data sources. Then, we provide the three values we noted earlier (IDs plus secret).
In the combo box, there are already a couple of useful calls available, so you don’t have to provide the Graph call URL for the first step. Just use Users and refresh the data.
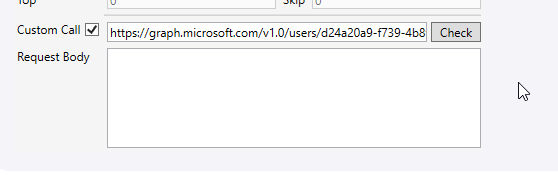
If you don’t want to rely on the the prepackaged combo box calls, just use the Custom Call option, as shown in the next screenshot. In most of the articles in this blog, we will use this option. You can copy and paste your HTTP calls directly from the Graph Explorer to there, and then use them.