Over the past few years, HubSpot has become one of the top tools for marketing automation and sales. A typical use case would be to put all kinds of contacts into HubSpot, which are gathered by the company through various ways.
This article shows how to build a self-service form to submit contact data to HubSpot.
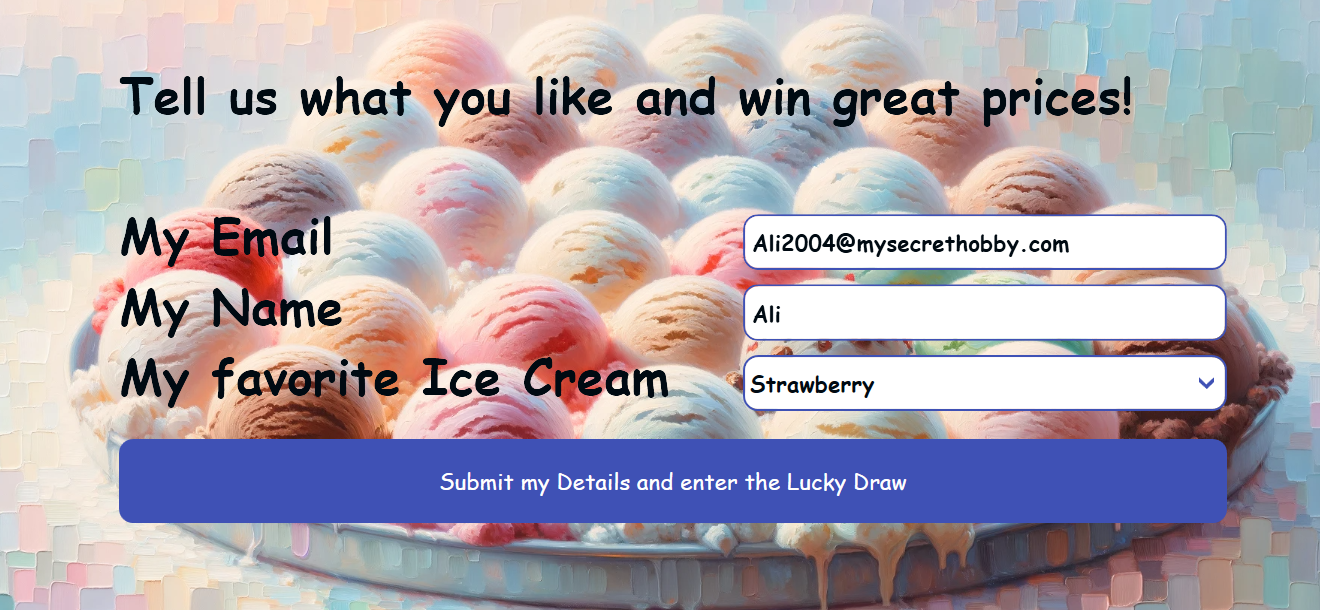
Let’s assume that an ice cream company is using this self-service terminal next to an ice cream stand, in order to ask their customers for their favourite flavor. The customer can also enter a lucky draw to win prices.
Of course, the company wants to have this data in HubSpot as soon as possible, in order to check back with the customer and send them a newsletter and other sales material. The example in this article shows how to build a JSON string and submit it to a real world API.
The HubSpot API
The HubSpot API is not too complicated to use, and it is based on typical REST web services. The endpoint we use is https://api.hubapi.com/crm/v3/objects/contacts. To better understand the API, you can read the HubSpot API dev guide.
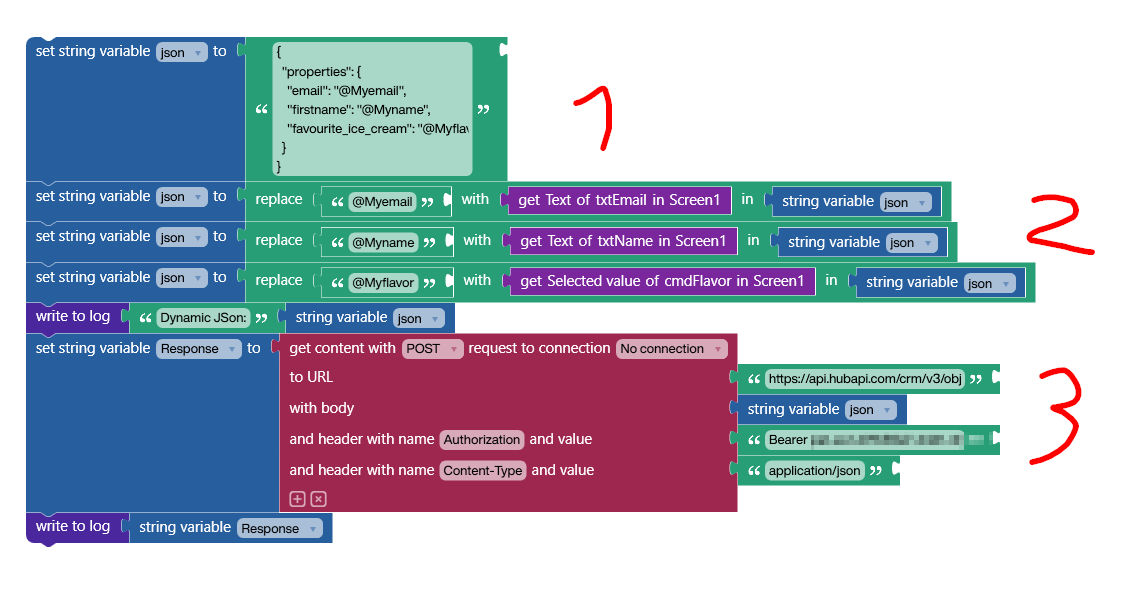
Because we want to create a contact in HubSpot, we need to submit a JSON string in the body of the HTTP call. Here is a very simple example of what the JSON must look like, in order to be understood by the HubSpot server. We provide the name, email address, and a HubSpot custom field called favourite_ice_cream, which contains the flavour that the customer chose in the form.
{
"properties": {
"email": "uli1990@gmail.com",
"firstname": "Ulrike",
"favourite_ice_cream": "Vanilla"
}
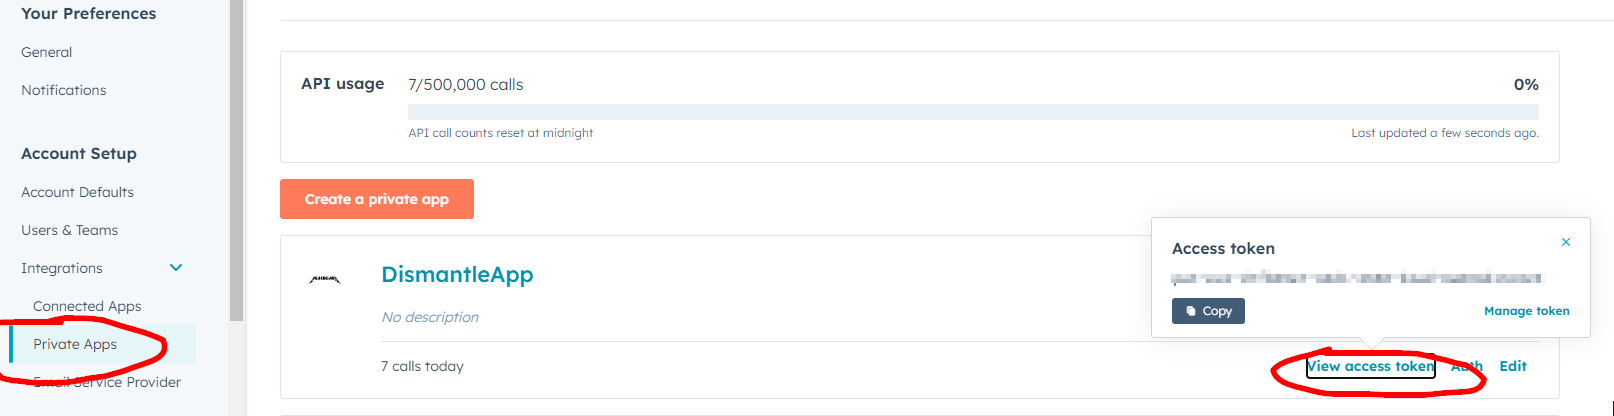
}For authentication, we need to submit an API token. To get a token, we go to the settings section of our HubSpot account and create a private app. We store the token for later usage, when Peakboard is initiating the call.
Build the application screen
Now let’s build the application in Peakboard.
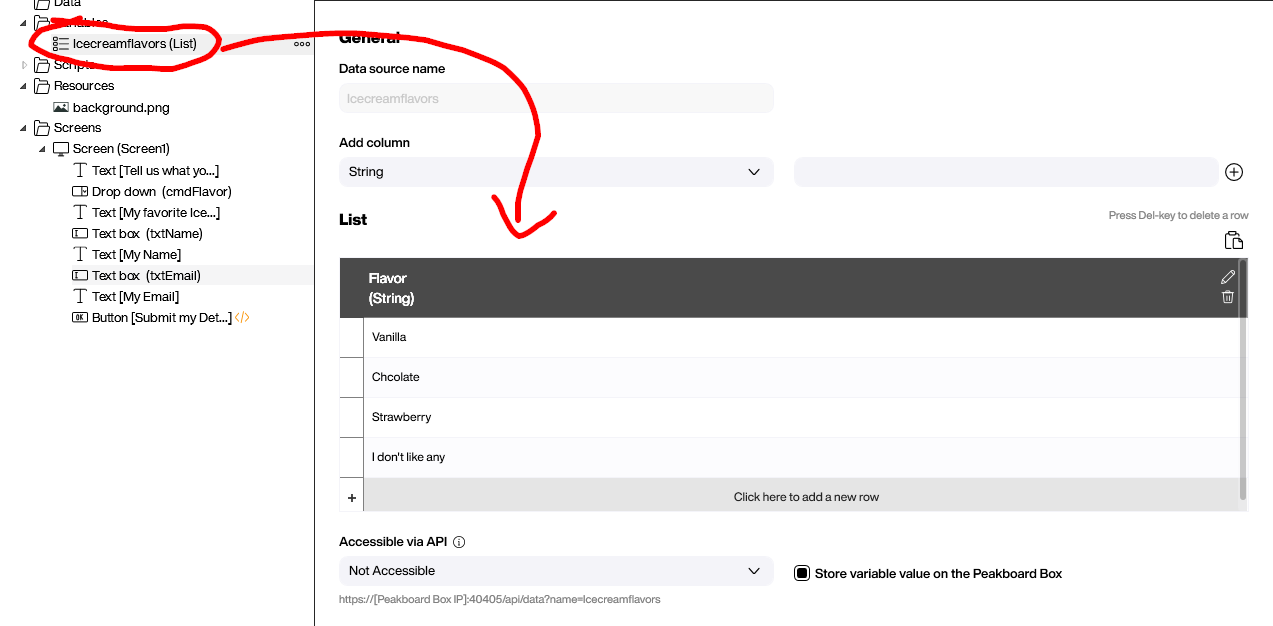
We want to give the user the option of choosing their flavour from a combo box. To fill the combo box with the appropriate values, we create a variable list with all the possible flavors. It’s a simple list with only one column.
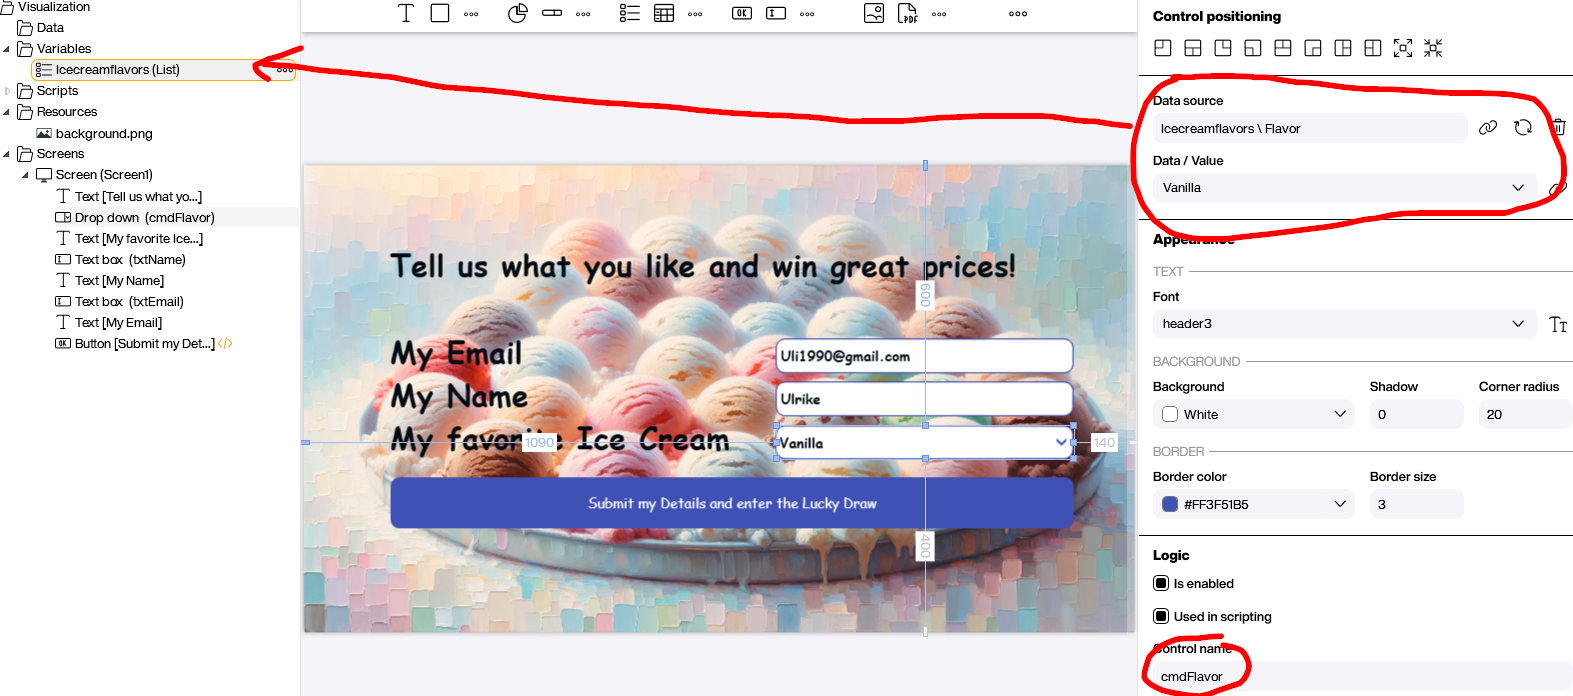
The screen is simple. We choose a nice background image, add the text, and put the interactive elements on the screen. To fill the combo box with values, we connect it to the variable list. We also give all three input controls a proper name, so we can address them from within our code.
Build the REST call
Let’s have a look now at the code behind the submit button. Here’s what happens:
- The JSON string is stored in a variable with three placeholders within the string. They all begin with a
@character, to make them easier to identify. - The placeholders are replaced by the actual values that come from the three input controls on the screen.
- This is the actual HTTP call. It’s a POST call, according to the documentation. We need to add two headers to make it work.
- The first header is
Authorization. Here, we submit the valueBearer <mytoken>. - The second header is
Content-Type. We have to set it toapplication/json, otherwise HubSpot won’t understand what to do with the string in the HTTP body.
- The first header is
If this were not just an example, we would check the return message for any errors. To keep it simple, we’ll instead just write the response to the log.
The result
Here’s the board in full swing.
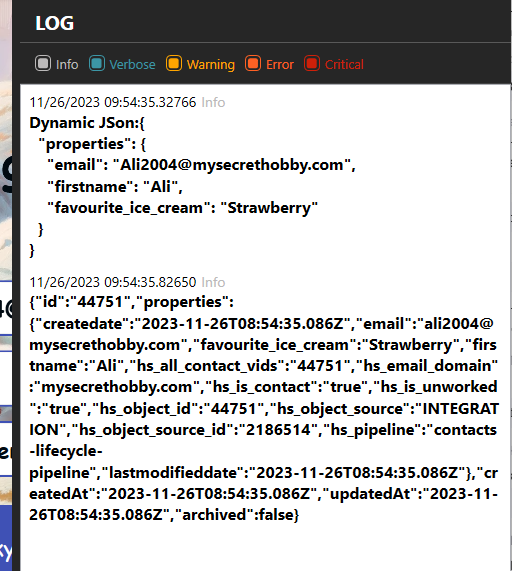
Let’s check the log. We can see the JSON that is built dynamically. We can also see the response from the HubSpot API server.
And here’s the result in HubSpot.
