In this article, we will learn how to add a Peakboard Box to Peakboard Hub Online (PBHO). That way, we’ll be able to manage and monitor the Box in PBHO.
Here is an overview of the steps we will take:
- Connect the Box to the cloud. This will allow PBHO to connect to the Box.
- Add the Box to PBHO.
See this article to learn the basics of PBHO.
Connect the Box to the cloud
In order for PBHO to connect to the Peakboard Box, we first need to connect the Box to the cloud.
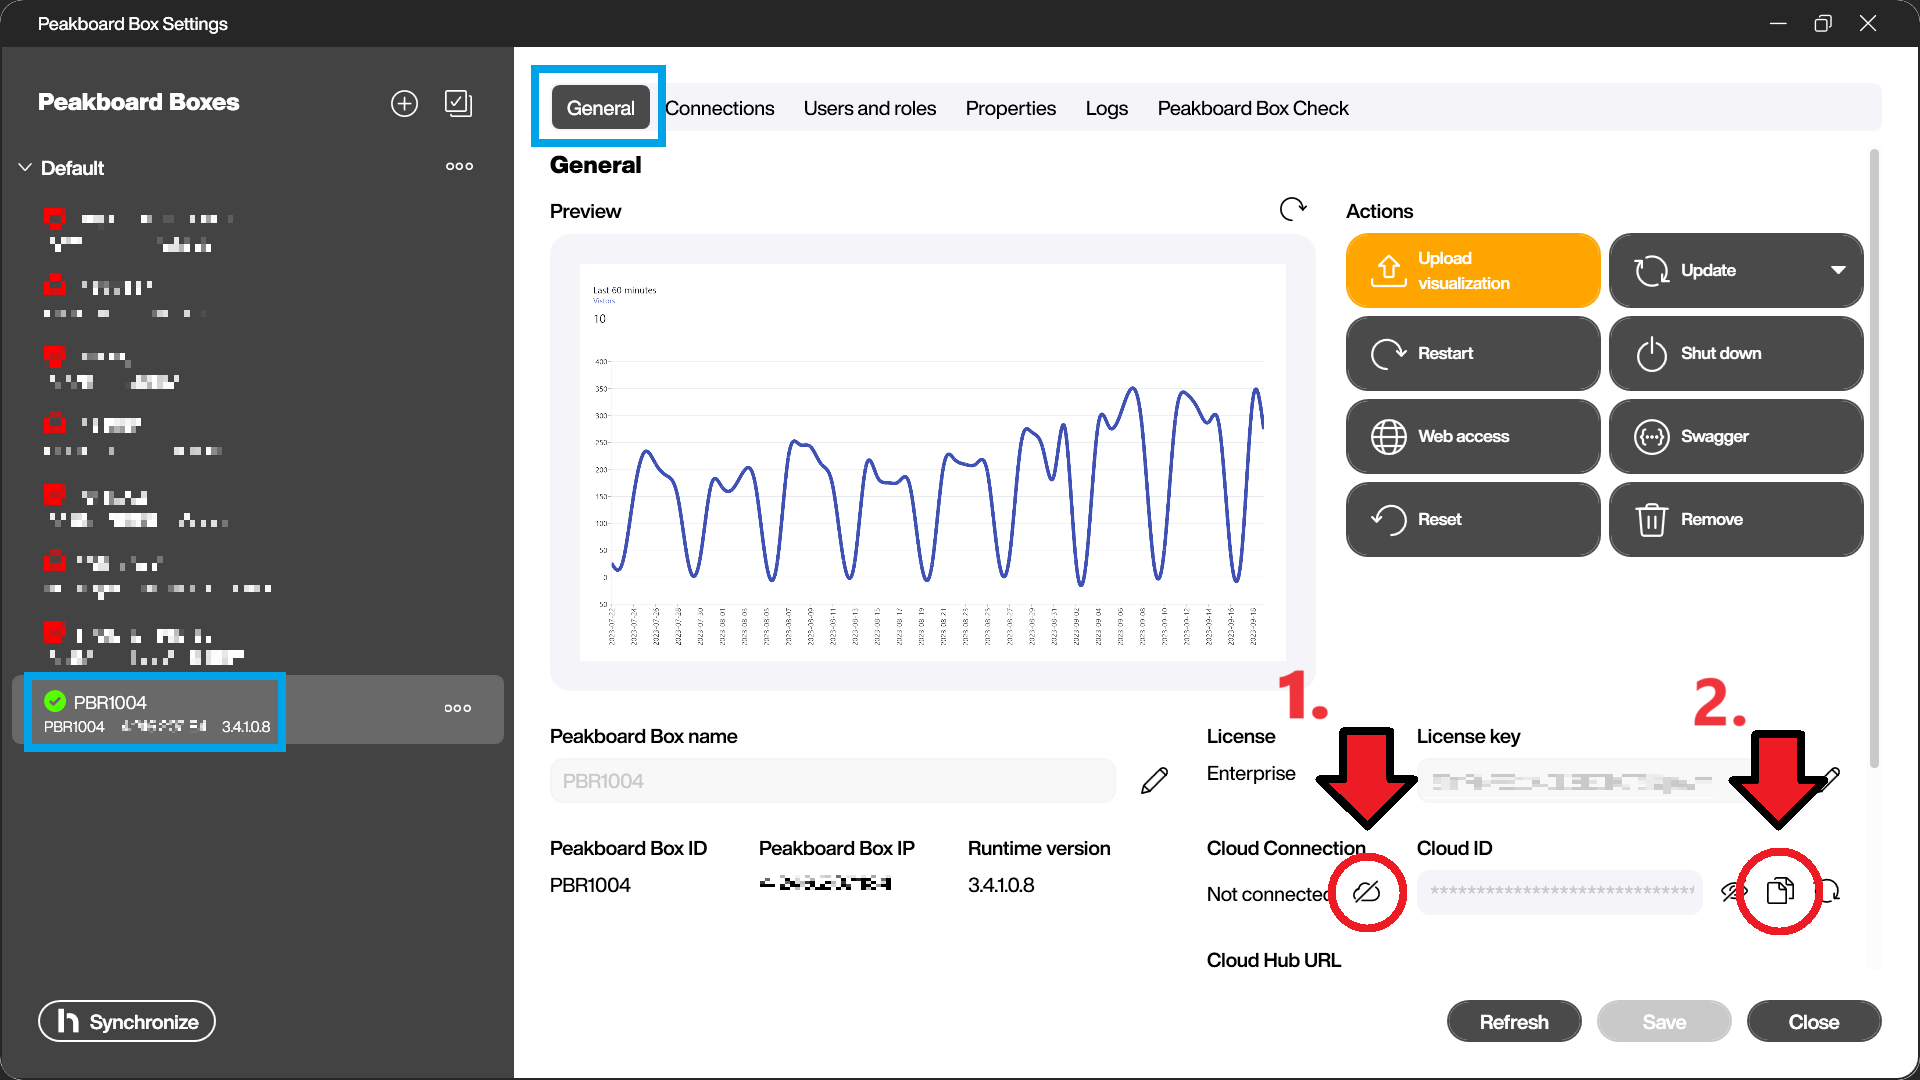
So, we go to Peakboard Designer and open the Peakboard Box settings.

Then, we select our Peakboard Box. We go to the General tab, and click on the cloud icon under Cloud Connection. Now, our Box is connected to the cloud.
Finally, we copy the Cloud ID. We will need it later.
Add the Box to PBHO
Now, we can add the Peakboard Box to PBHO.
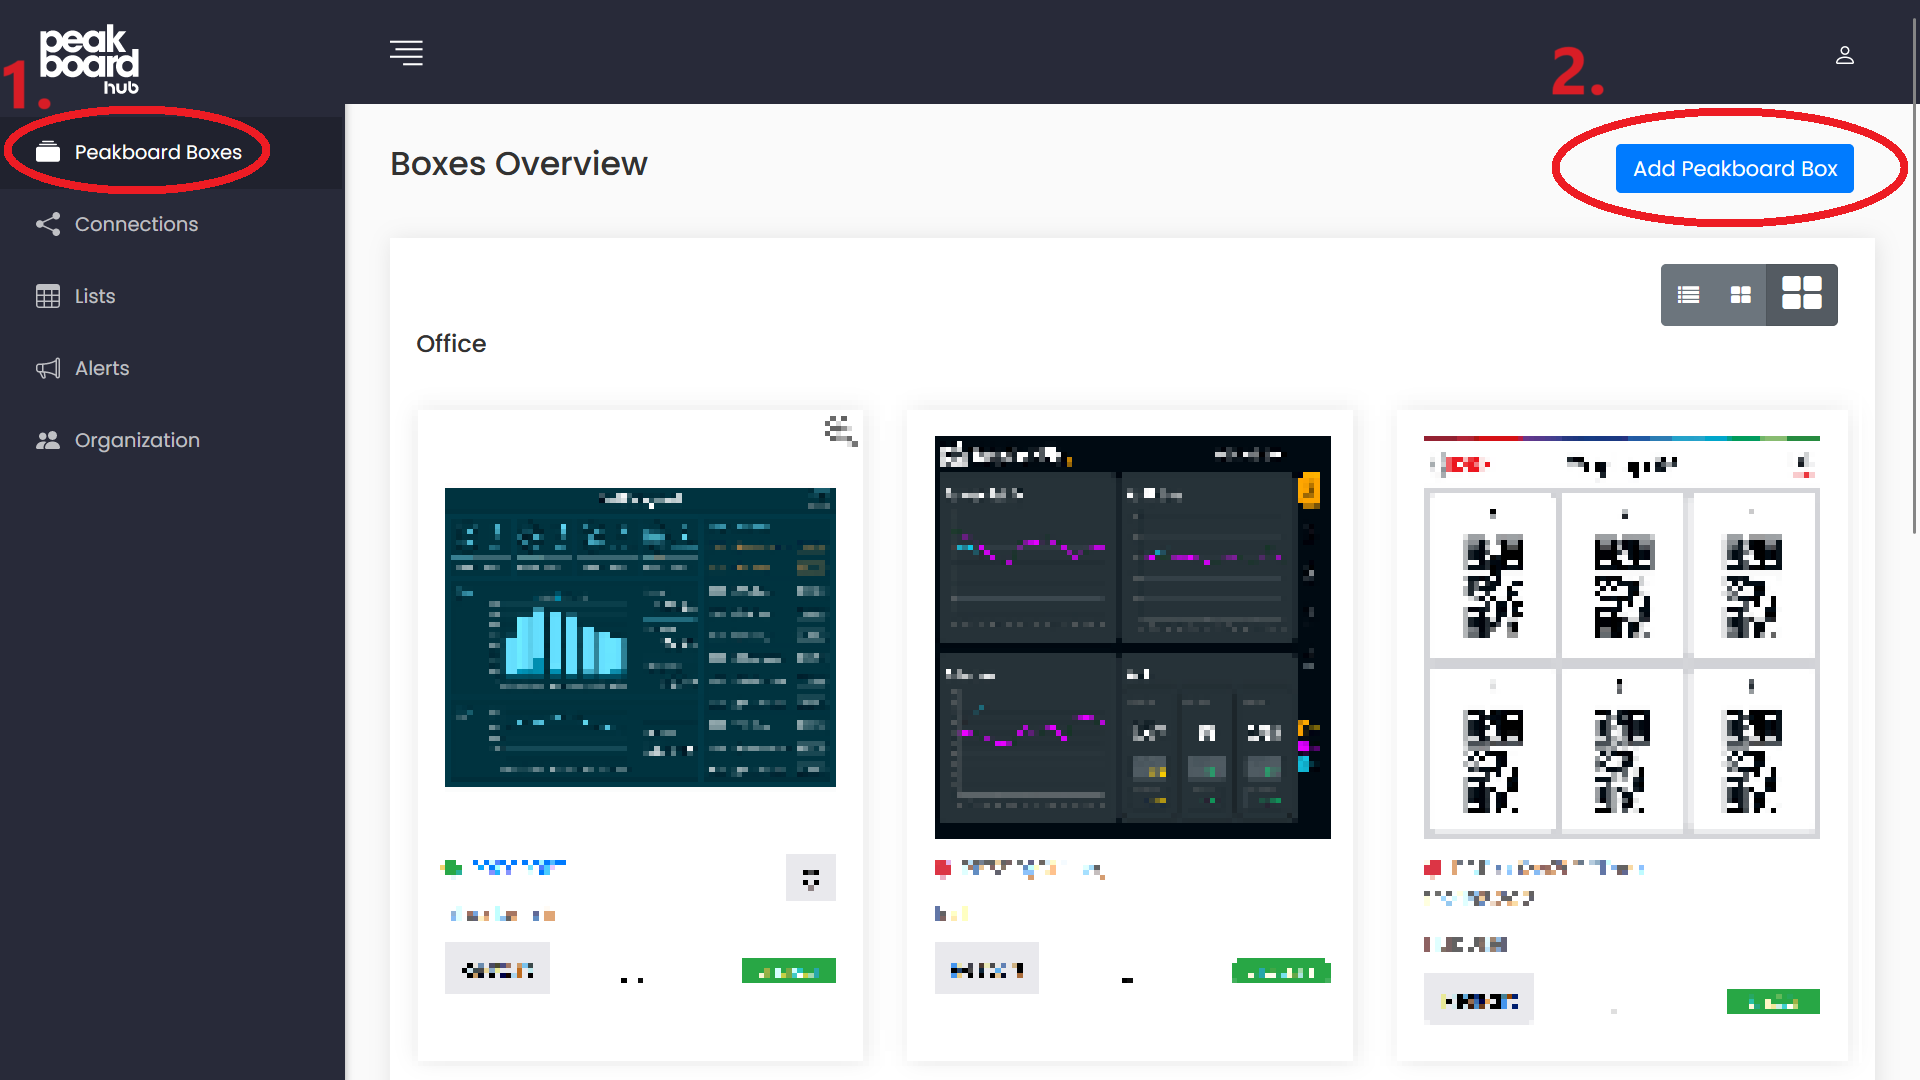
First, we open PBHO and go the Peakboard Boxes tab. Then, we click on Add Peakboard Box.
Next, we enter the cloud ID from before. Then, we enter the credentials of a user with sufficient permissions. (Check the Users and roles tab in Peakboard Designer to view all users.) Finally, we click Save.
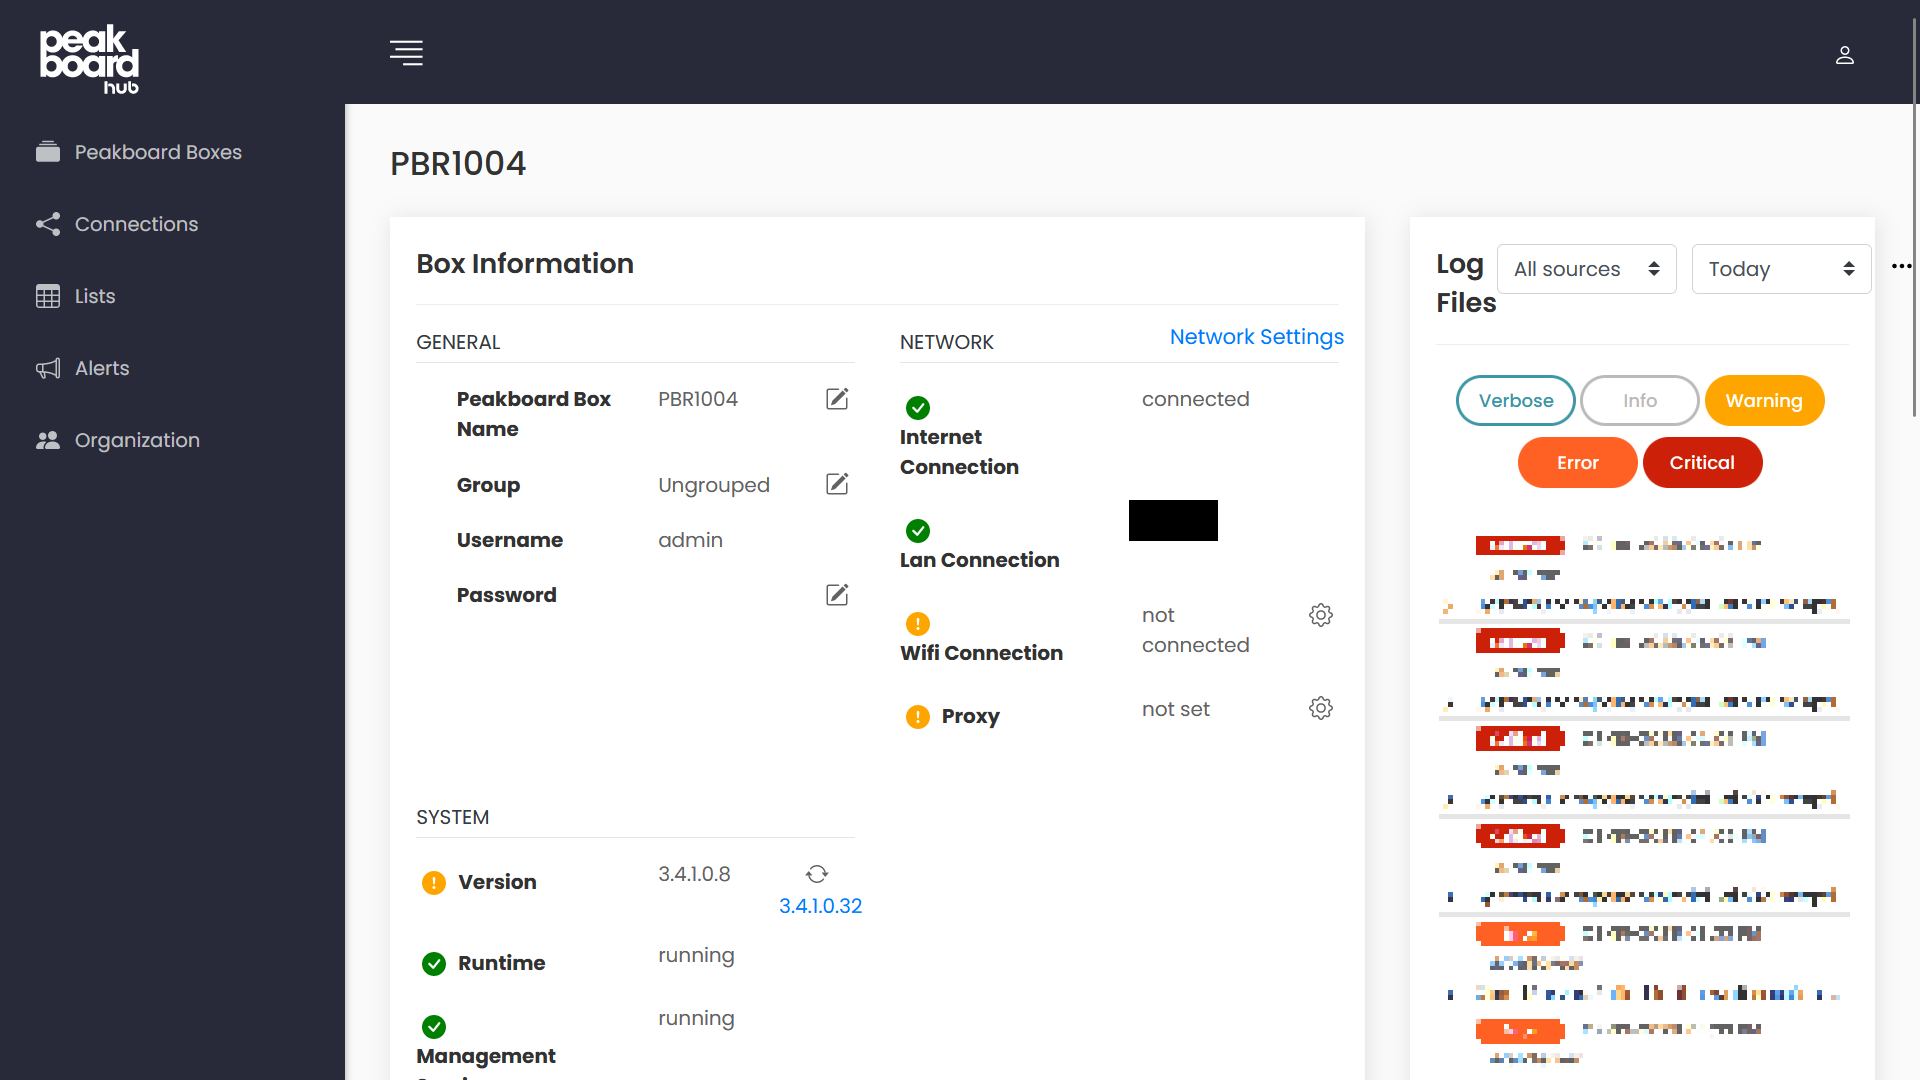
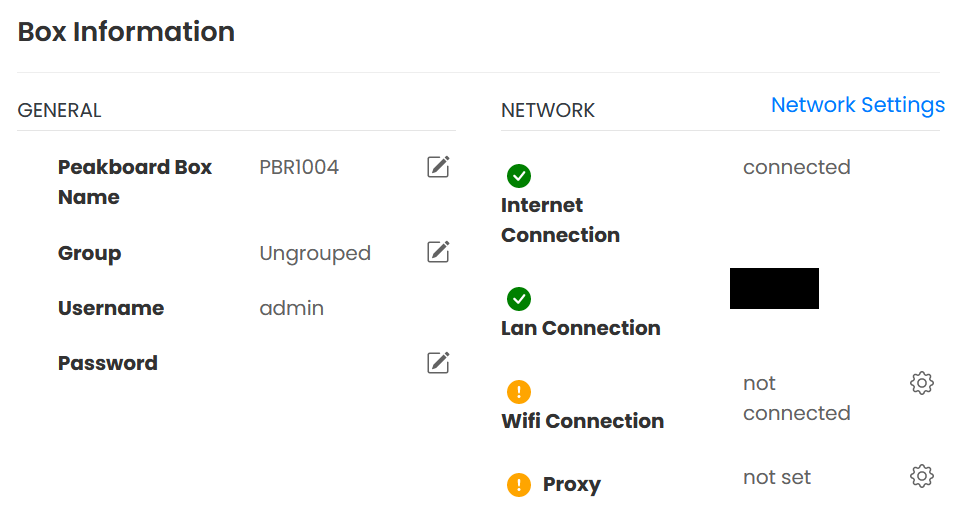
Now, our Box has been added to PBHO. When we refresh the page and click on our Box, we can see all sorts of information about our Box, as well as controls for managing it.