Trello is an online, collaborative list-making tool. In this article, we will learn how to create a Peakboard dashboard that can display and modify Trello lists.
Here is an outline of what we will do in this article:
- Get an API key and token from Trello. Our Peakboard Box needs these to authenticate itself to Trello.
- Add data sources for the Trello lists. These data sources let us read and write to the Trello lists.
- Add styled list controls for the Trello lists. These let us visualize and edit the Trello lists.
- Add the card title. This lets us see the name of a Trello card.
- Add a label color indicator. These let us see a Trello card’s label color.
- Add a Move button. This button lets us move a Trello card from one list to another.
- Add a Delete button. This button lets us delete a Trello card from a list.
- Add a Refresh All button. This button lets us manually refresh all Trello lists.
- Add a Create New button. This button lets us add a new Trello card to a list.
This article assumes that you are already familiar with the basics of Trello.
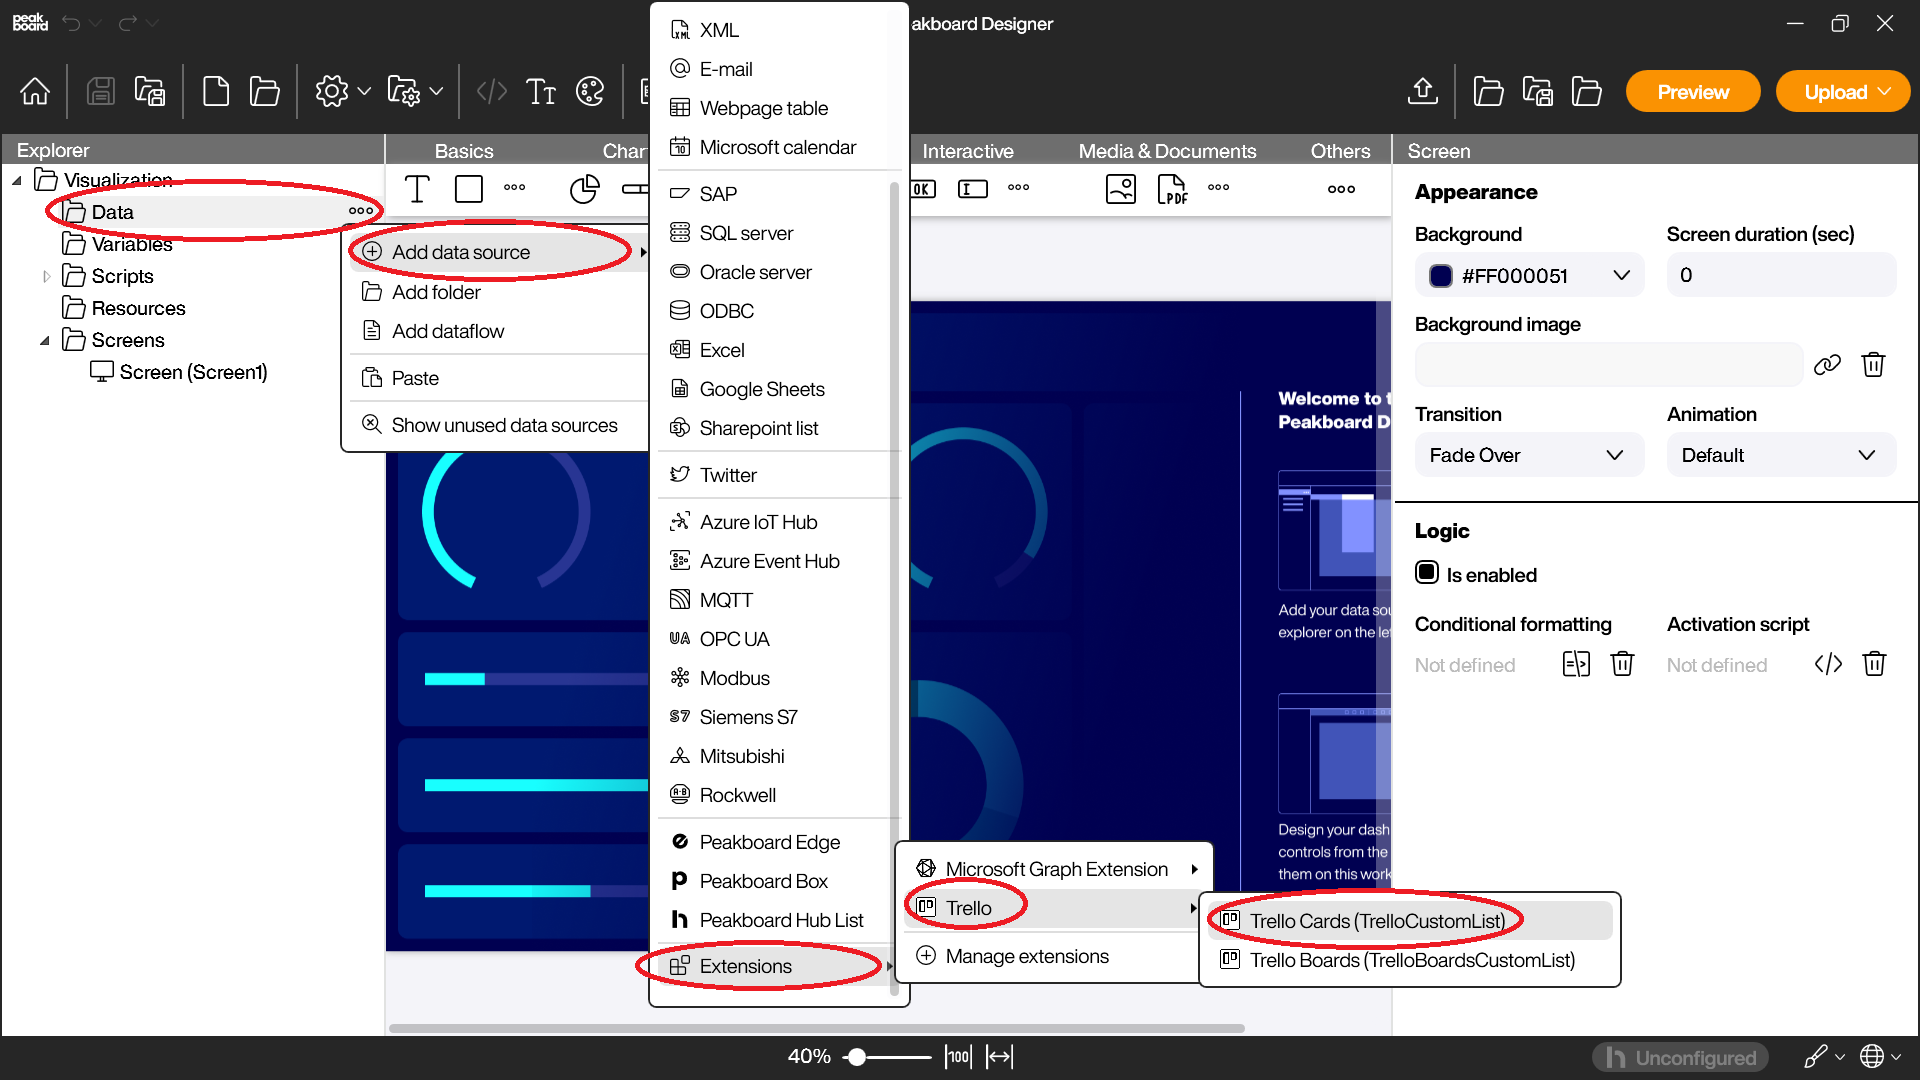
The Trello extension is required to integrate Trello into Peakboard.
Get an API key and token from Trello
We need to get an API key and token from Trello. That way, our Peakboard Box can authenticate itself to Trello.
The first step is to create a new Power-Up in Trello. We can do this in the Power-Ups admin portal.
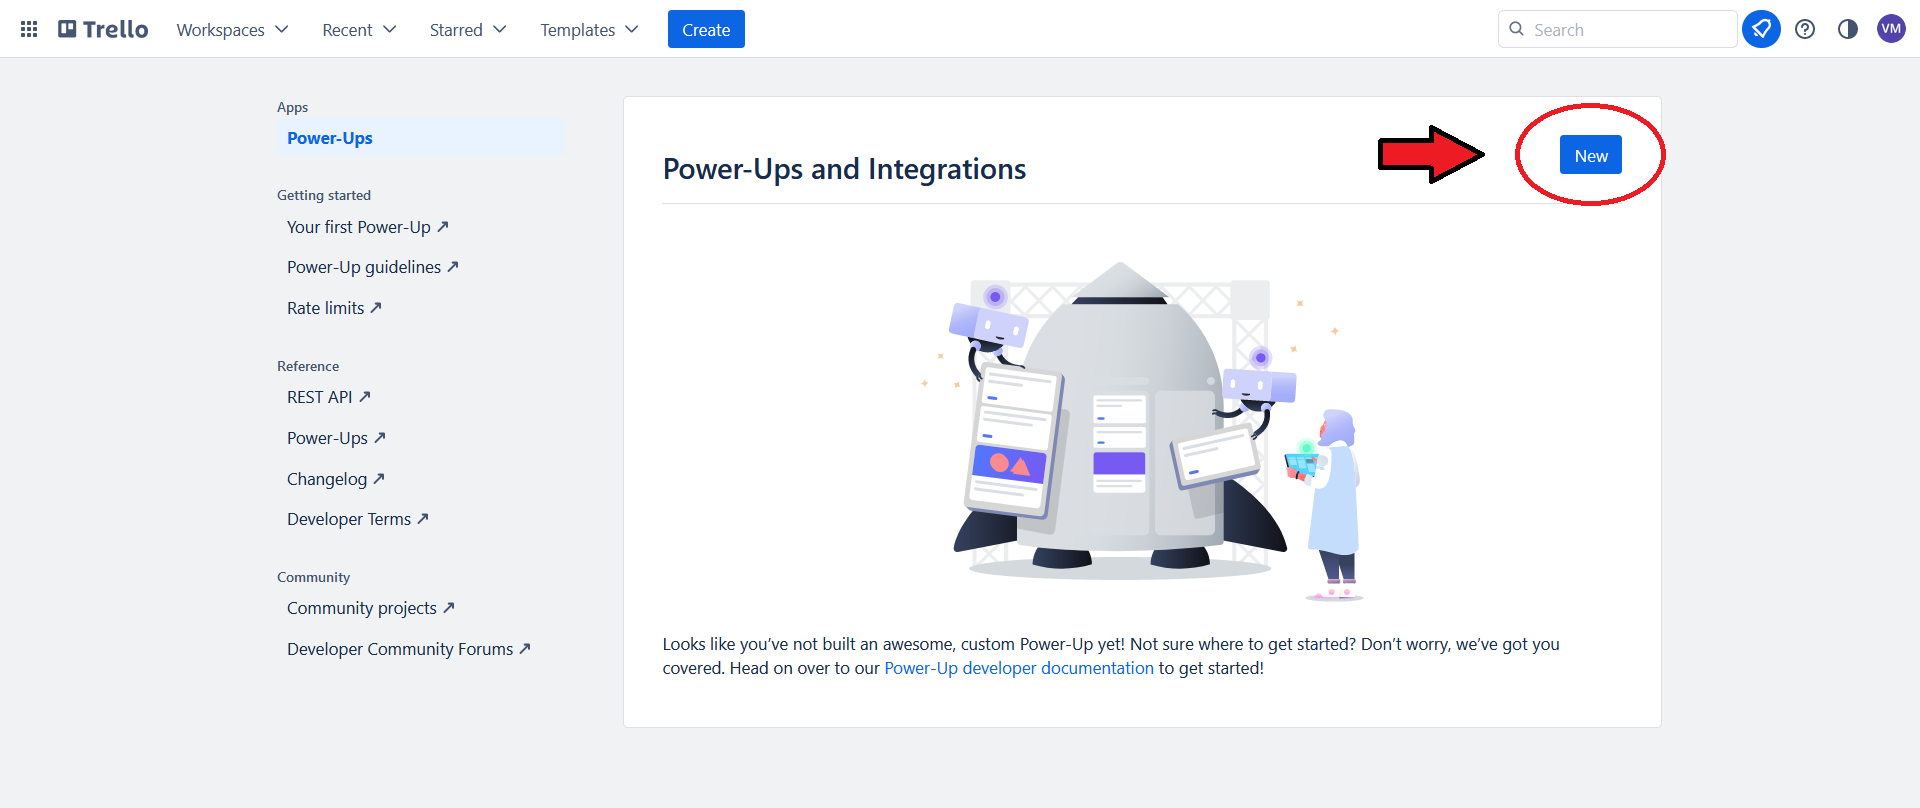
Once our Power-Up is created, we can generate an API key for it.
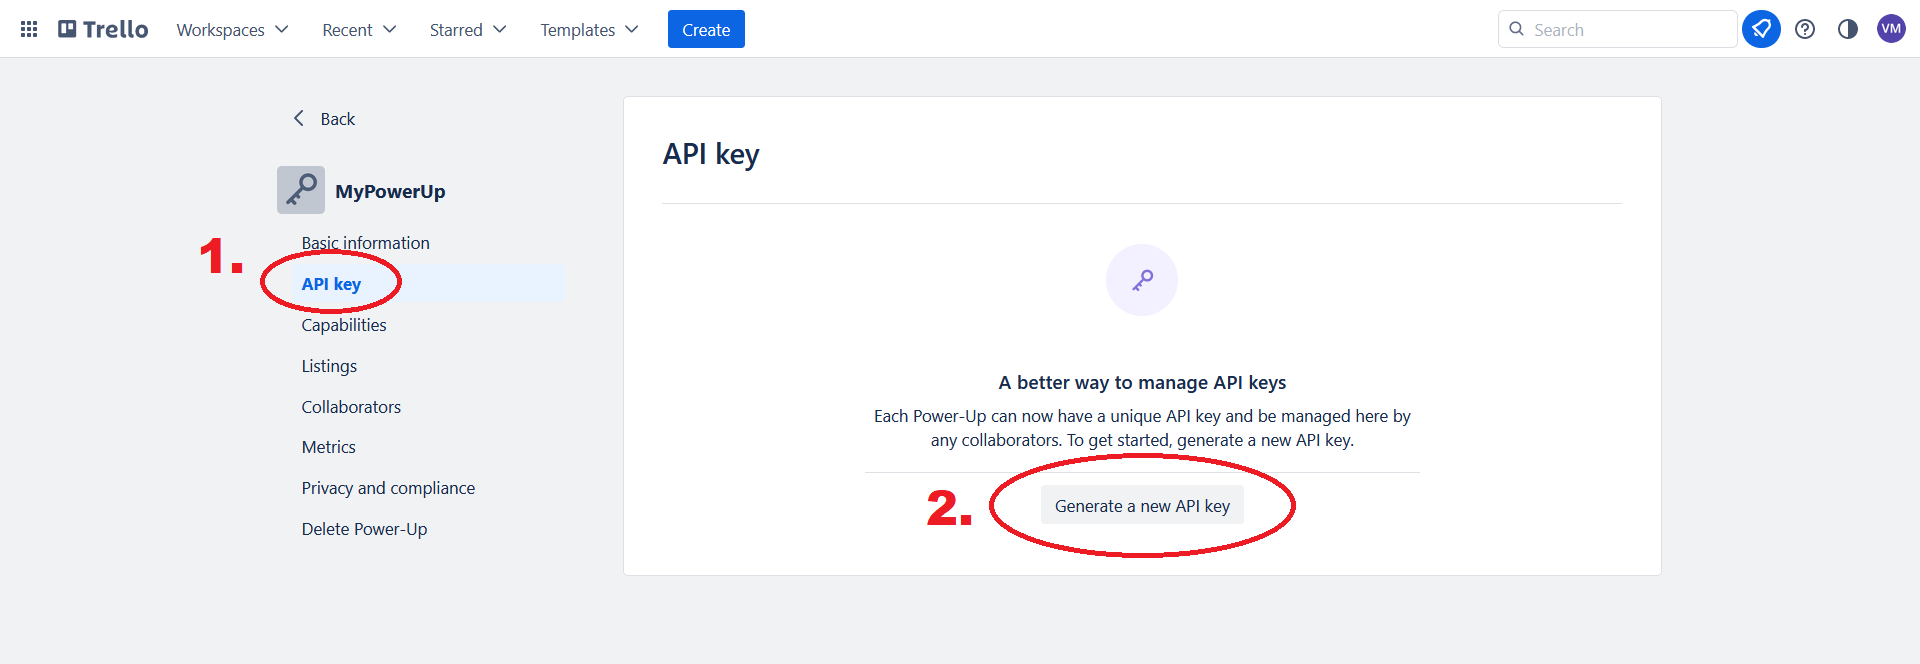
We copy down our API key. Then, we generate a token for our Power-Up and copy it down too.
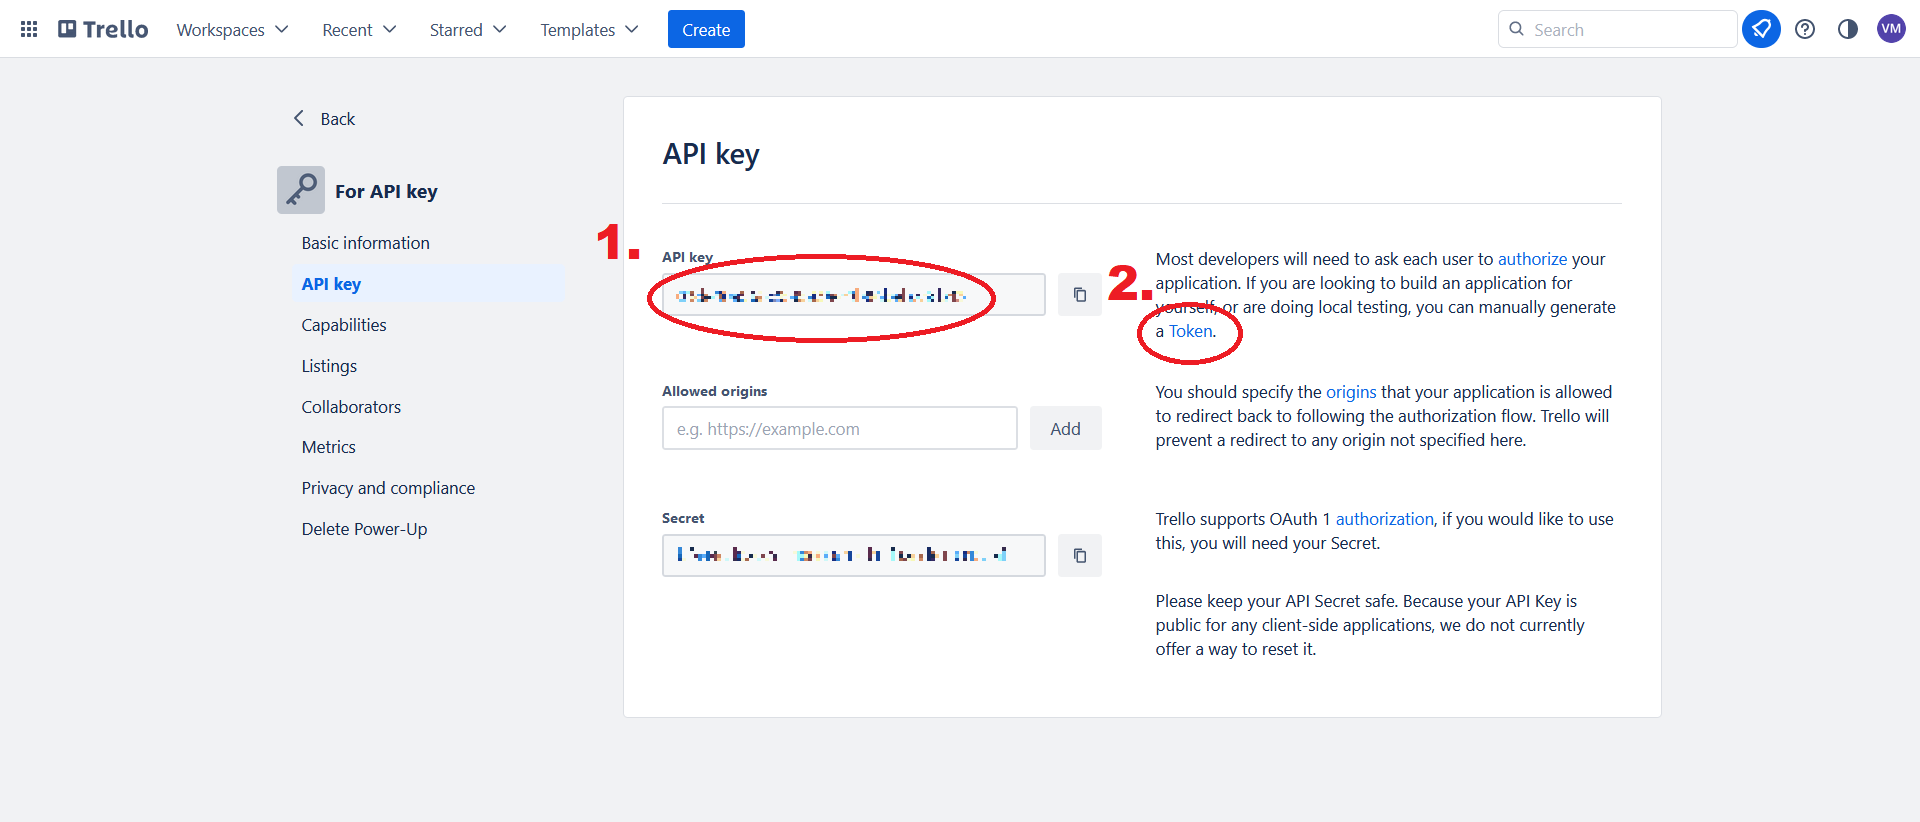
See Trello’s documentation for more information about these steps.
Add data sources
Here’s what our sample Trello board looks like:
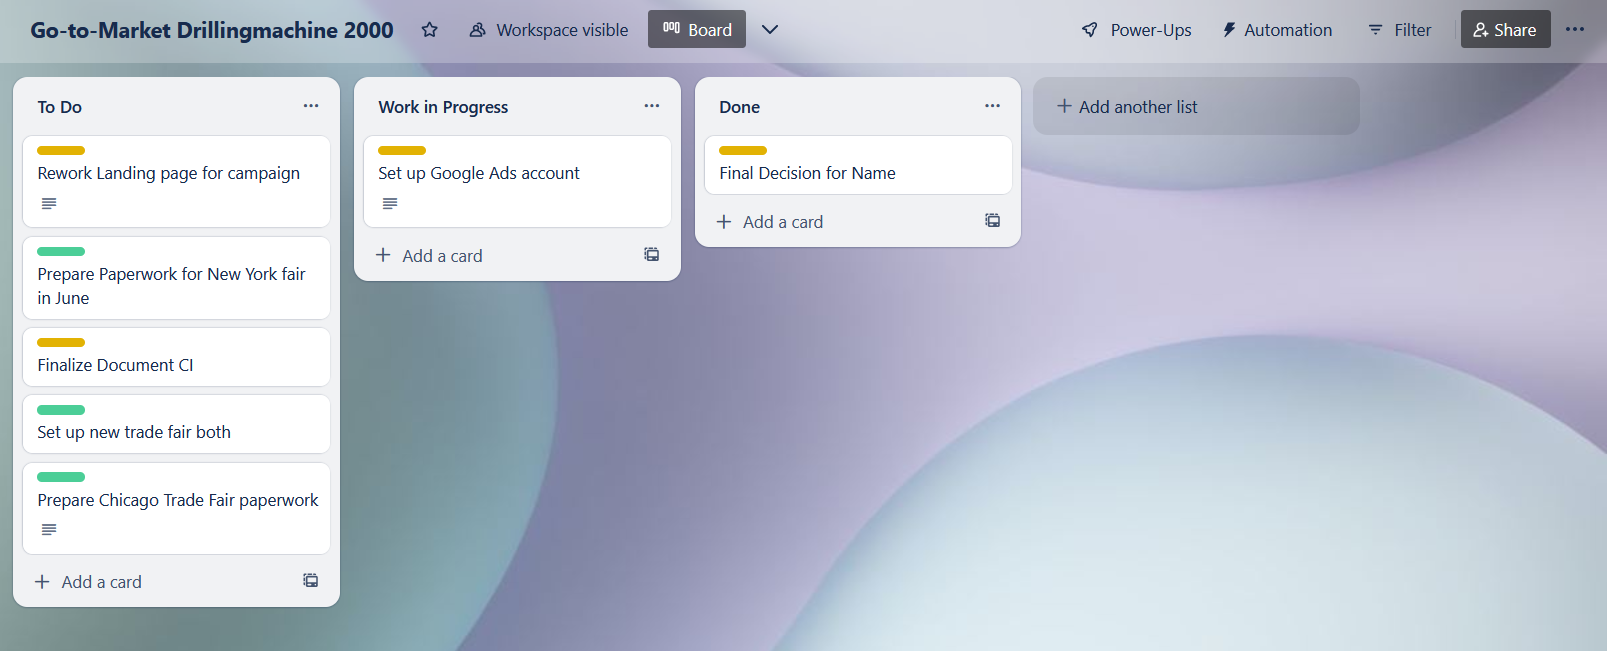
We will add one data source for each of the lists in our board, giving us three data sources in total.
Add a data source
Let’s add the data source for our To Do list. The process is similar for the other two lists.
First, we create a new Trello Cards data source.
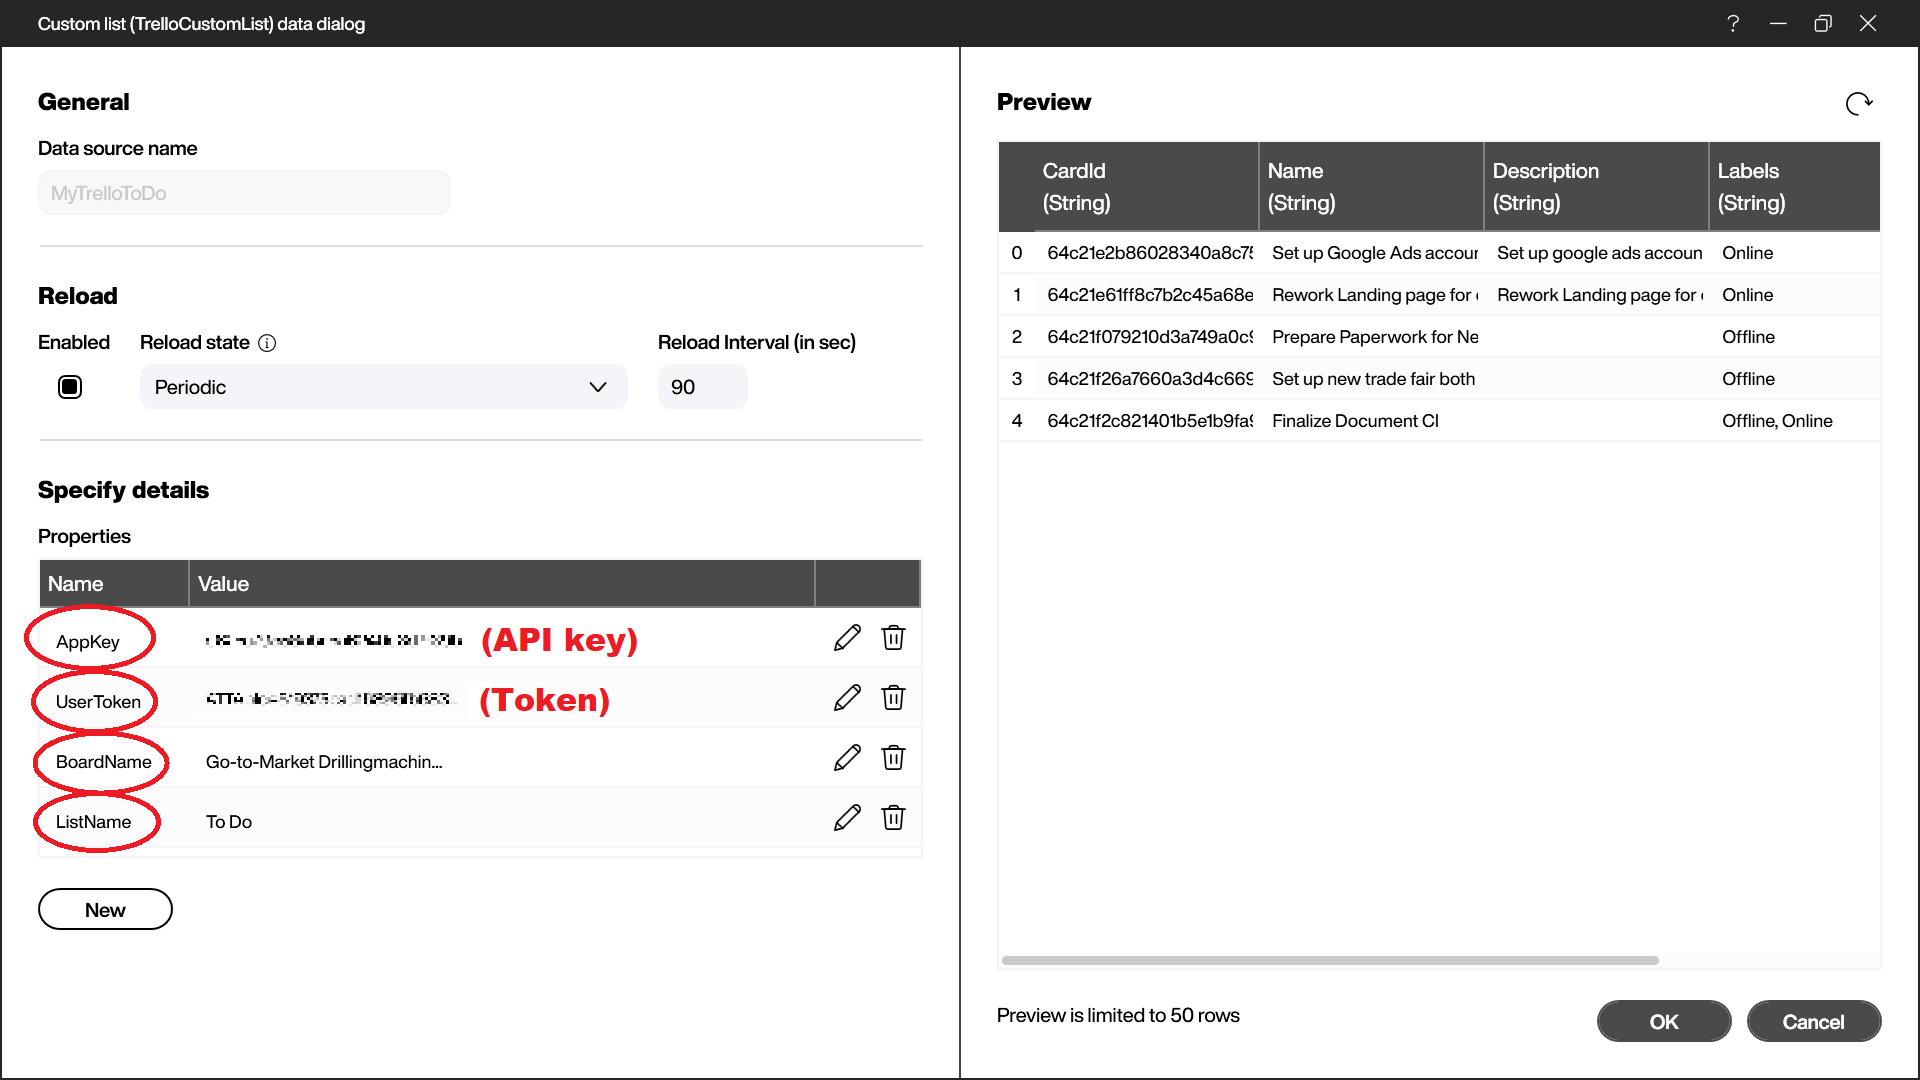
Then, we fill out the properties of the data source:
AppKeyis our API key from before.UserTokenis our token from before.BoardNameis the name of our Trello boardListNameis the name of our Trello list.
After this, we repeat the process to add a data source for the other two lists.
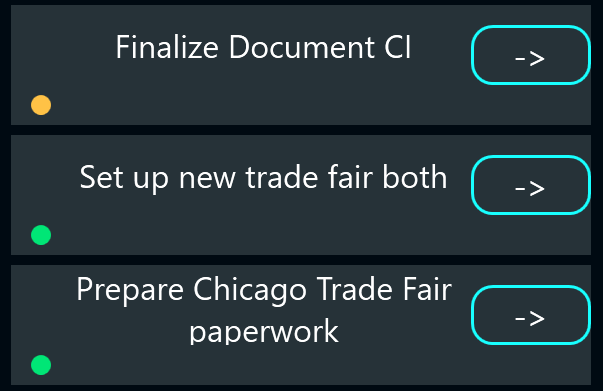
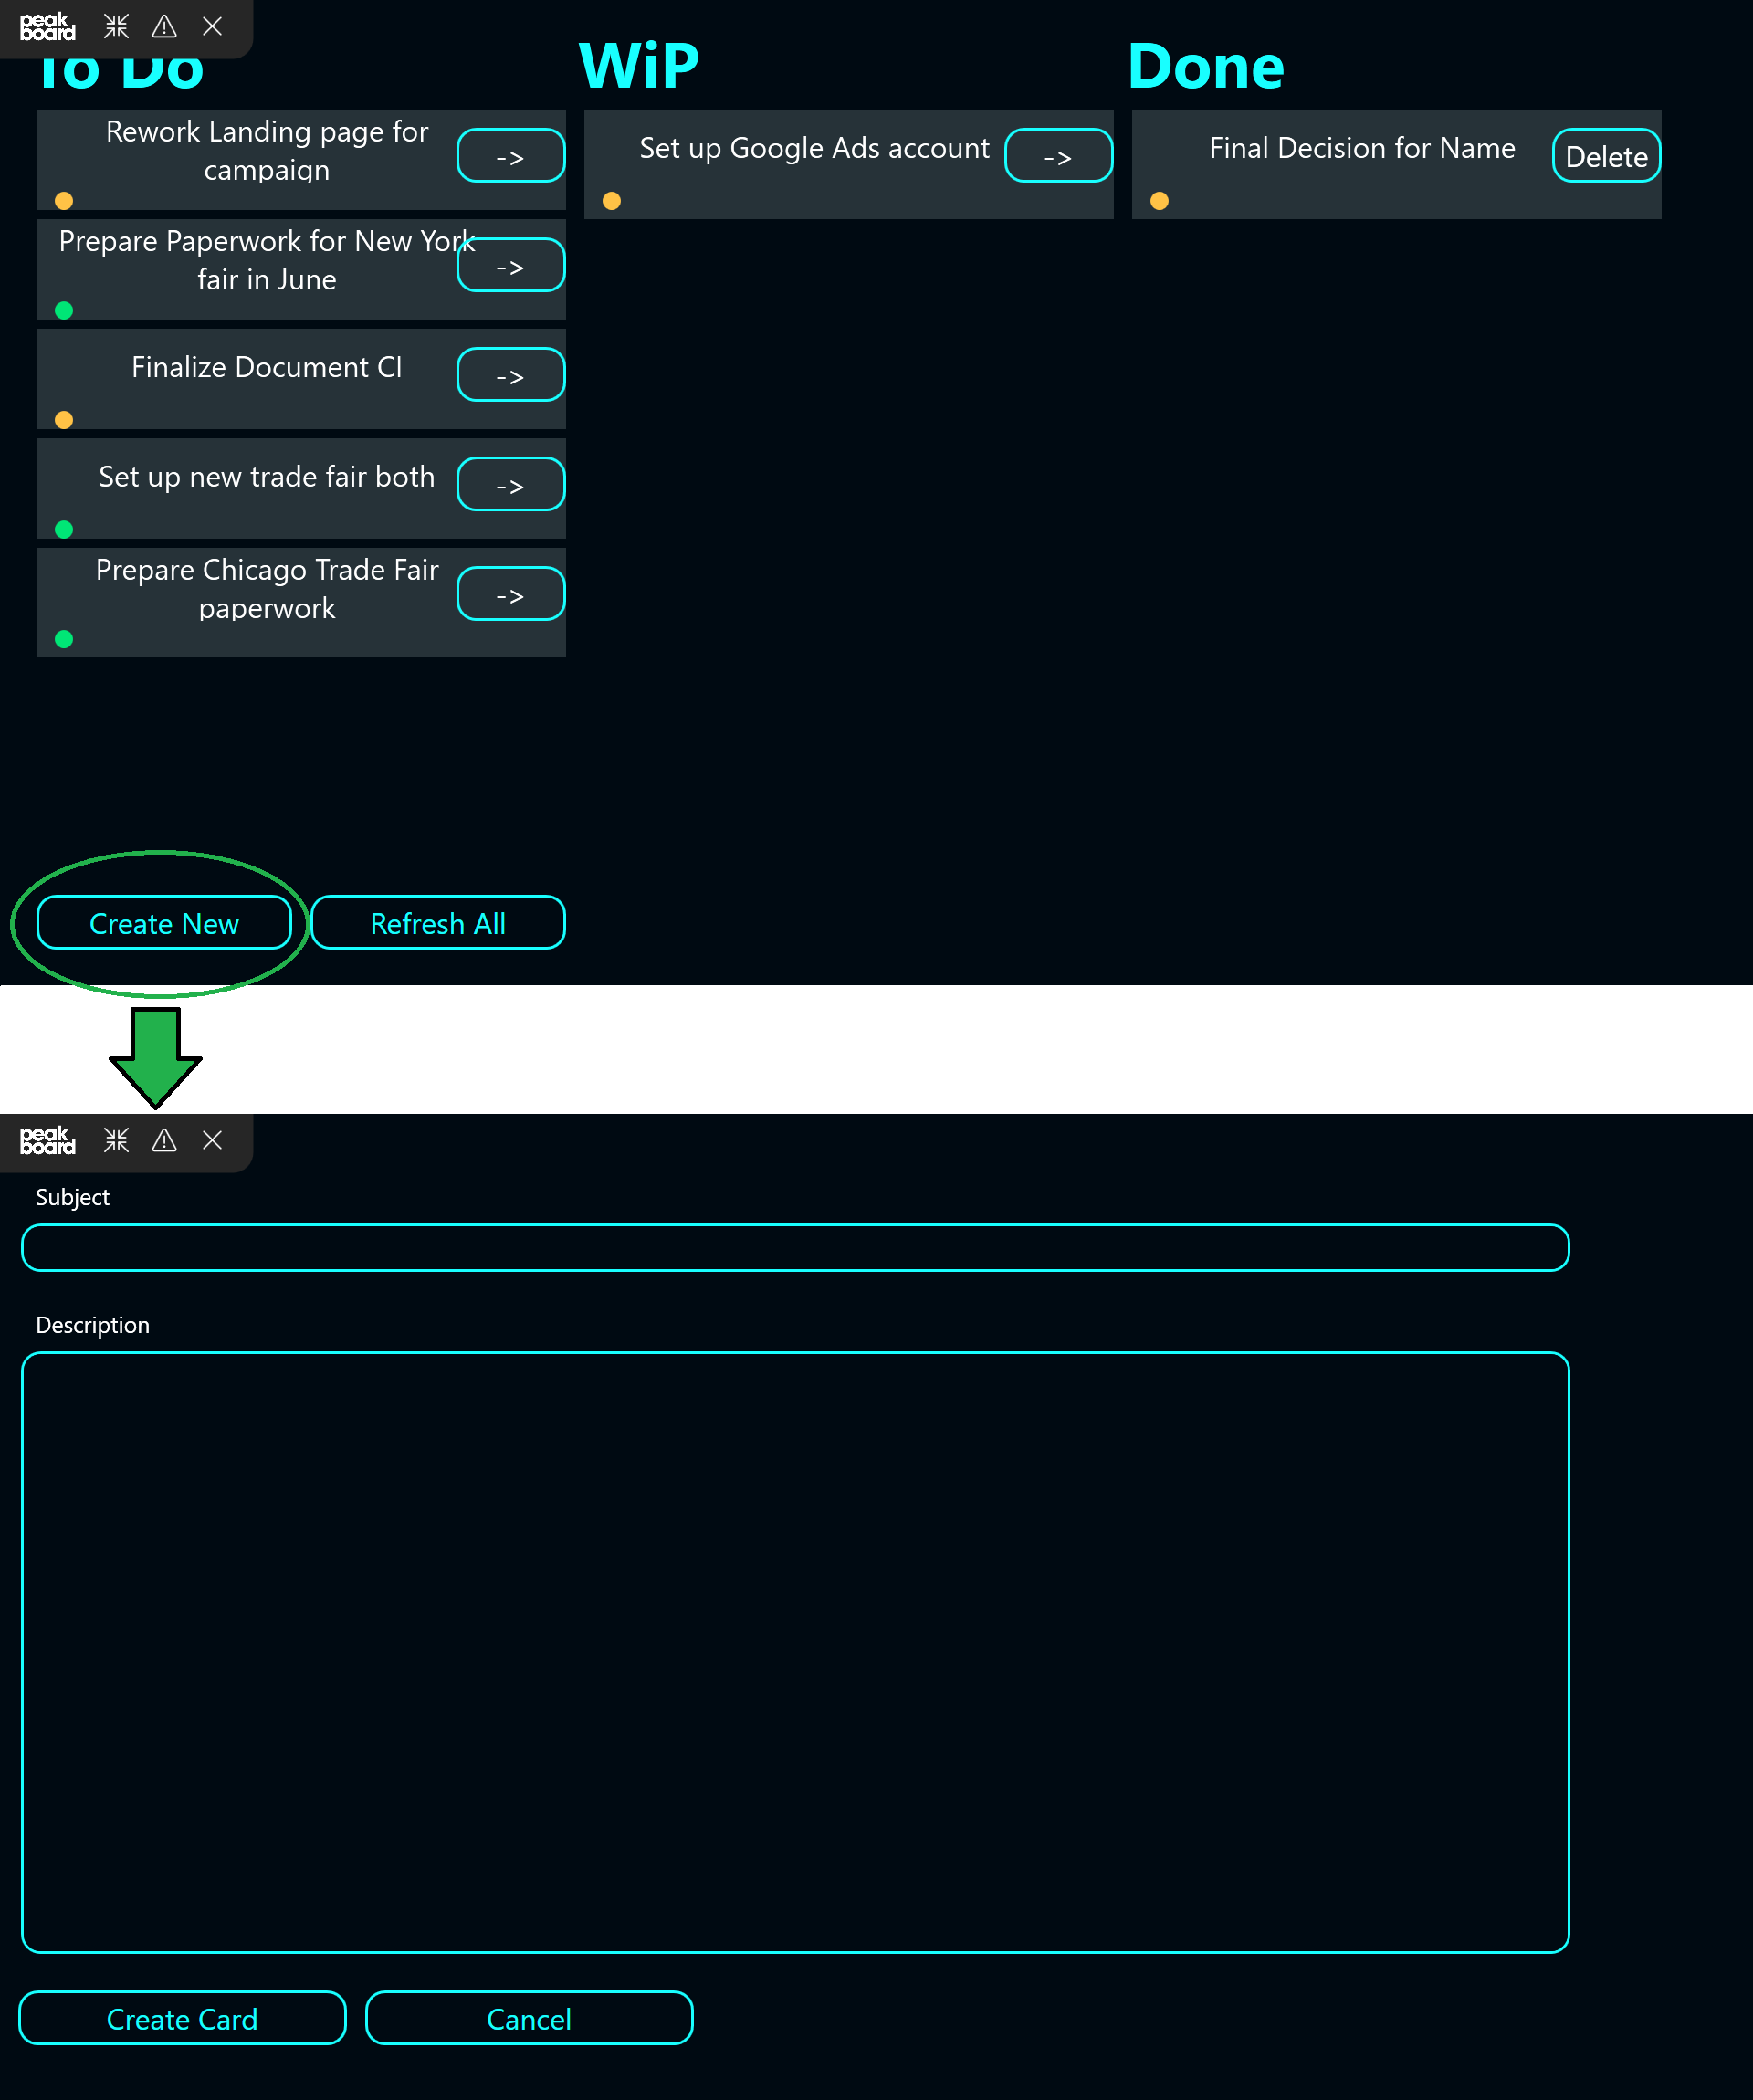
The finished dashboard
The dashboard that we are going to create is a little complicated. So, let’s take a look at the finished product now, to see how it all fits together.
You can also download the dashboard to take a more in-depth look. Note that the preview will not work, because the API key and token have been removed.
We won’t go through all the steps of creating this dashboard in great detail. Instead, we will focus on the Trello-specific parts.
Add styled list controls
First, we add three styled list controls—one for each of our data sources.
There are three parts to our styled list template:
- The text that displays the name of the Trello card.
- The ellipse that indicates the Trello card’s label color.
- A move botton (for the first two lists) or a delete button (for the third list).
Let’s take a look at each of these in turn.
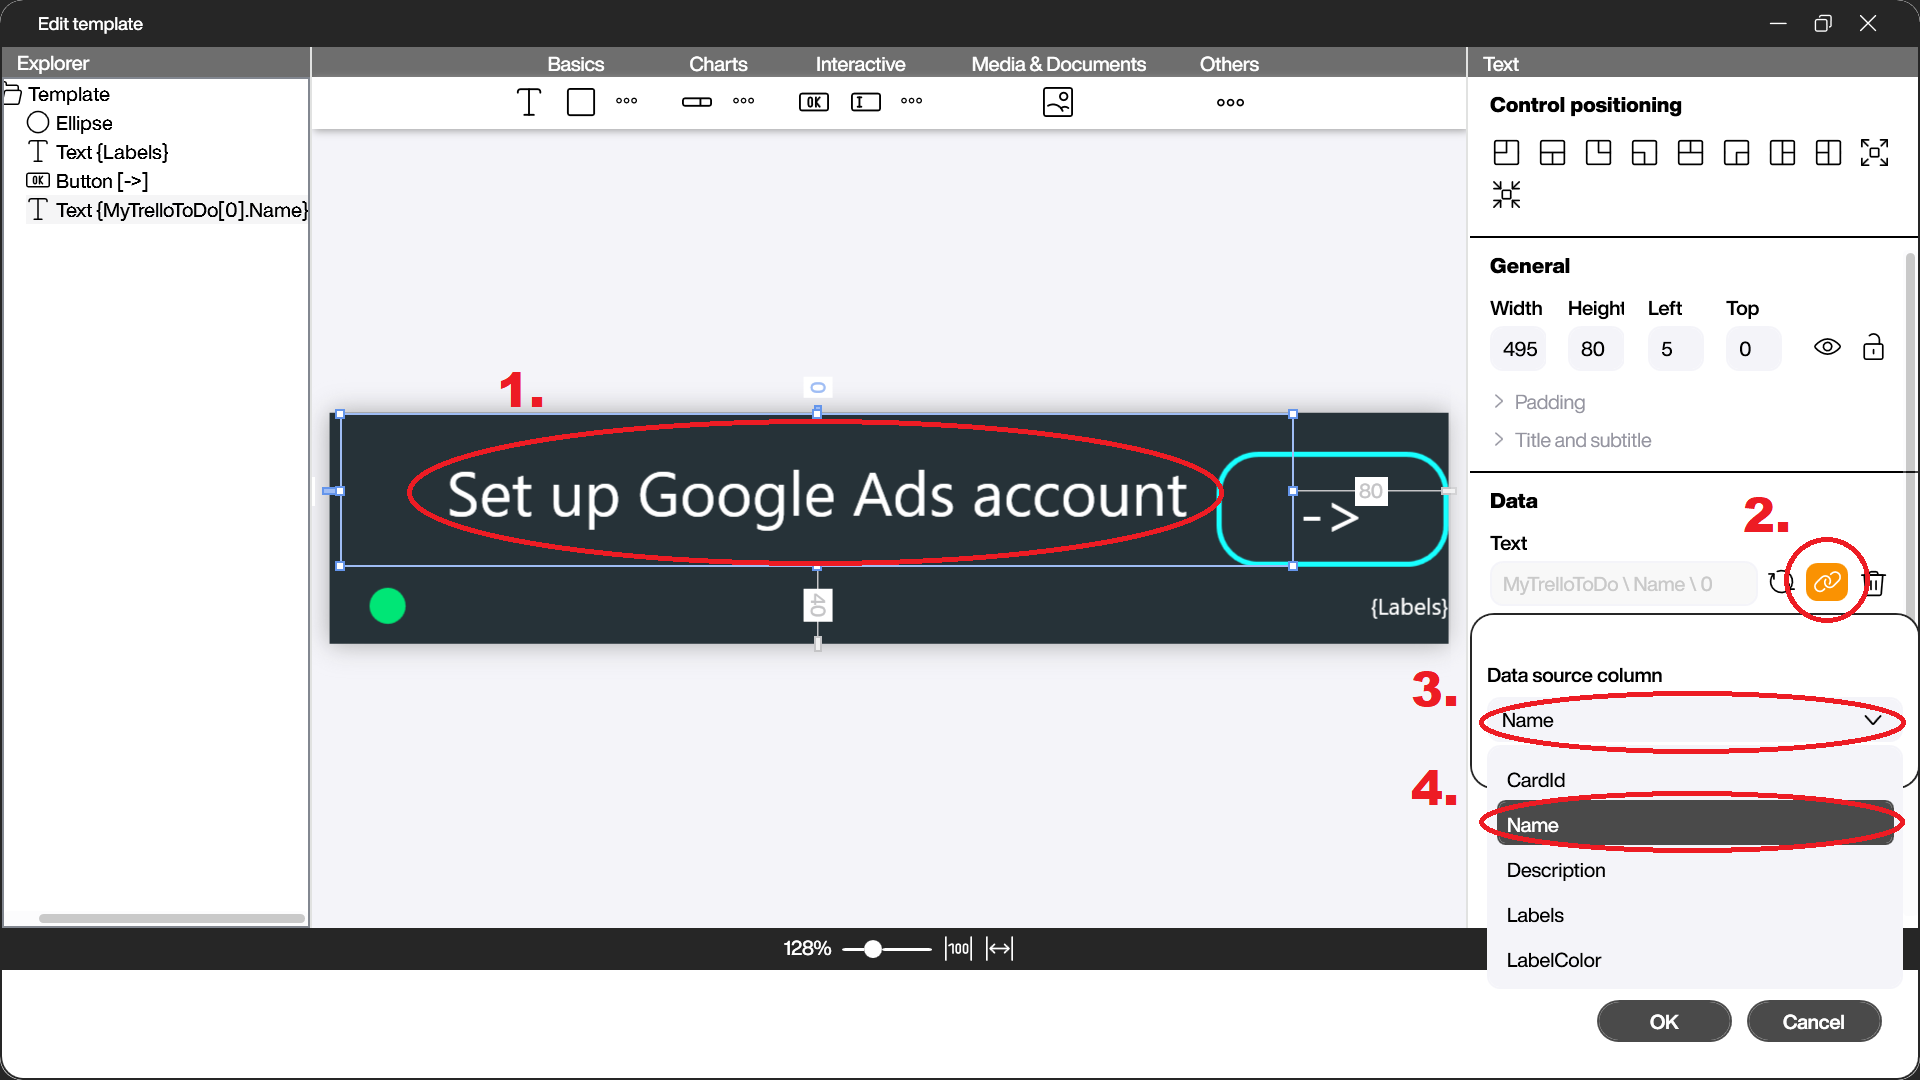
Add card name
For our card name, we use a text control. We set the text to the Name column of our data source.
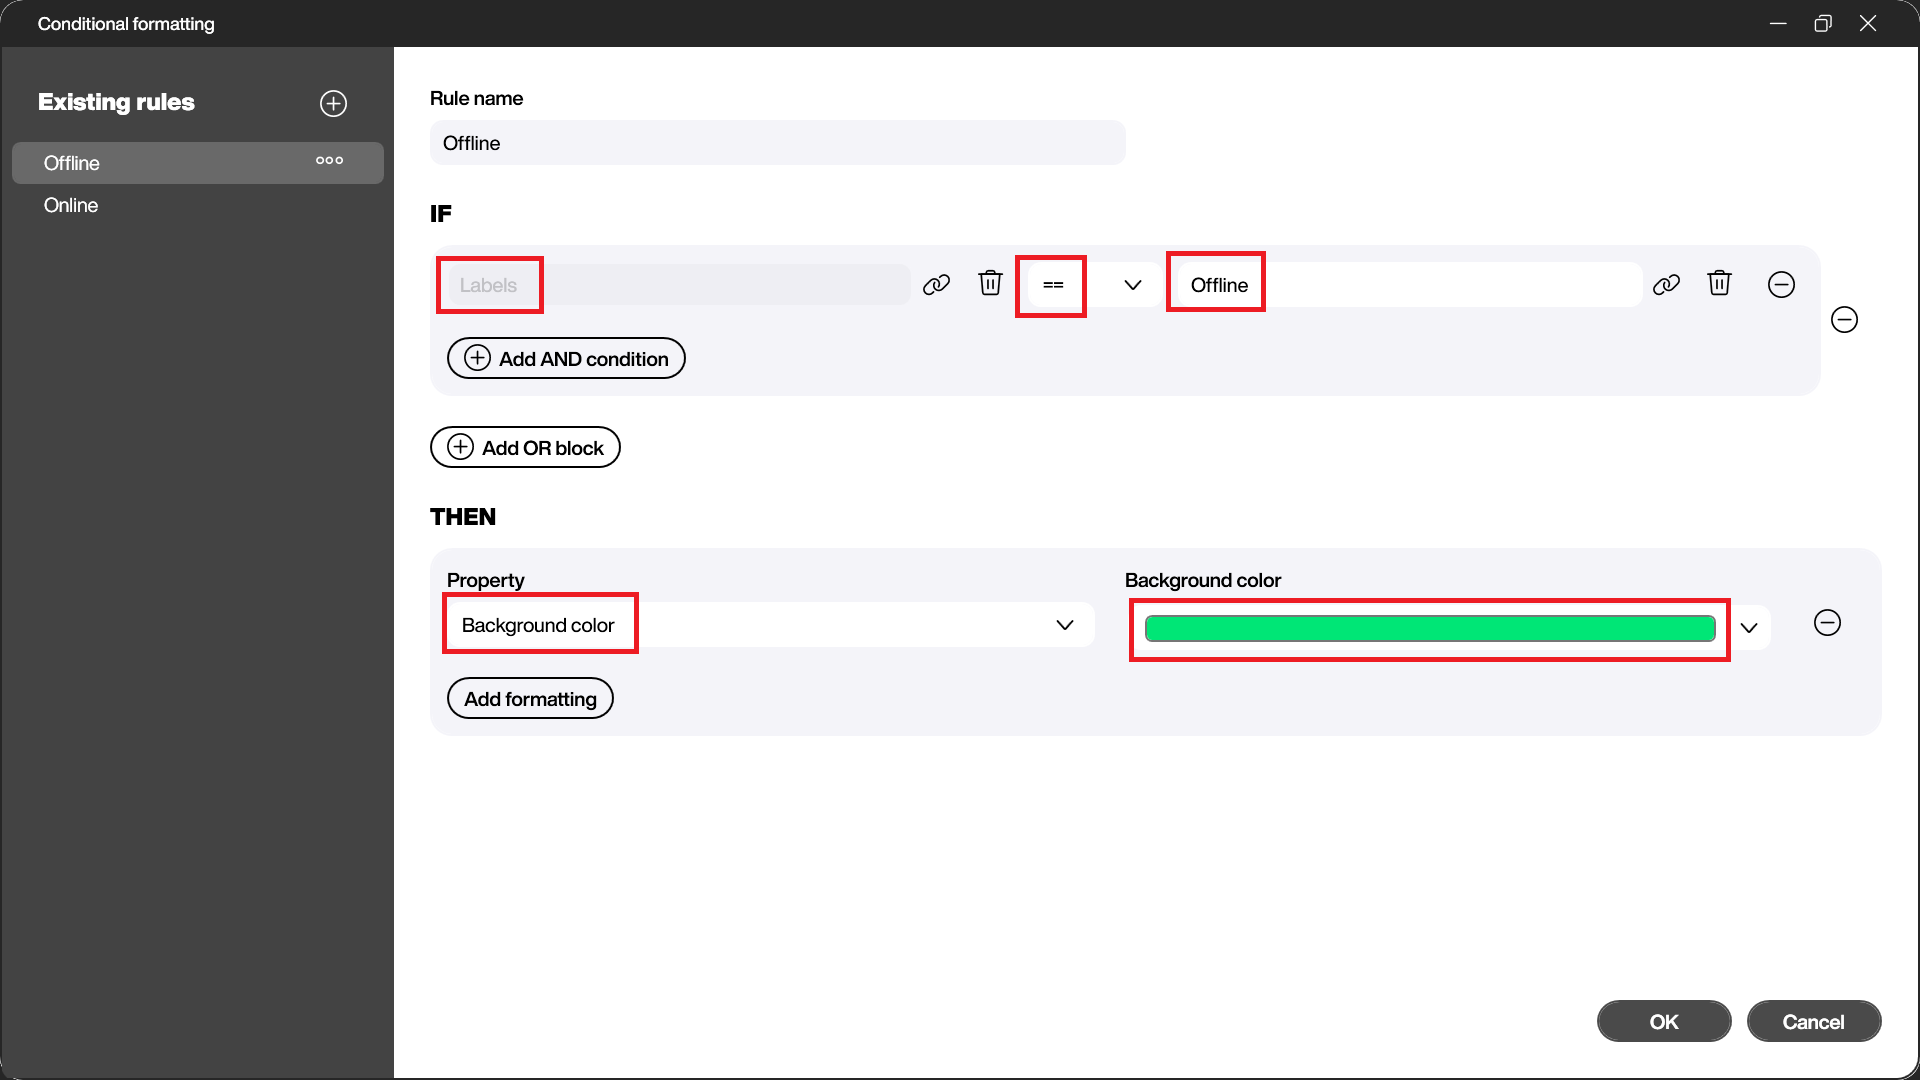
Add label color indicator
For our label color indicator, we use an ellipse control. To make it functional, we add conditional formatting to the ellipse.

We add a rule that checks a card’s label, and changes the indicator to the color associated with that label.
For example, we know that in Trello, our “Offline” label is green. So, we add a conditional formatting rule that says, “If the label is ‘Offline’, then turn the indicator green.”
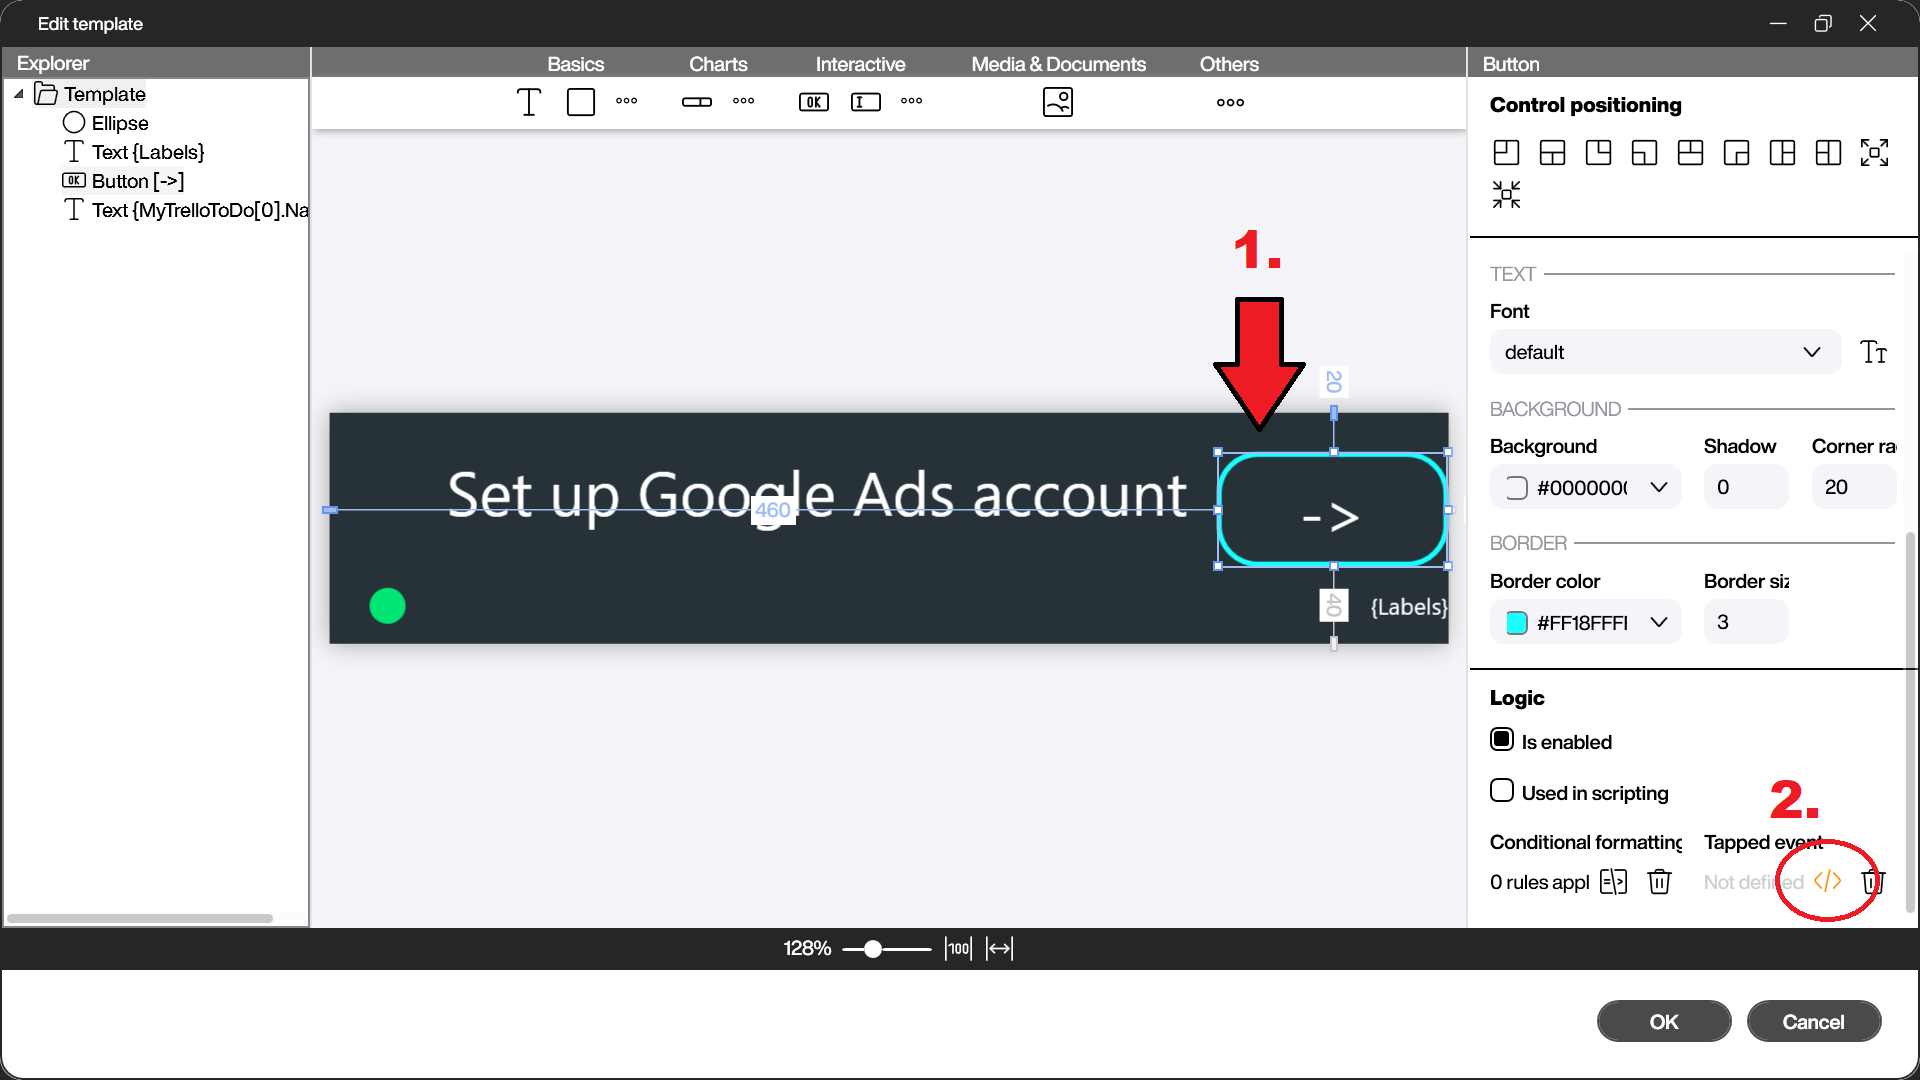
Add move and delete buttons
We use a button control for our move and delete buttons. We make our buttons functional by adding a tapped event.
Here is the script for the move button:
local mycard = data.MyTrelloToDo[screens['Screen1'].MyToDoListView.getindex(this)].CardId
data.MyTrelloToDo.movecard(
mycard, -- String - The ID of the card
'Work in Progress' -- String - The name of the list that the card should be moved to
)
data.MyTrelloToDo.reload()
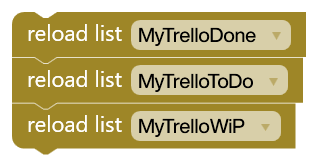
data.MyTrelloWiP.reload()This script first stores the ID of the card being moved in mycard. Then, it calls the movecard function to move that card to the next list. Finally, it reloads both affected lists.
Here is the script for the delete button:
local mycard = data.MyTrelloDone[screens['Screen1'].MyDoneListView.getindex(this)].CardId

data.MyTrelloDone.delete(
   mycard -- String - The ID of the card that should be deleted.
)

data.MyTrelloDone.reload()
This script first stores the ID of the card to be deleted. Then, it calls the delete function to delete the card. Finally, it reloads the affected list.
Add Refresh All button
We use a button control for our Refresh All button. We add a simple tapped event that reloads all three data sources.
Add Create New button
Our Create New button will switch the user to a secondary screen, in order to create the new card. So we first create an empty, new screen, named CreateNew.
Then, we add a button control with a tapped event that just switches the screen to CreateNew.


Make the Create new screen
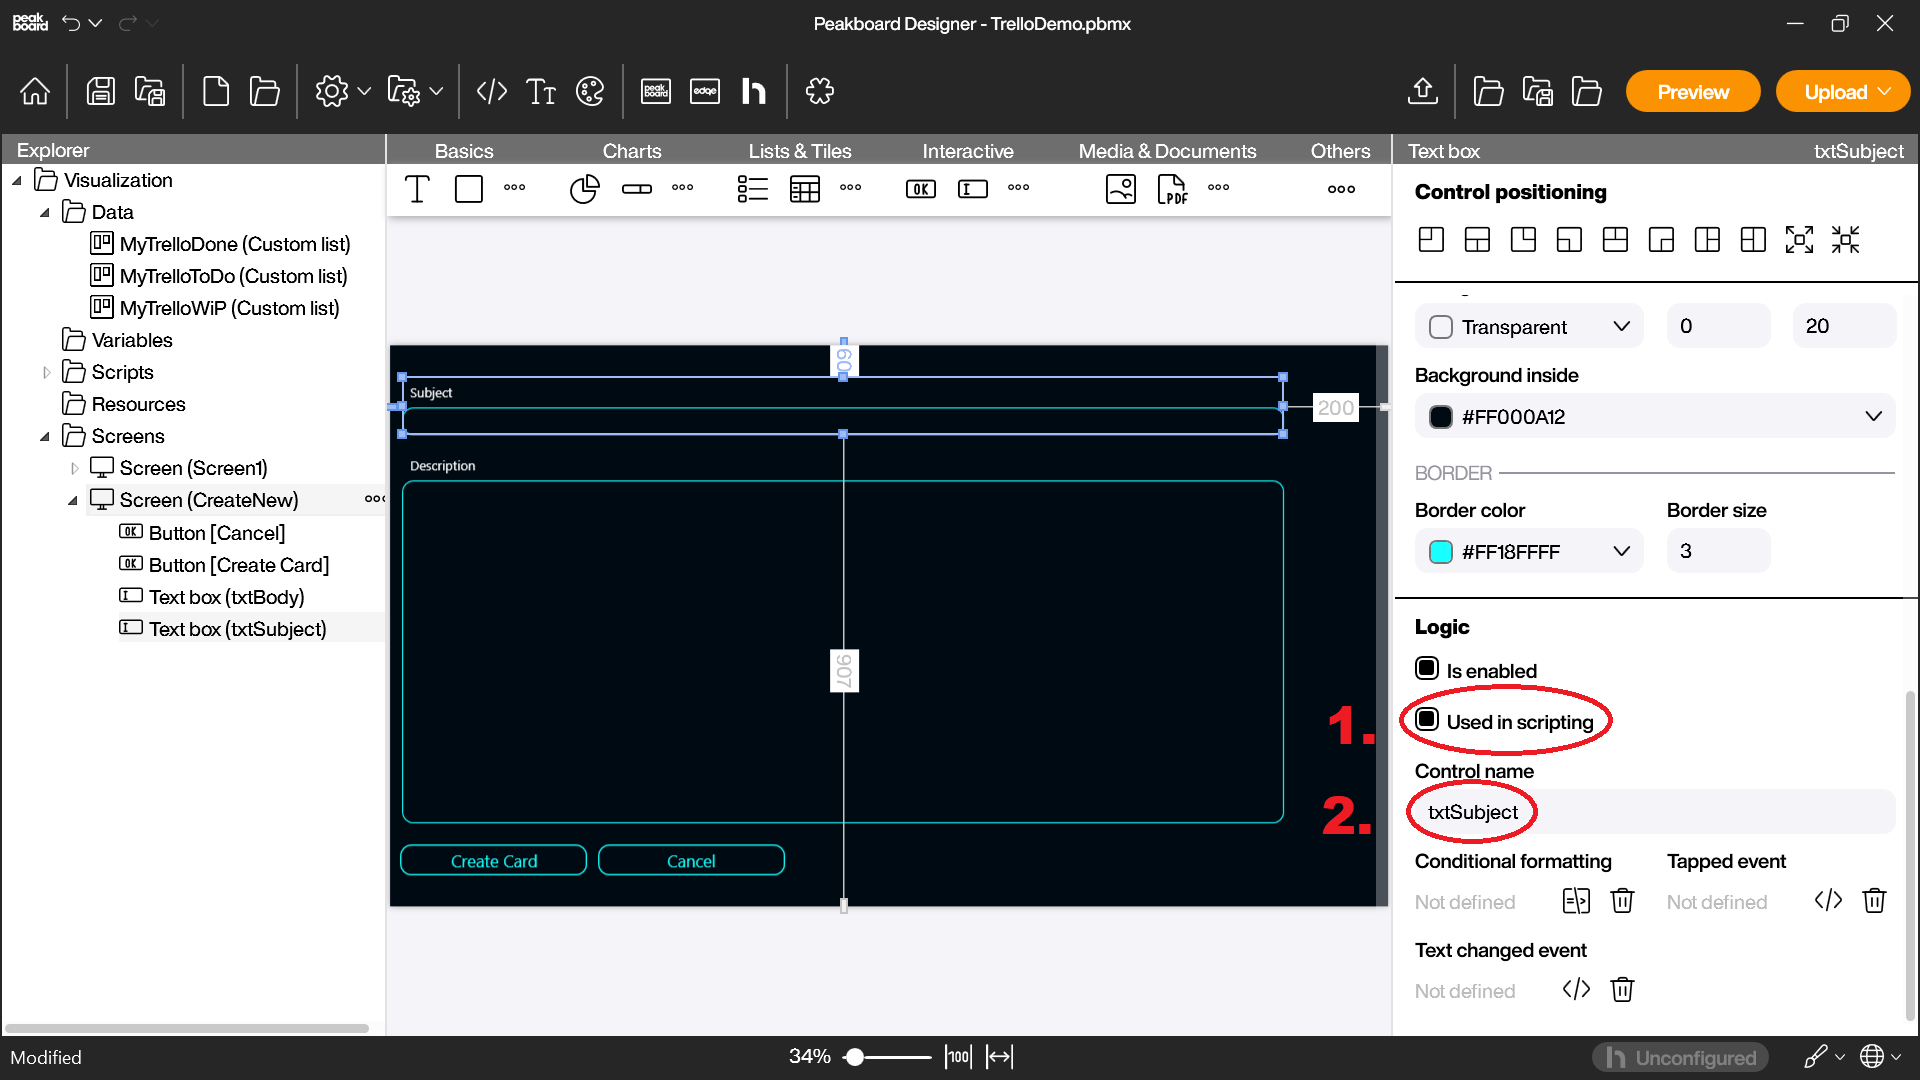
Now, lets make CreateNew. We add two text box controls: one for the new card’s subject, and one for the new card’s description.
For both text boxes, we select the Used in scripting option, and we give it a control name. We will use these control names in our script.
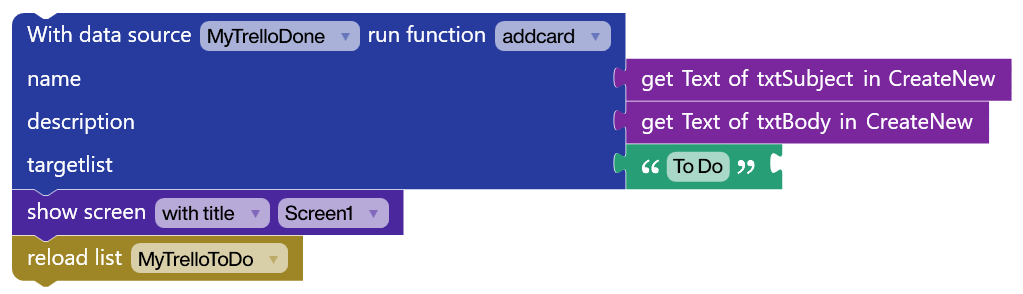
Here is the script for the Create Card button. It first runs the addcard function. It takes the name and description from our text boxes, and uses our first Trello list as the target list. Then, it switches screens and reloads the affected list.
Our cancel button has a simple tapped event that just switches the Peakboard Box back to the main screen.

Conclusion
And that’s it! We now have a dashboard that can view Trello lists, move cards between Trello lists, delete cards from a Trello list, and even add new cards to a Trello list.
Once again, here’s the completed dashboard with the API key and token removed. Take a look and try it out yourself!