
Peakboard applications are often used with BI tools. We discussed this topic in this article where we embedded a Power BI map. In today’s article, we will do something similar, but with Tableau.
Unlike with Power BI, there isn’t a dedicated control for Tableau dashboards. Instead, we use the HTML control and put some dynamic HTML code in. The control processes this code and displays the HTML-based dashboard.
The tricky part here is the authentication. Tableau provides a token to access the Tableau portal and dashboard as an external app. To get this token, we need a Peakboard extension called the Tableau Token Generator. Here’s what we do in our Peakboard application:
- Generate a Tableau token.
- Generate some dynamic HTML.
- Inject the newly generated token into the dynamic HTML.
Set up the Tableau portal
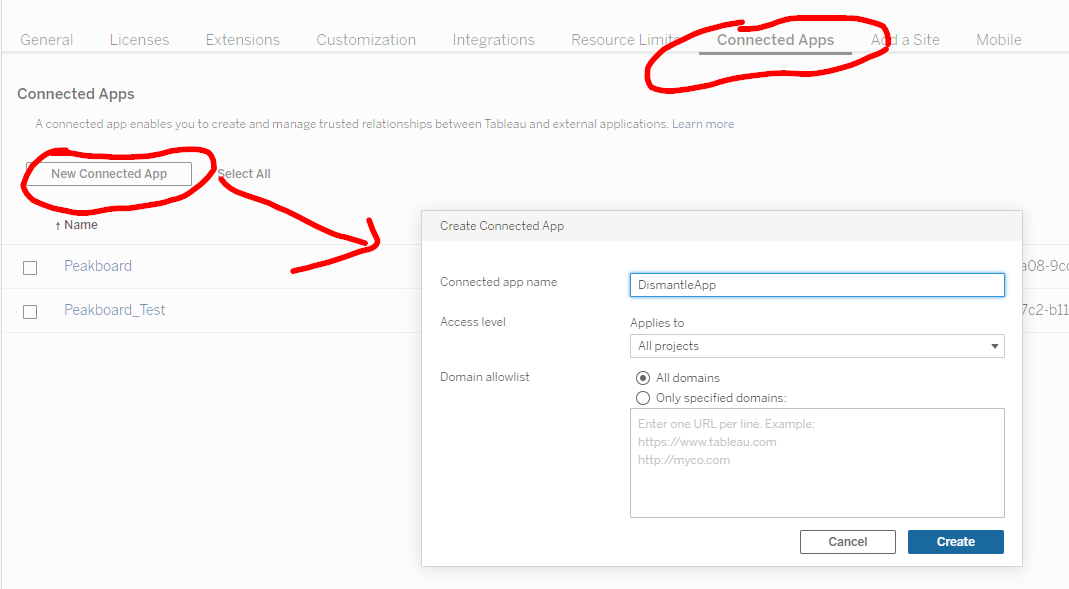
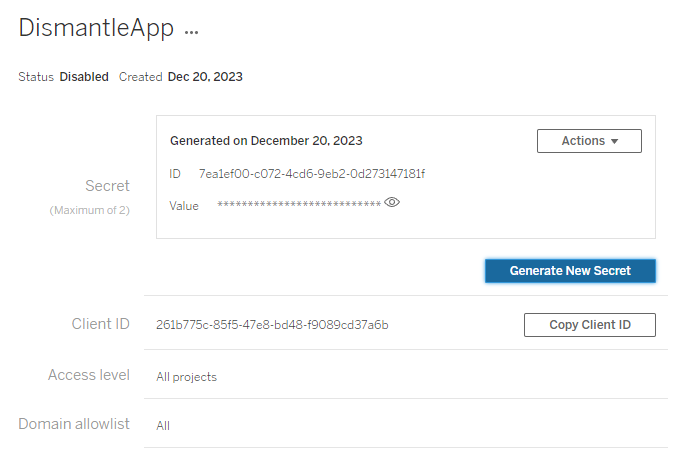
First, we need to create a Tableau connected app. To do this, we go to the Tableau portal settings and click on Connected Apps. Then, we create a new connected app. We generate a secret for the connected app, and we copy the secret ID, secret value, and client ID. We will need these later.
Preparing the data source for generating a token
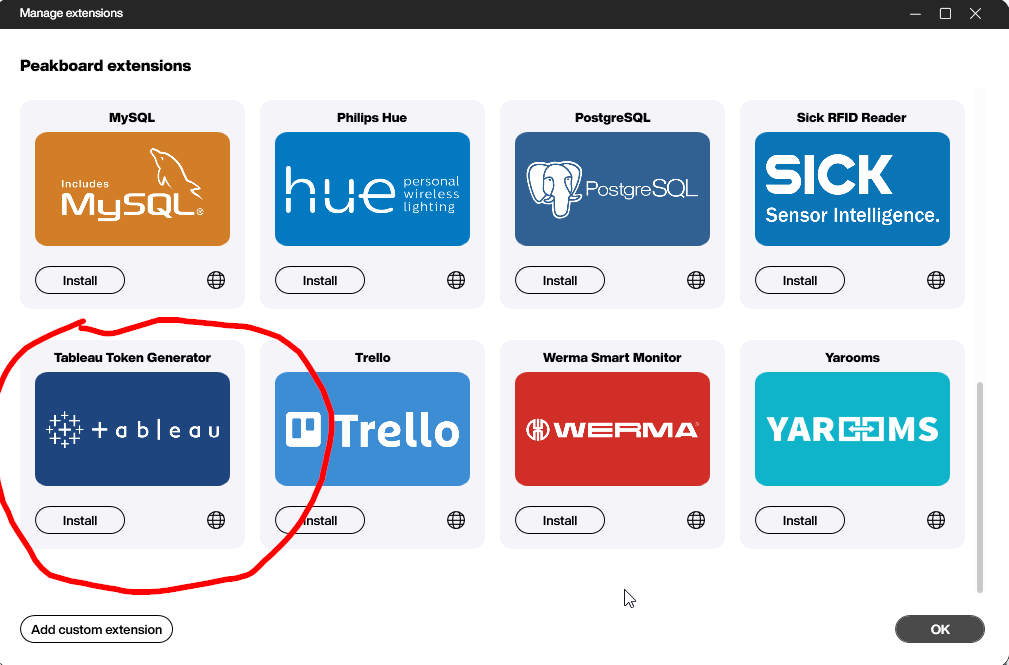
To generate an authentication token, we need the Tableau Token Generator extension. To add it to Peakboard Designer, we select Data Source > Add Data Source > Manage Extension and then find and install the extension.
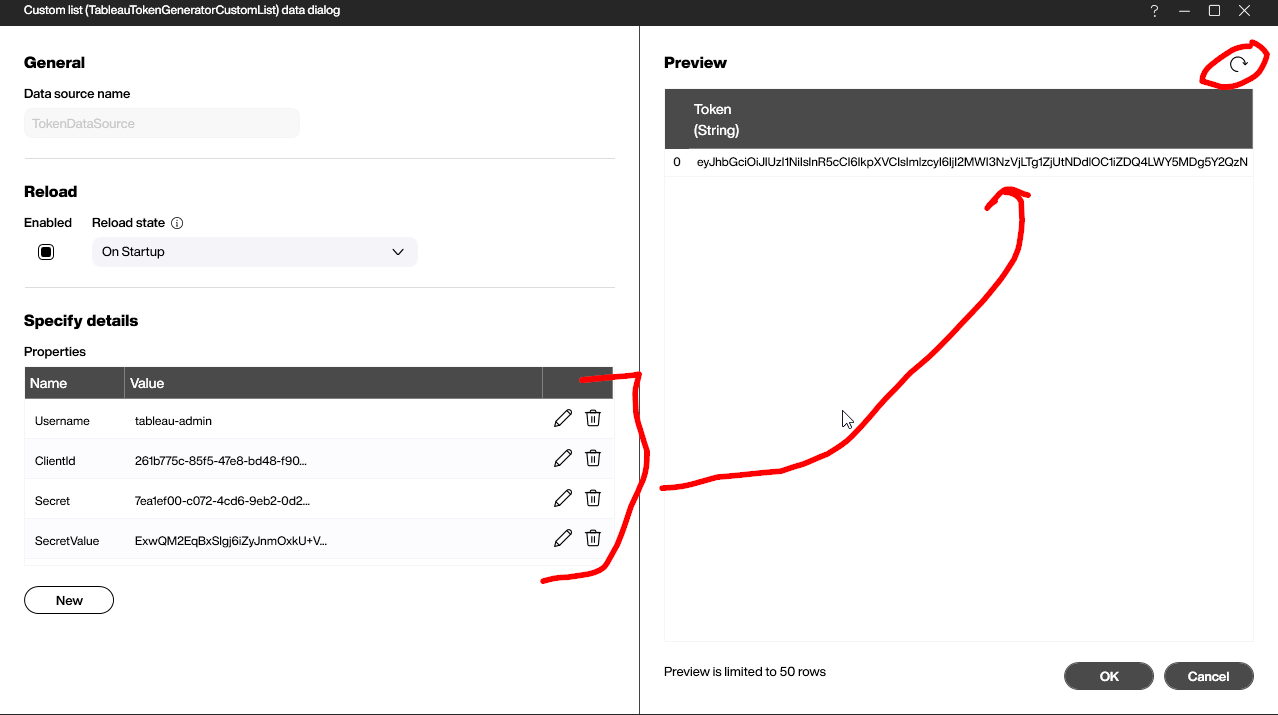
The data source needs the following four parameters:
- Tableau portal username
- Client ID
- Client Secret
- Secret Value
After filling out all the values, we click on the data load button to check if the token was generated properly. The output of the data source has one column and one row with the token.
HTML generation
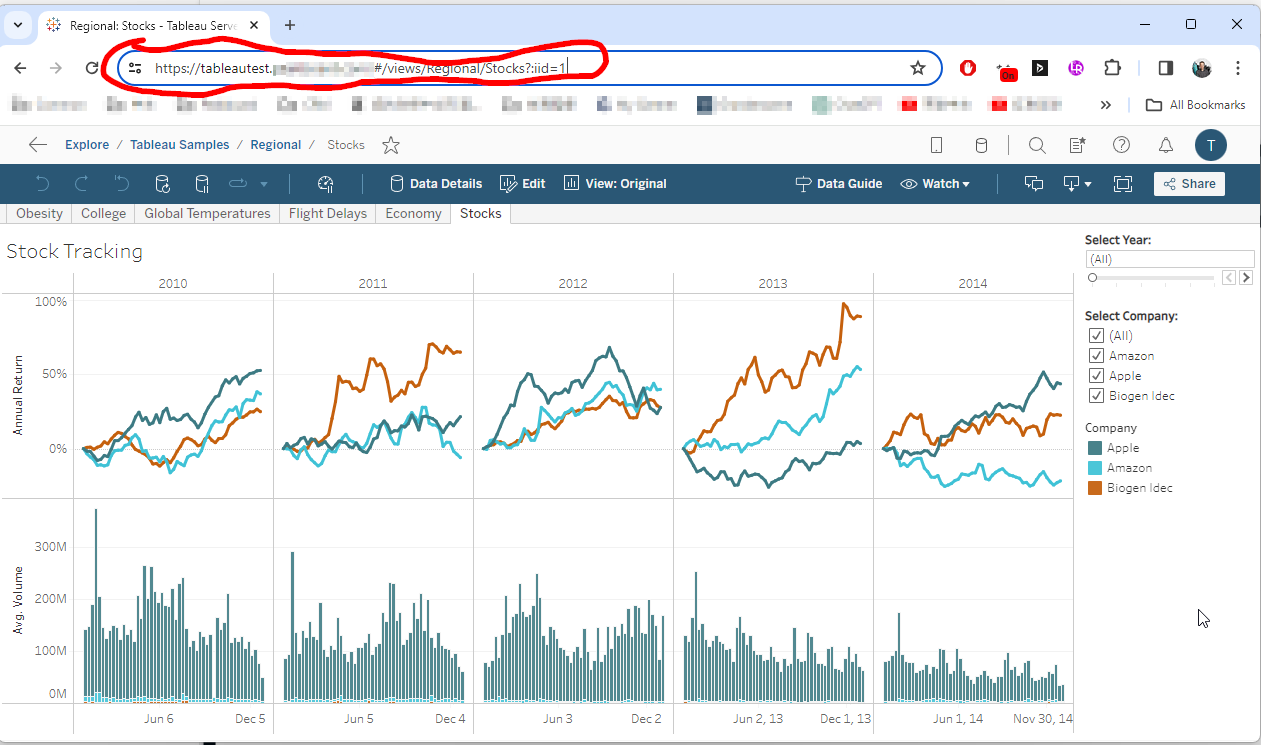
In the Tableau portal, we find the dashboard or visualization we want to use in Peakboard. We copy the URL.
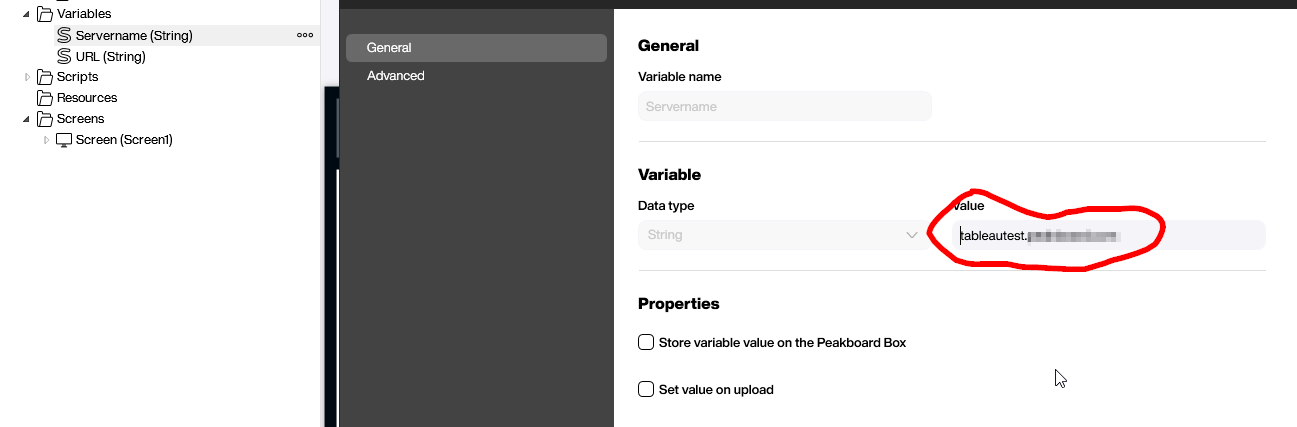
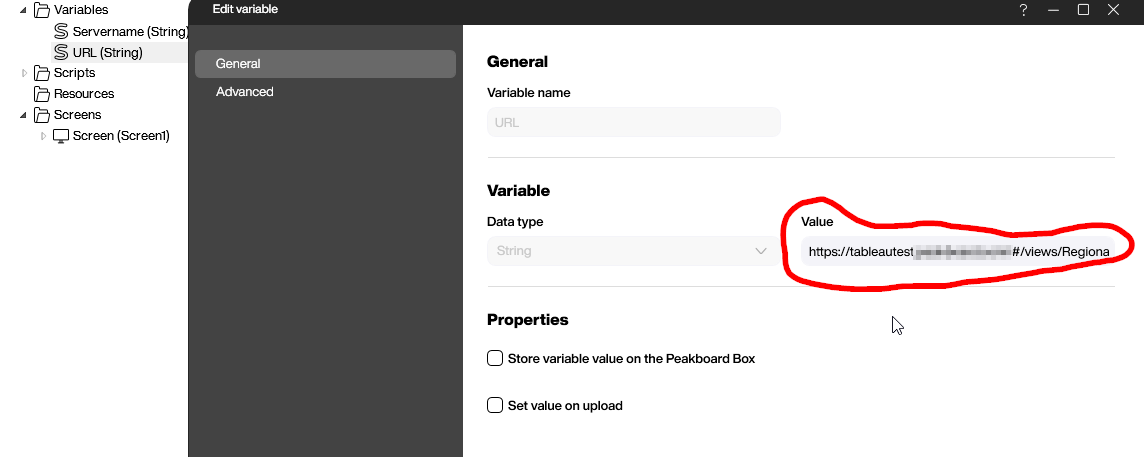
Now, let’s have a look at the HTML we need to generate. In the following code, there are three important parameters: the server, the URL to the Tableau dashboard, and the token.
<script type="module" src="https://MyServer/javascripts/api/tableau.embedding.3.latest.min.js">
    </script>
<tableau-viz id="tableauViz" src="MyVisURL" width="1920" height="883" toolbar="bottom" iframe-auth token="MyToken">
  </tableau-viz>
Later, we will create two global variables: one for the server and one for the URL. Of course, we can also use fixed values in the HTML—but that’s a bad practice. Using variables lets us change the Tableau dashboard or visualization without having to change the actual HTML code.
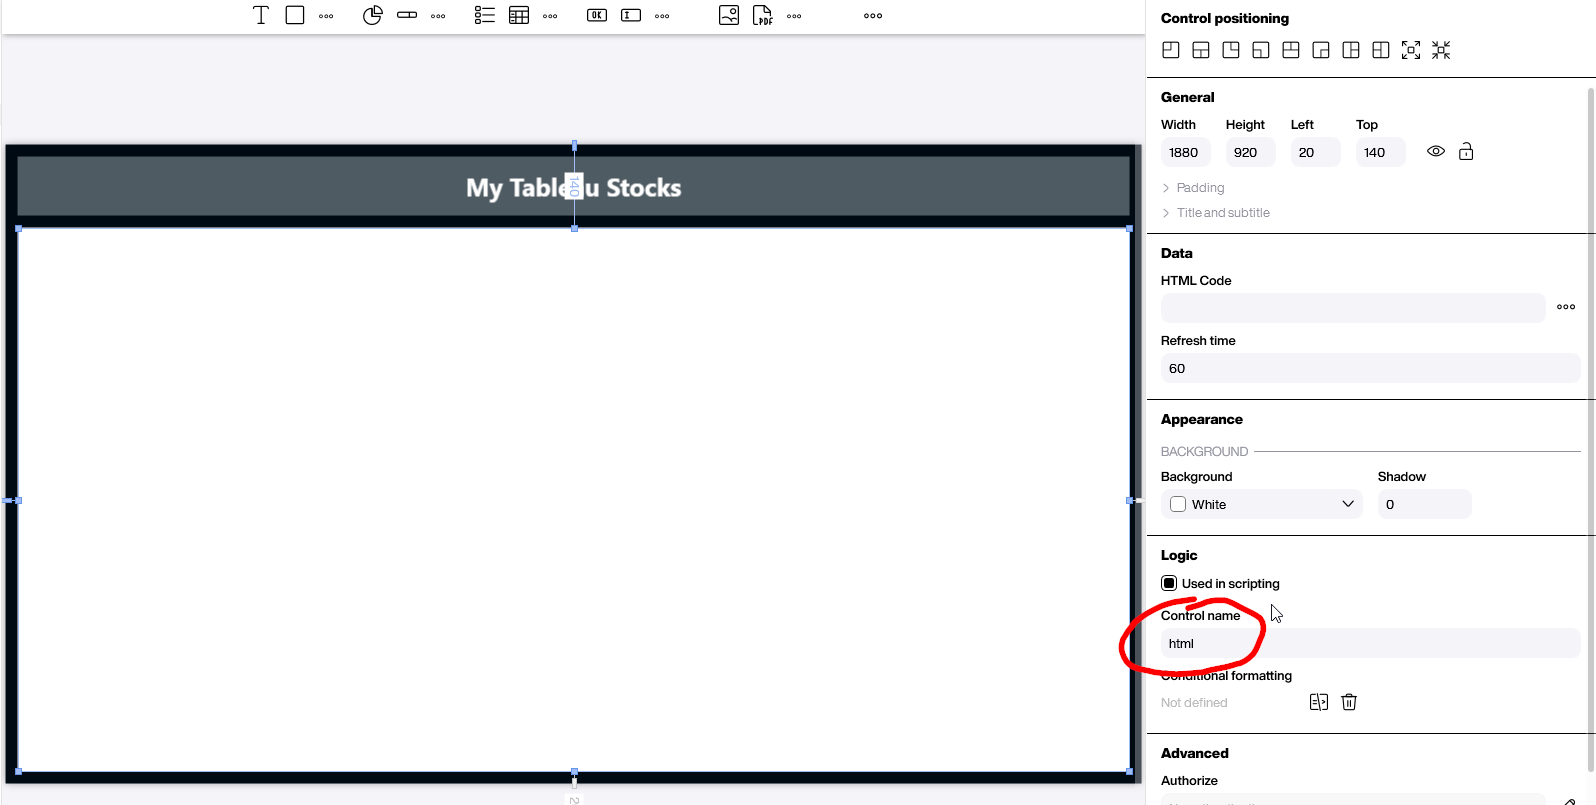
Finally, we add an HTML control in the center of the canvas and give it a proper name.
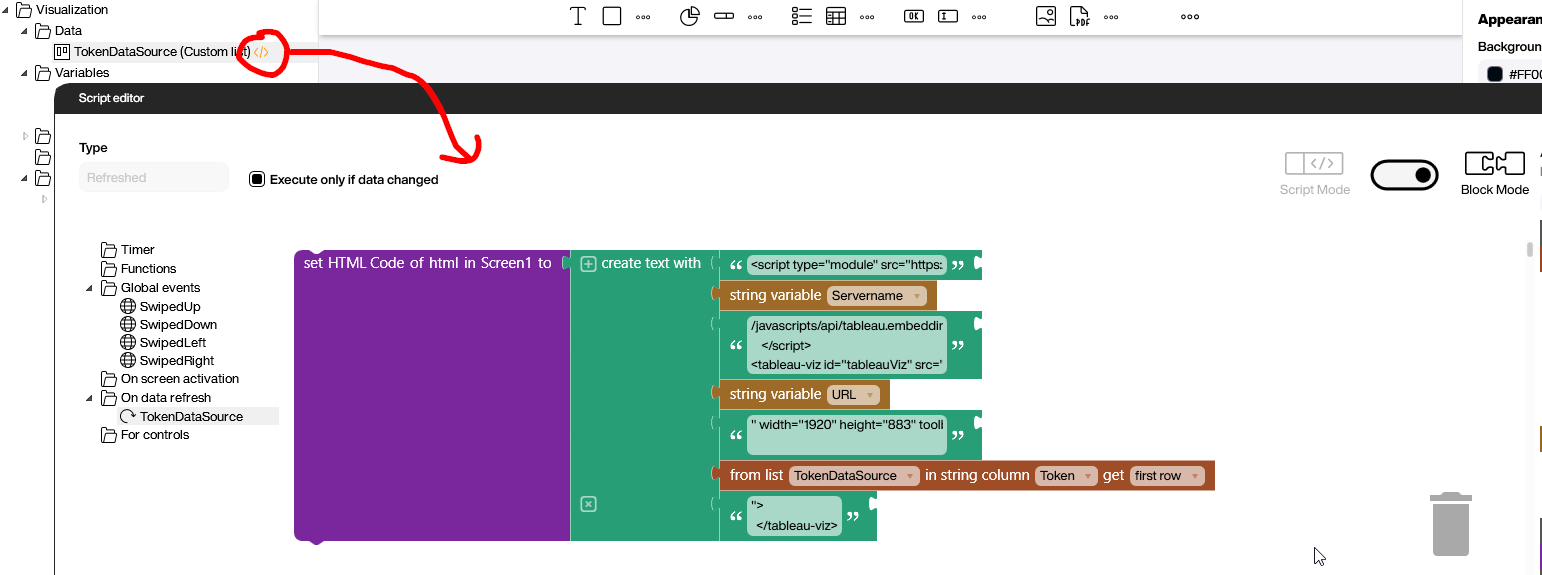
The actual magic happens in the refreshed script of the Token generator data source. As you can see in the screenshot, we build the HTML code and insert the three dynamic values into the appropriate places in the code. After concatenating everything, we apply the HTML code to the HTML property of the HTML control.
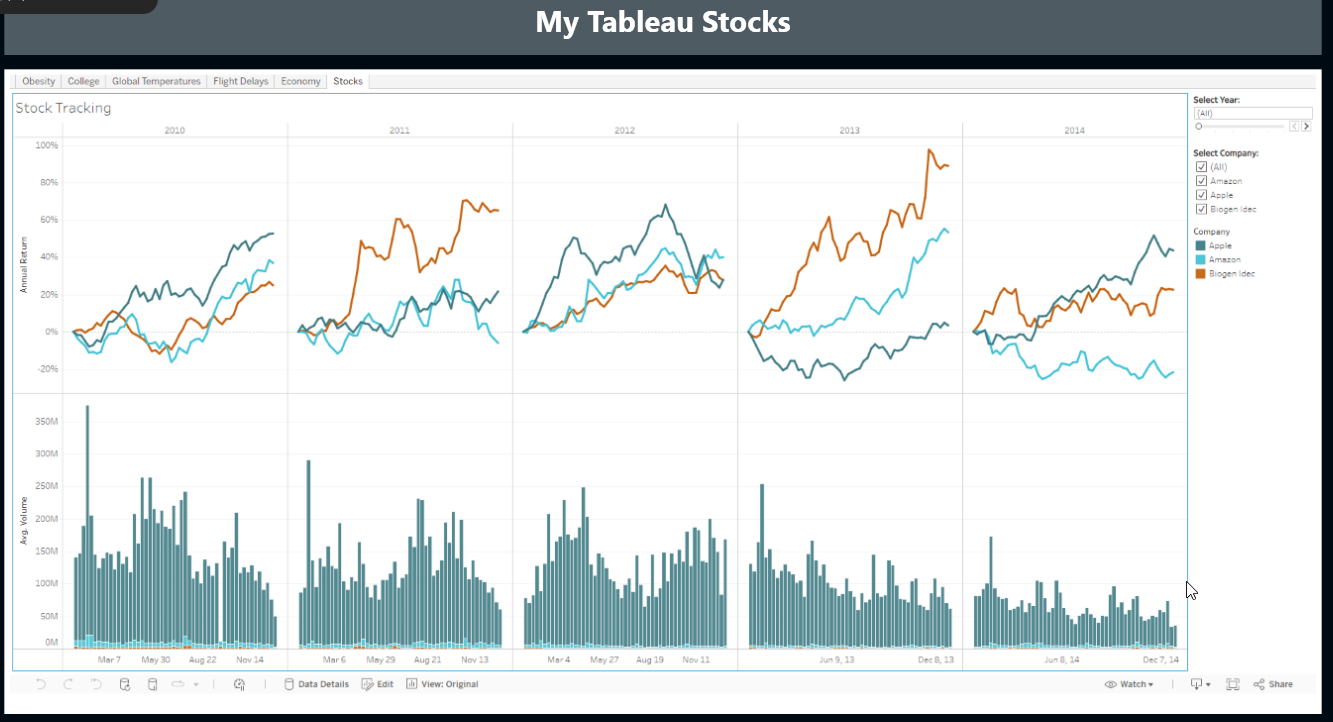
Here’s the final result:
Conclusion and outlook
After we solved the authentication issue with the token, the rest of the steps were easy. Generating the HTML code was straight forward and not too complicated.
What we did not discuss in this article is how to restrict the Tableau dashboard and get rid of the toolbars or tabs, or set filters, or allow or disallow certain levels of interactivity. All of these things can be easily configured within the dynamic HTML. Just check out the Tableau documentation for more details.