
In today’s article, we will discuss narrowband IoT devices. Narrowband IoT devices are usually not connected to any kind of Wi-Fi or local company network. Instead, they use the cellular network to connect to a server. For technical details, see this Wikpedia article on Narrowband IoT.
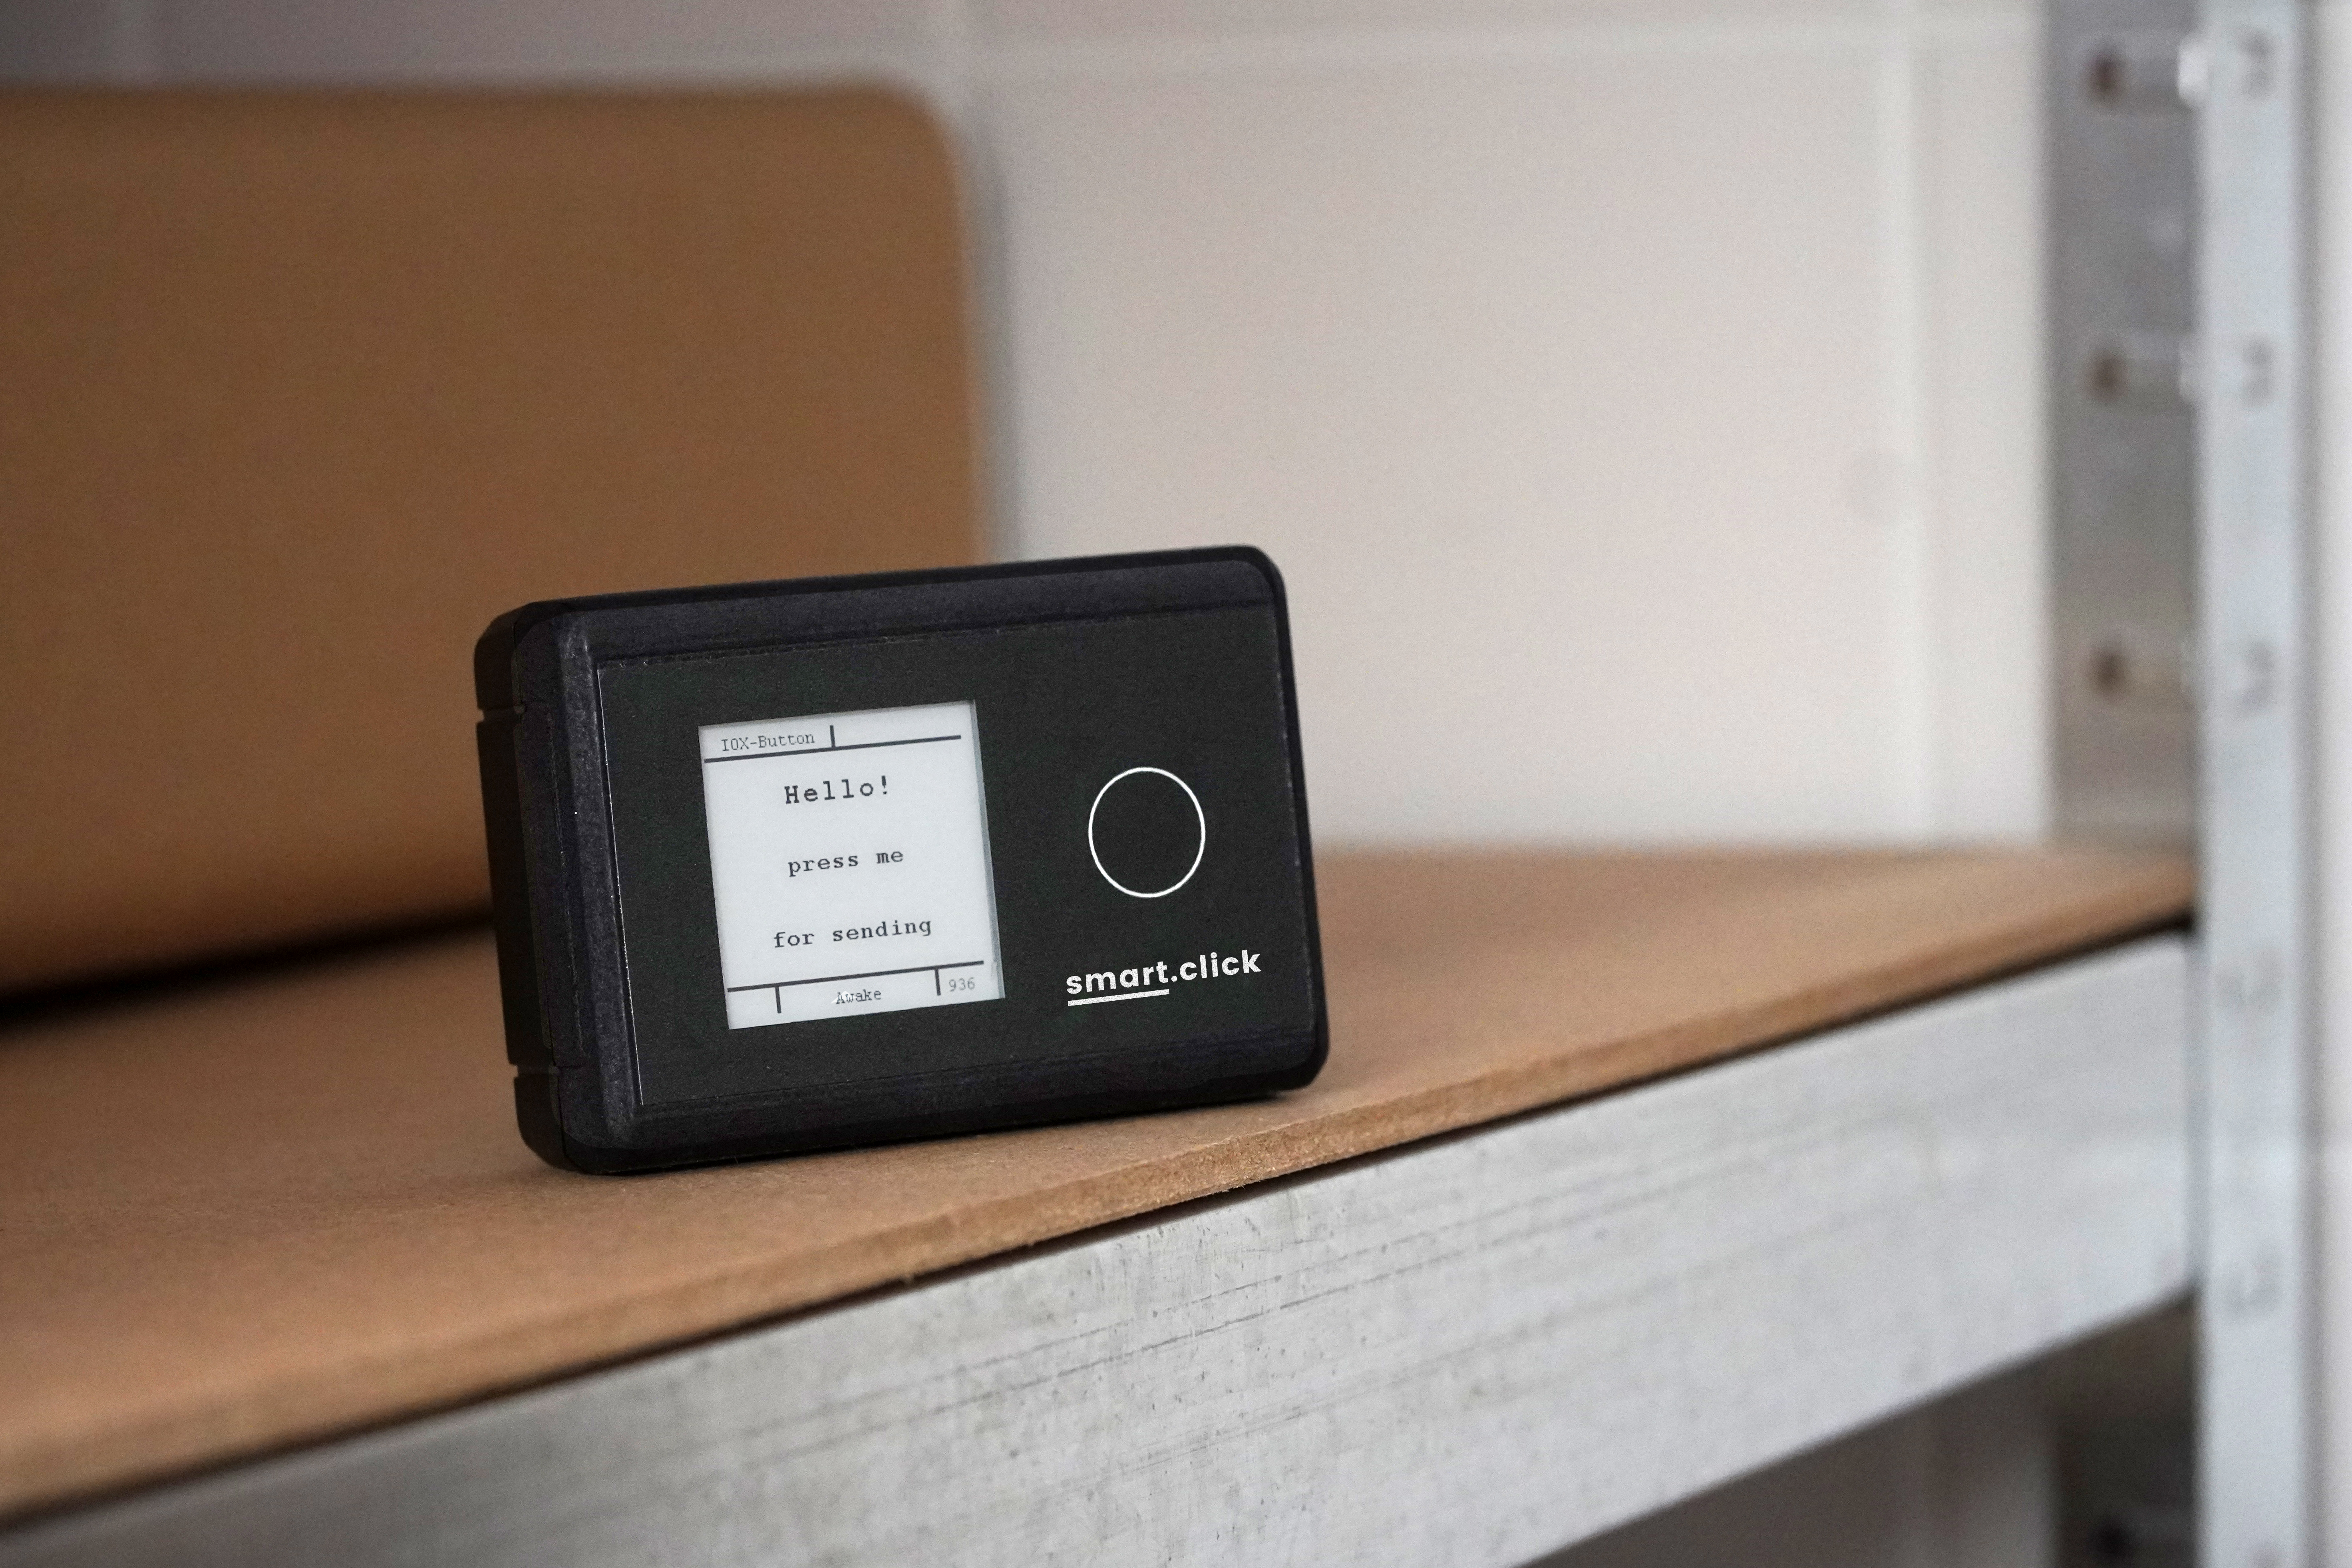
The device we will look at is called the smart.click Button. It’s made by a German company called IOX Lab. The following picture shows the device. It runs on a battery and so it doesn’t need anything besides a cellular network (like external power or LAN network access).
We will build a Peakboard application that lets someone call for help by pressing a smart.click Button. This button could be placed in an off-site production environment. Or, it could be placed in a local factory where you don’t have access to the network infrastructure (for example, if you’re a vendor and want to put the button in a client’s factory so that they can press it to initiate an order process).
After someone presses the button, a message pops up in the Peakboard application and a timer starts, to show how much time has passed since the alarm was triggered. After pressing the button a second time (for example, once the caller receives the order), the alarm is dismissed.
The technology behind this process is MQTT. The IOX button server sends a MQTT message to a broker that is available over the internet, and our Peakboard app subscribes to this MQTT topic. The rest is just Peakboard application logic.
Set up the smart.click Cloud
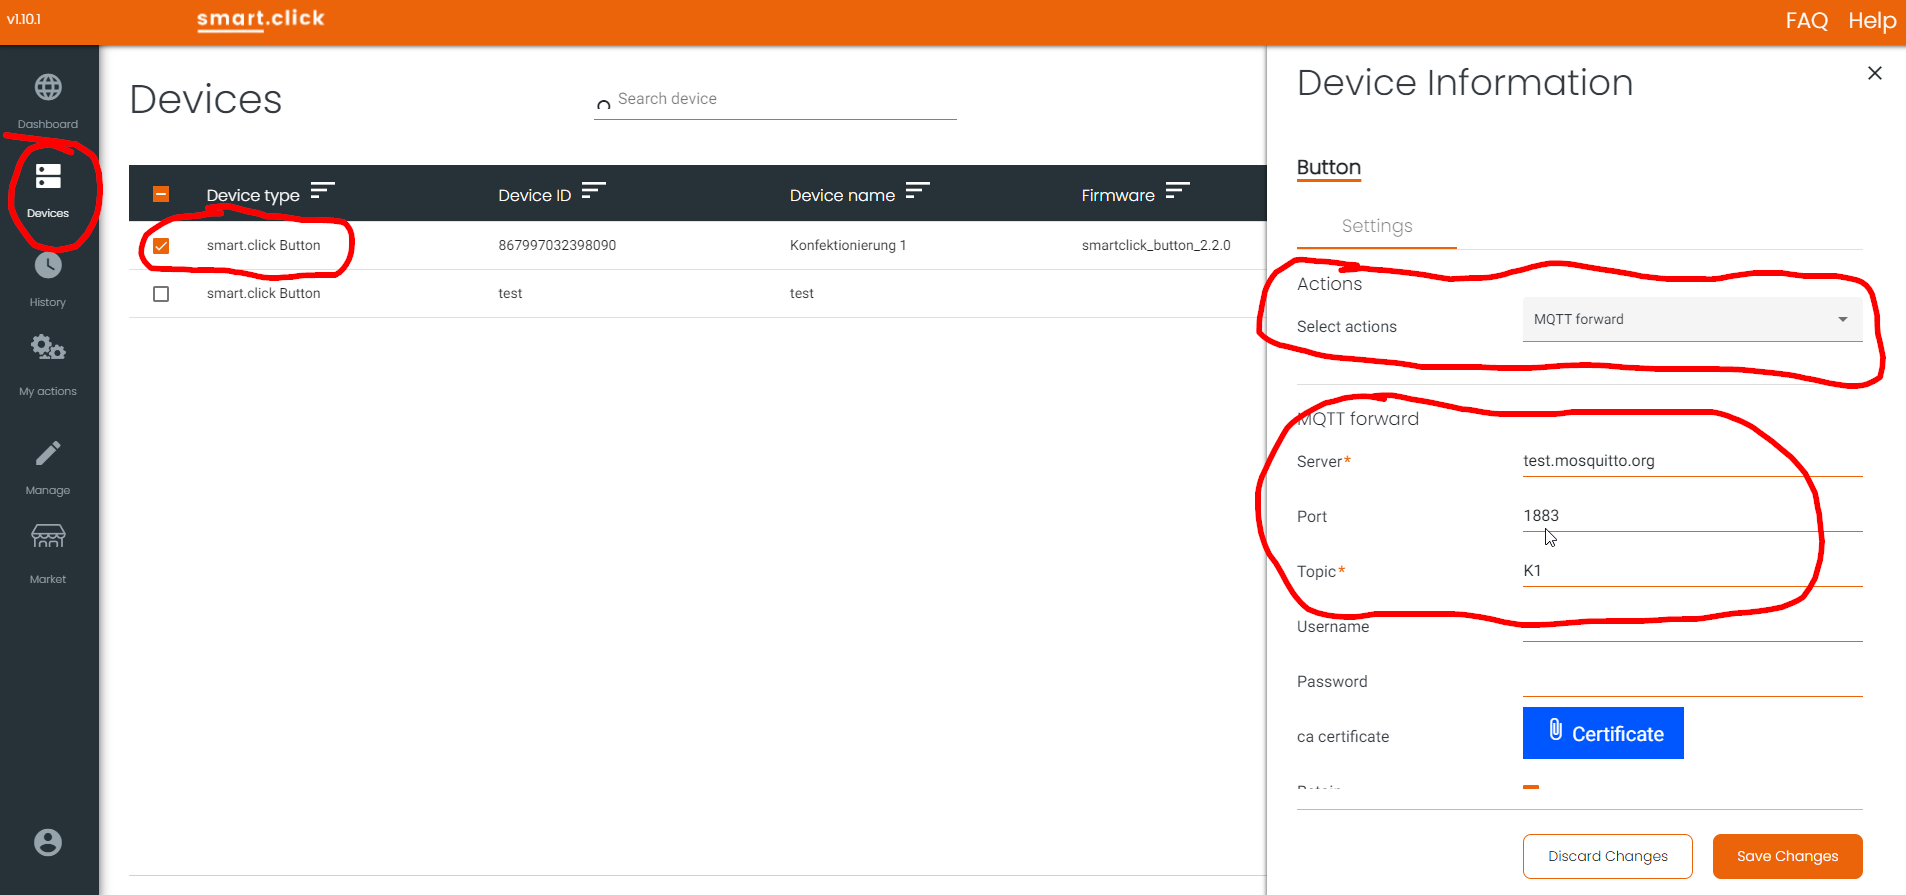
After purchasing a smart.click Button, the button will be available in the smart.click Cloud. We visit the portal to configure what happens after the button is pressed. There are several options, such as SMS, email, and MQTT. We select MQTT and define the broker and MQTT topic.
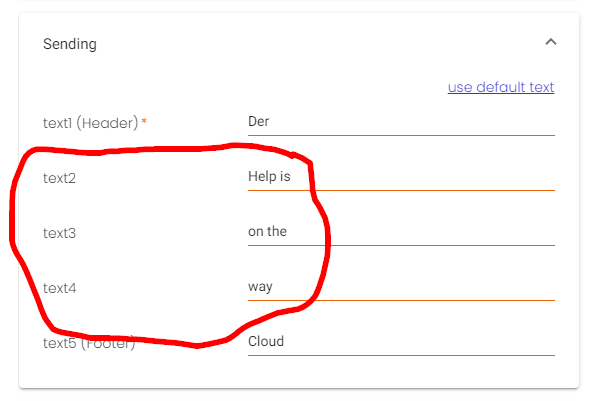
There are also options to configure the message on the E Ink display of the button. The following screenshot shows the message after the button is pressed and the message is sent.
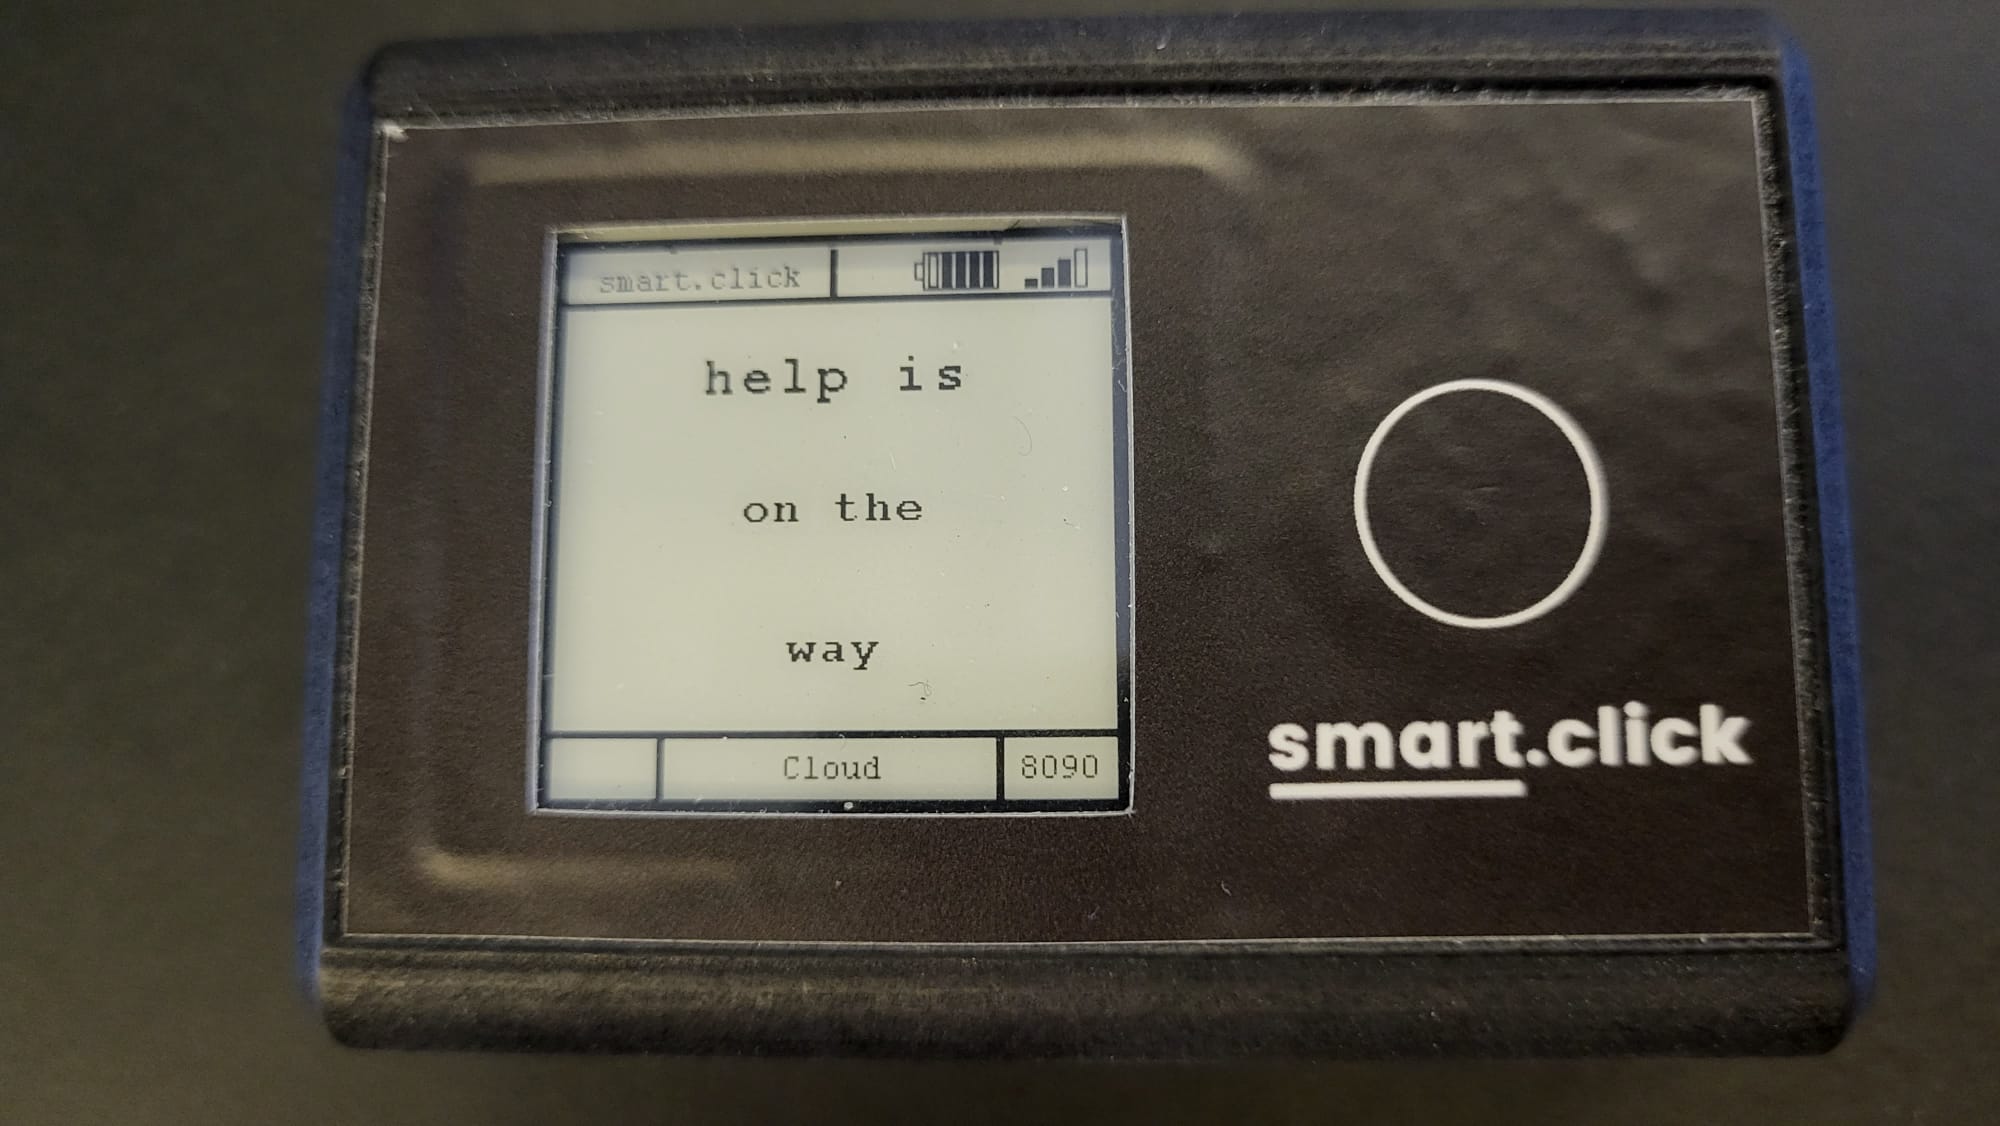
And here’s how it looks like on the actual button:
For our example, we use a free, public MQTT broker. In a real-world environment, you would set up your own MQTT broker.
Here’s an example message sent by the button. We don’t actually use any of the data in the JSON string. We only care about the fact that a message arrives. If you’d like, you can use the attributes from this payload to enhance your project (for example, to display the battery status).
{
  "device": {
    "imei": "867997032398090",
    "imsi": "901288007597541",
    "fw_version": "smartclick_button_2.2.0",
    "battery": 2731,
    "rsrp": -78,
    "cellid": "1203C65",
    "uptime": 1876178520
  },
  "payload": {
    "commands": "ordered"
  }
}
Build the Peakboard application
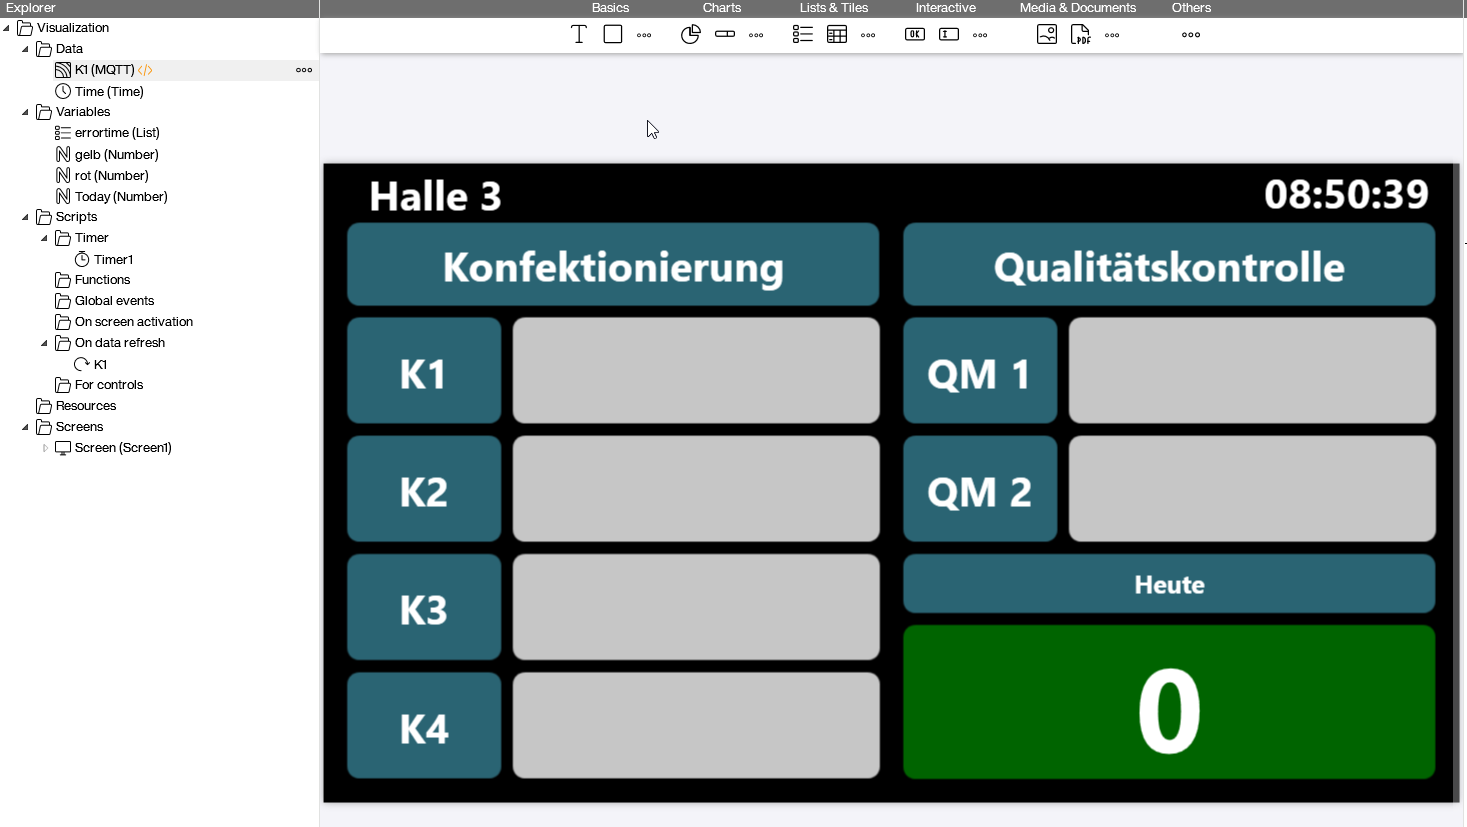
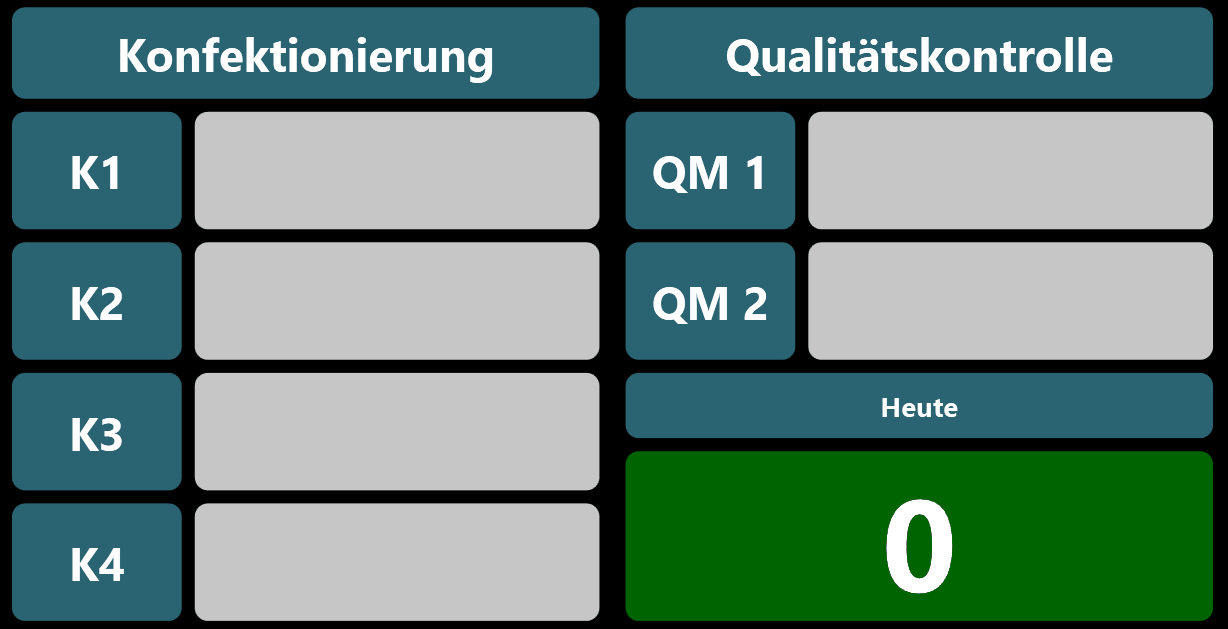
The Peakboard app shows several positions that could show an alarm (K1-4, QM1, QM2). We only show how to build K1, as the others work the same.
Every time an alarm or event is triggered, the corresponding rectangle turns red, and a timer appears, which shows the amount of time that has passed since the event was triggered. It also increases a counter that shows the total number of triggers for the day.
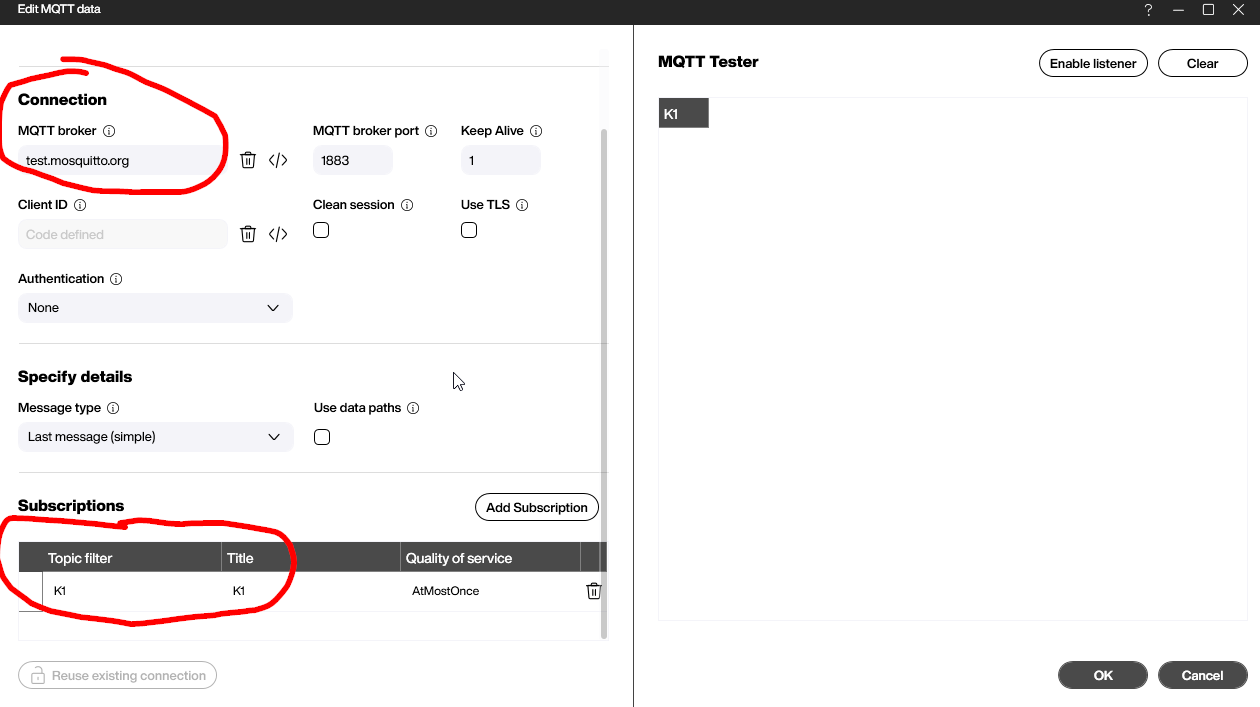
The data source is pretty straightforward. We configure the same server and topic as in the IOX portal.
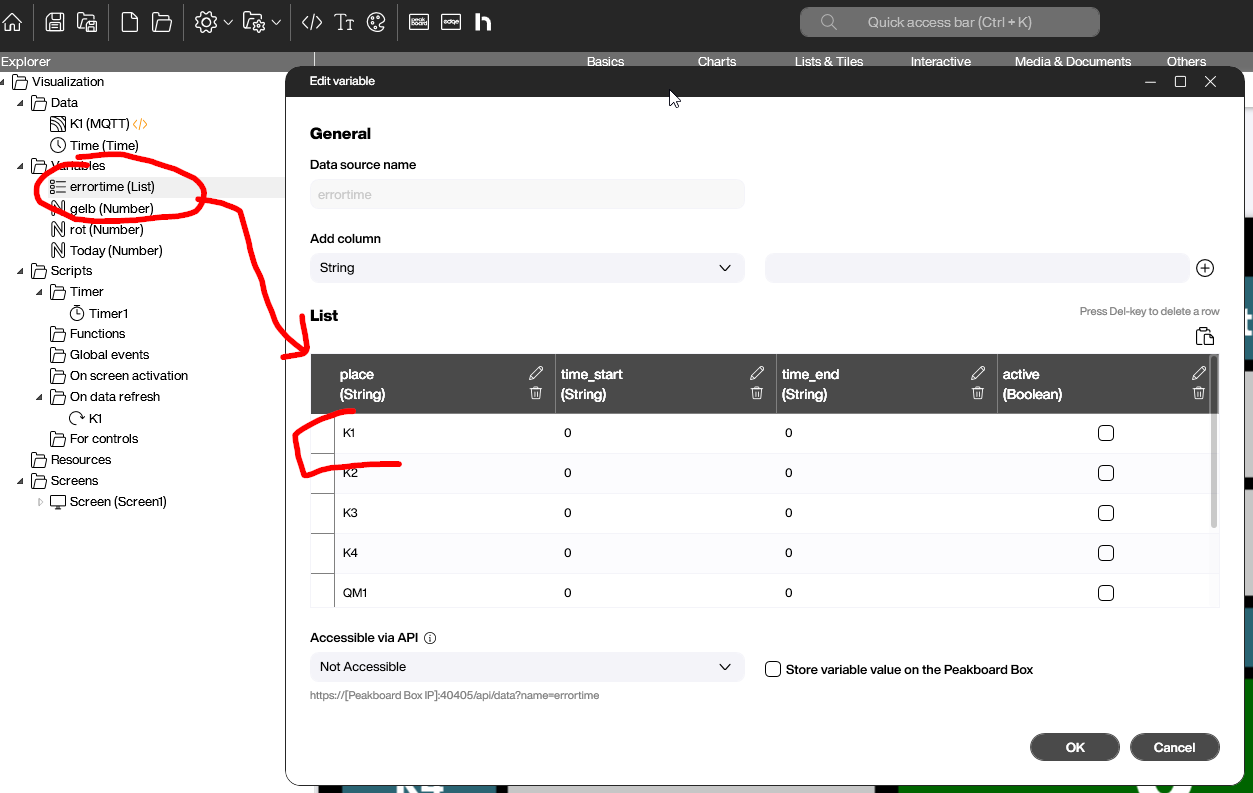
We also need a variable list, as shown in the following screenshot. Each location has one entry there. This list keeps track of which alarms are active and when they were active.
Building the scripts
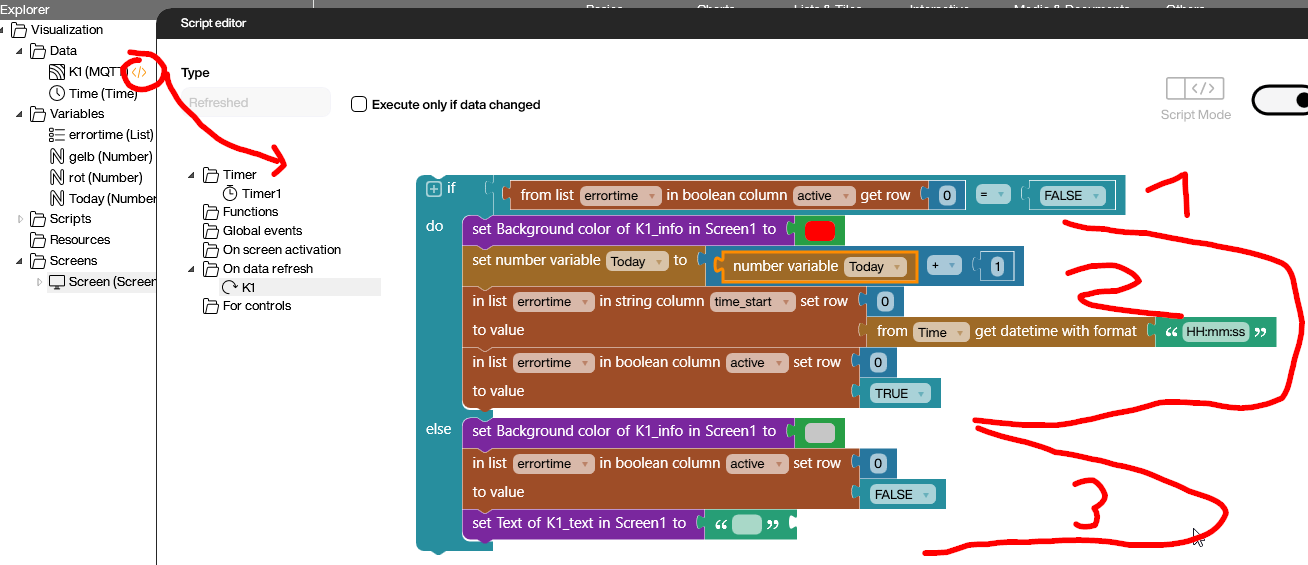
Here’s the refreshed script that is triggered every time a message comes in (which is every time the button is pressed).
We first check if the alarm is currently active.
If the alarm is inactive, we must set it to active. So we set the rectangle to red, increase the counter for toady’s messages, and set the start time and active flag in the variable list.
If the alarm is active, we must set it to inactive. So we set the rectangle color back to normal, and we set the alarm flag to false.
The second script is a timer script that displays the elapsed time. It is executed every second and generates a well-formatted elapsed-time text. Here’s how it works:
- We first make sure the alarm is active.
- We translate the start time, which is stored in the variable list, to a real date.
- We subtract the alarm date/time from the current date/time and format it as minutes and seconds.
- We apply the result to the corresponding text box.

Result and conclusion
Here’s the final result. You can see what it looks like when the button is pressed for the first time and second time.
Note that we didn’t do anything with the actual payload of the incoming JSON string. A nice exercise for the reader could be to monitor the battery status after extracting this information from the JSON string.