There are countless services on the internet that provide weather information, either as a widget or as an API. In this article, we will learn how to use weatherapi.com. They offer a free plan to get basic weather information from any location in the world. If you want to follow this tutorial step-by-step, make sure to sign up for the free plan and get your own API key.
The API explorer lets you play around with the API call we will use. The only parameter is the name of the location (it can be a name, a set of coordinates, or a zip code). The call we’re using is
http://api.weatherapi.com/v1/current.json?key=XXX&q=Taipei&aqi=nowhere XXX is the API key.
Let’s create a new board and add a JSON data source. We don’t have to deal with authentication, as the API key in the URL tells the server who we are.
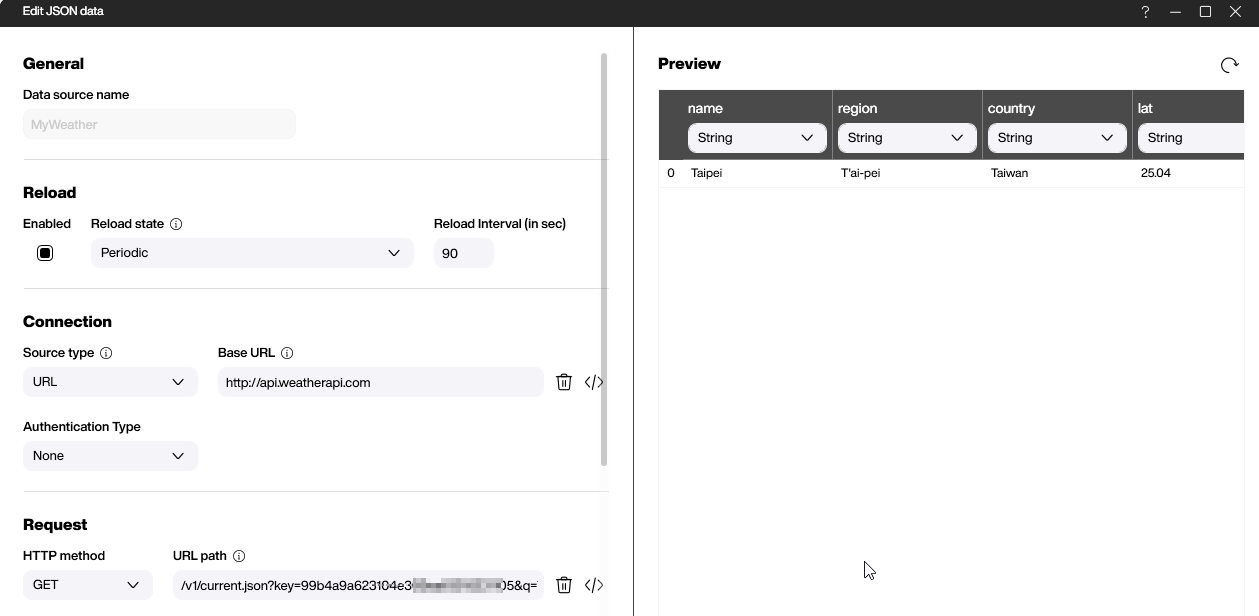
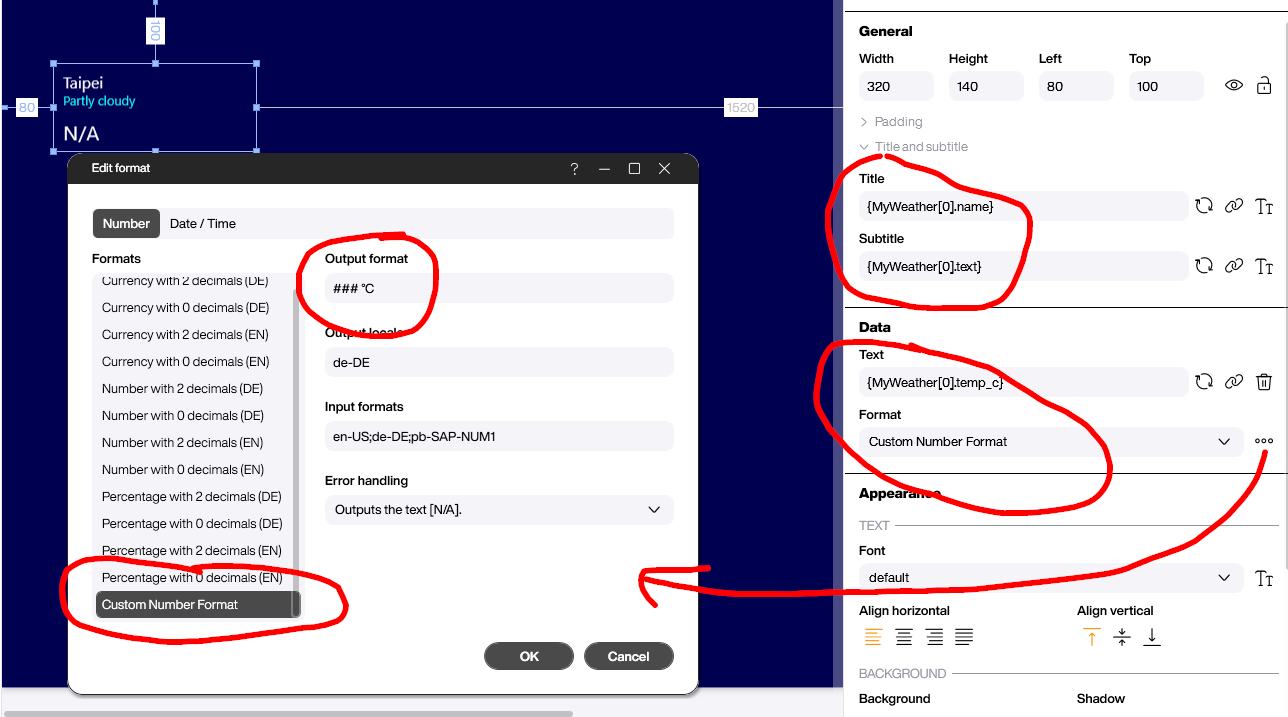
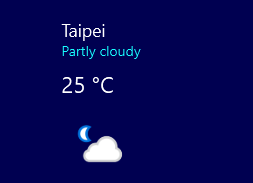
The most important parameters are location (column name), temperature (column temp_c), and the weather description (column text). We can easily visualize these with a single text box with a title and subtitle. Please check the screenshot for how to format the temperature. In this case, we use a custom format with the unit °C to beautify the number.
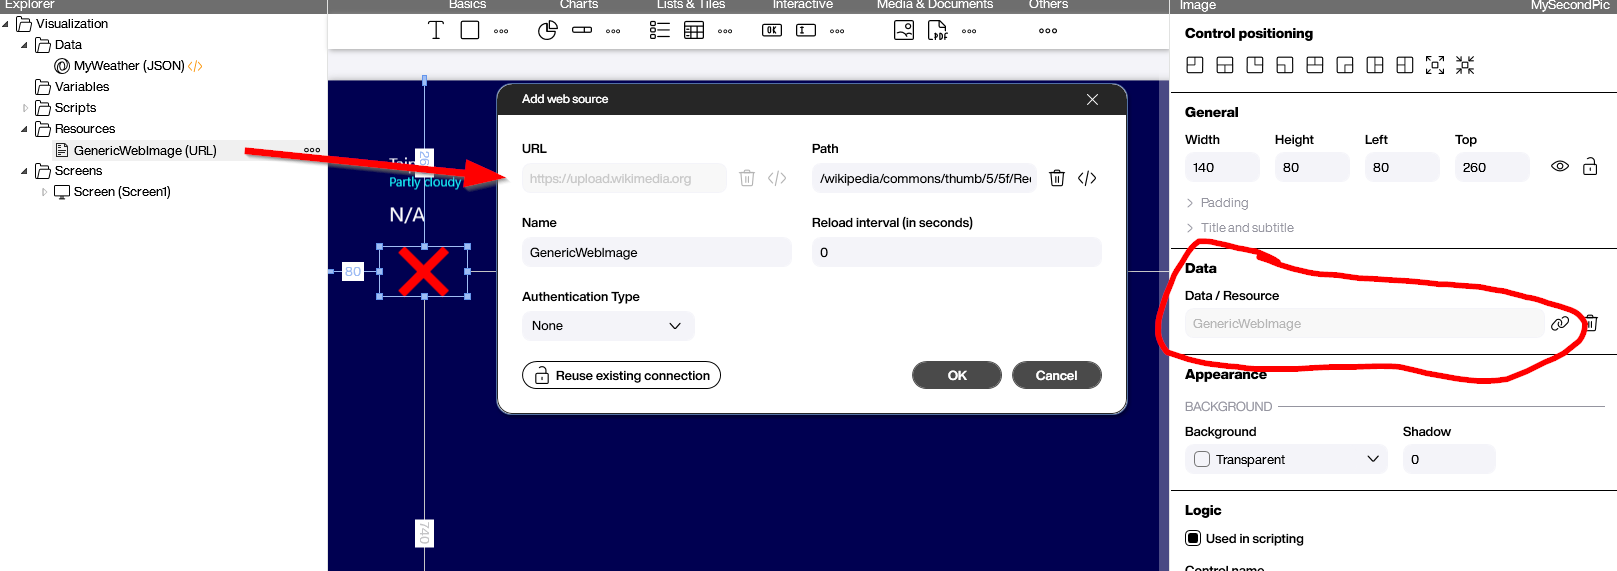
Weatherapi.com provides the caller with a link to an illustration of the weather condition (e.g. clouds or sunshine). To use these icons directly in our board, we place an image control on the canvas. Then, we add a link to a web resource that will feed the image control with a default image. Just use a generic picture like a red cross. The actual image is unimportant, as we will override it with what the API returns to us.
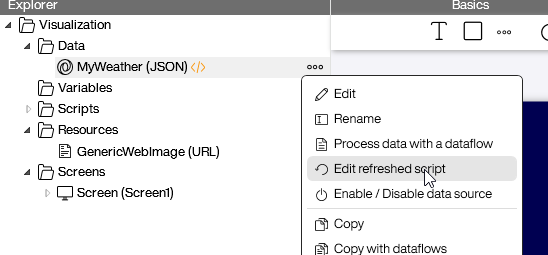
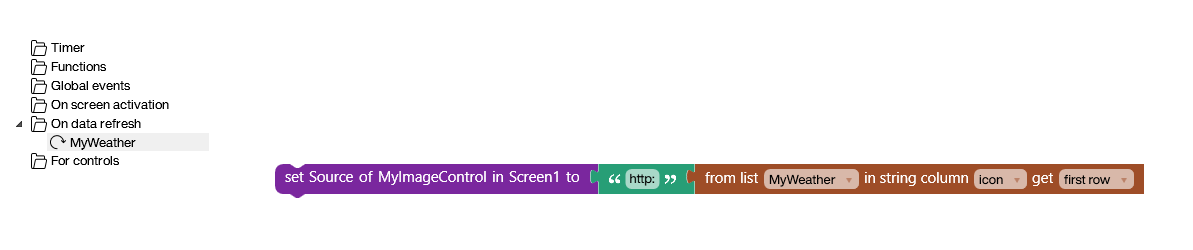
Every time the data is queried from the API, we can use the Refreshed-event to arrange all proceeding actions, like setting the URL of the image control.
Here’s the block we’re using to build the URL. The value of the API comes with a URL, but http: needs to be added to make the URL valid. So we just add it and set the resulting value as the Source proerty of the image control. That’s it!
And here’s the result:
- Download WeatherAPI.pbmx