This article combines several technologies and explains how to use them. Here’s the goal: Every time a ticket is created in Zendesk, it should be sent to a Peakboard announcement board informing the viewer about the new ticket. Here are the steps to do it, with the help of n8n.io:
- The n8n workflow listens to the Zendesk inbox and fires every time a new ticket arrives.
- Additional information is queried from Zendesk using the ticket number from the trigger.
- The Zendesk ticket as a whole is sent to an MQTT broker.
- Peakboard subscribes to the MQTT node and picks out the information needed from the complex Zendesk JSON string.
If you want to re-build this tutorial, you can get a trial of n8n.io. Besides the n8n.io account, you will also need administrator access to your Zendesk account. Check the settings there and get an API key. You will need this API key to access the Zendesk data from n8n.io.
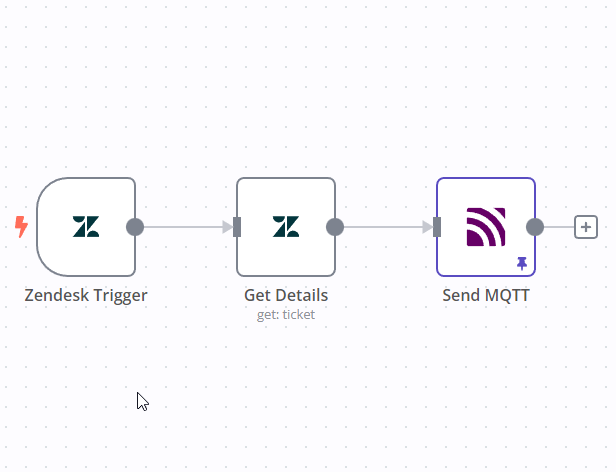
Here’s the workflow we build in n8n.io. The initial trigger is the creation of a Zendesk ticket. Then, additional information is queried from Zendesk. Finally, the ticket is sent to MQTT:

Building the workflow in n8n.io
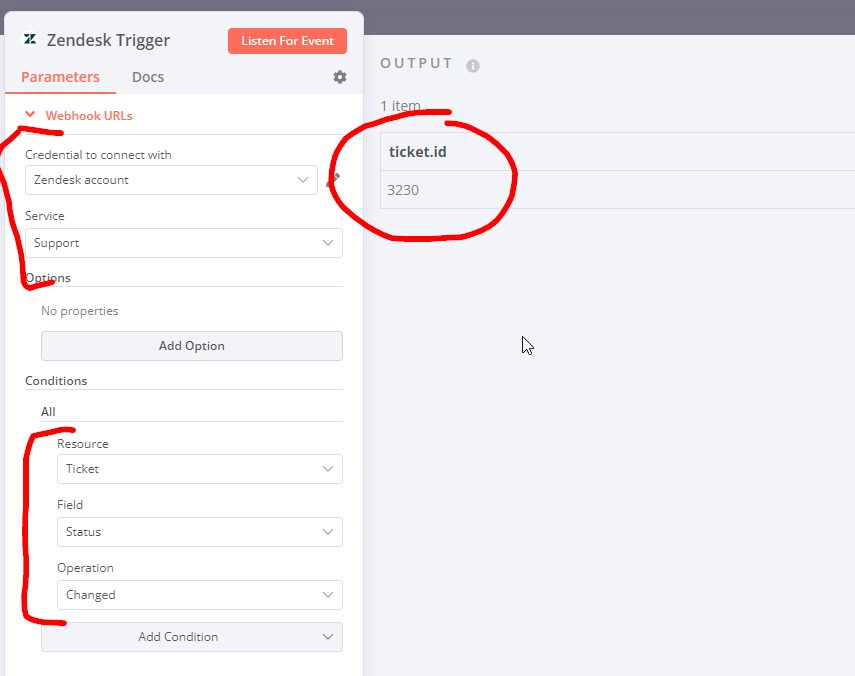
This screenshot shows how the trigger is configured. You need to provide the API key and connect n8n.io to Zendesk. Then, you have to define the trigger. In our case, we just let the trigger fire every time the status of the ticket changes. If you want to use this in the real world, just adjust it to your needs. As you can see, the trigger only pumps out the ticket number, nothing else.
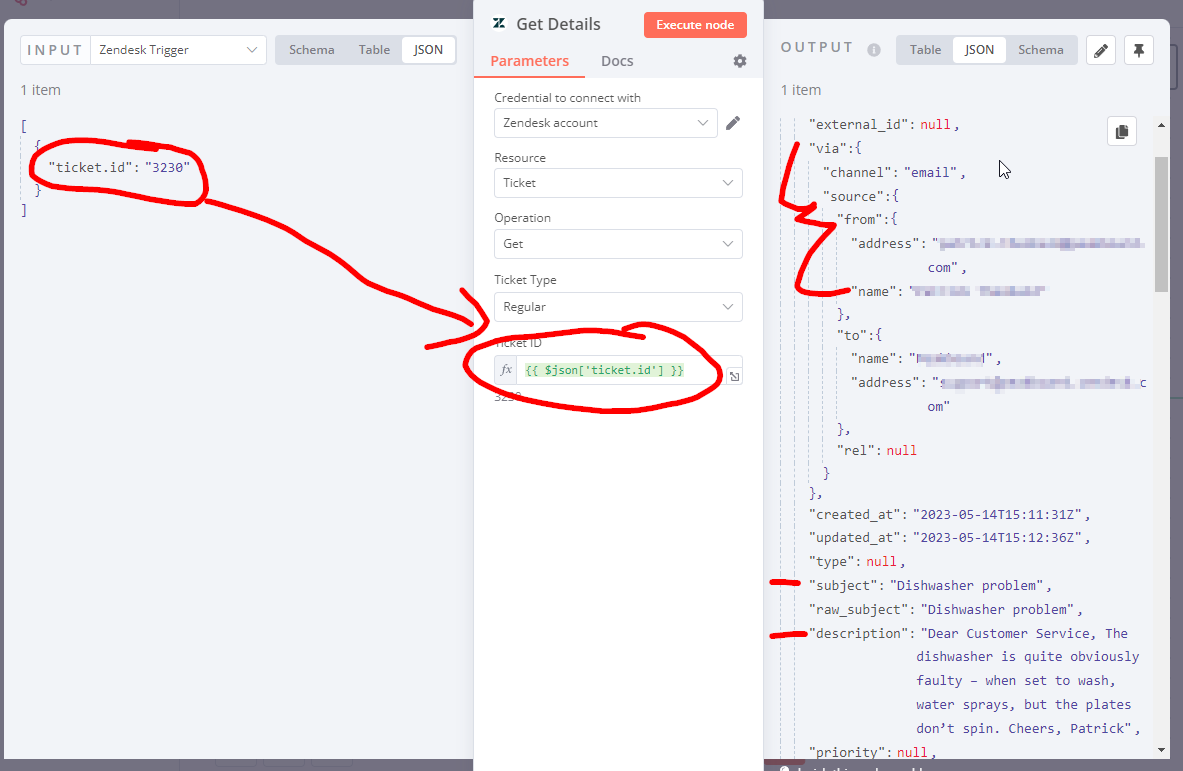
In the next step, we use a second Zendesk-related function to get the details of the ticket. This screenshot shows that the JSON string with the ticket number is the input. The ticket number is sent to Zendesk. And the return value is a complex JSON string that contains all the information we need about the ticket (e.g. subject, sender, etc.).
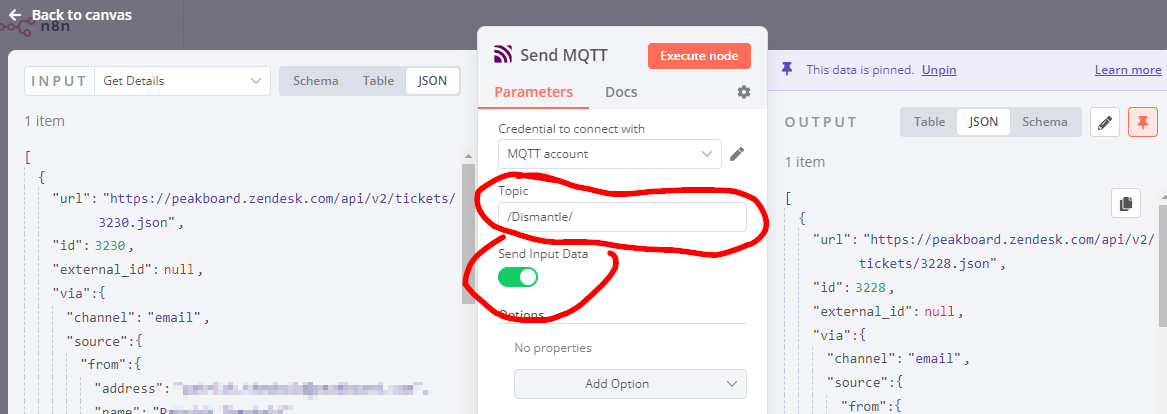
The final step is to send the whole JSON string without any modification to an MQTT broker. In our case, we use the public broker test.mosquitto.org, so there’s no hassle with authentication.
Building the board and processing the MQTT message
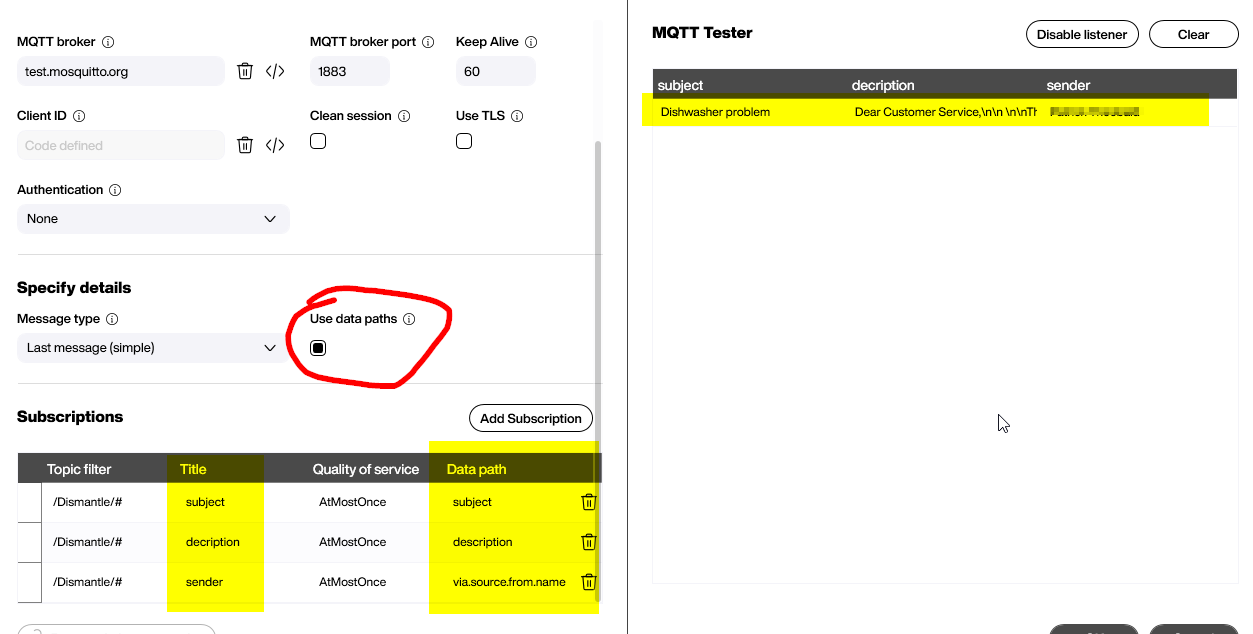
On the Peakboard side, we just use a regular MQTT source to catch the nodes from the broker. As you can see in the screenshot, we use data paths to pick out the information we want from the complex JSON string. In our case, it’s the sender, subject, and description. The sender’s name is an even more complicated path that requires going down several hierarchy layers within the JSON string.
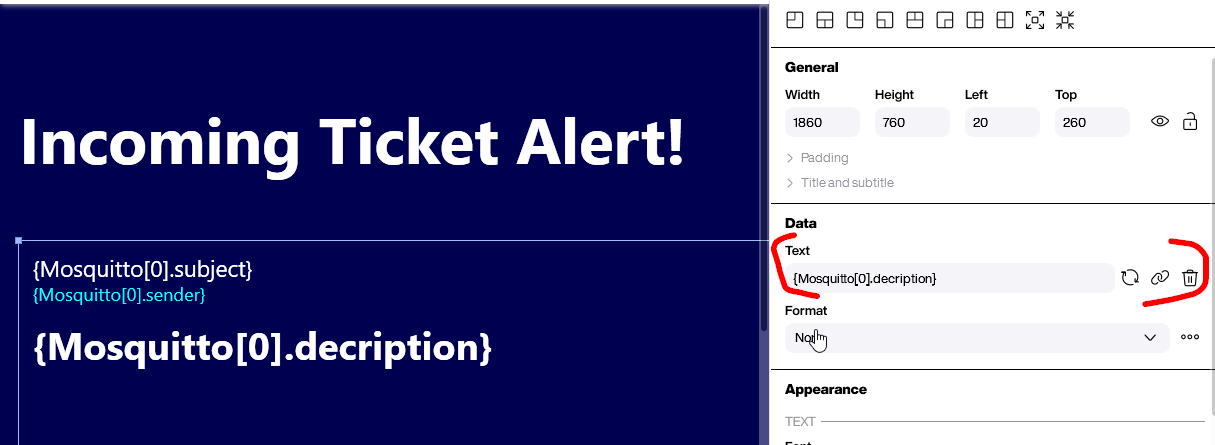
Here’s the easy part. On the canvas, we place a tile to display the sender, subject, and description, by directly linking to the data source.
Live Test
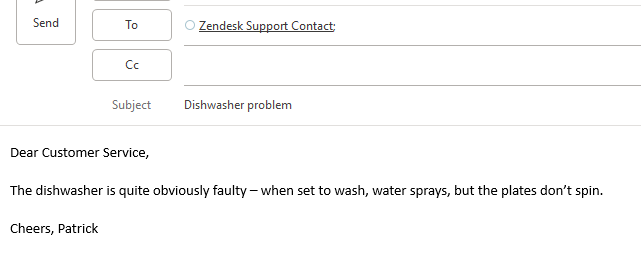
Before we test the whole process, please make sure that the n8n.io workflow is running, either as active or in debug mode. Also turn on the board to at least the preview mode. Then, we can send an email to the Zendesk account and see how the ticket finds its way automatically to the board. Beautiful!
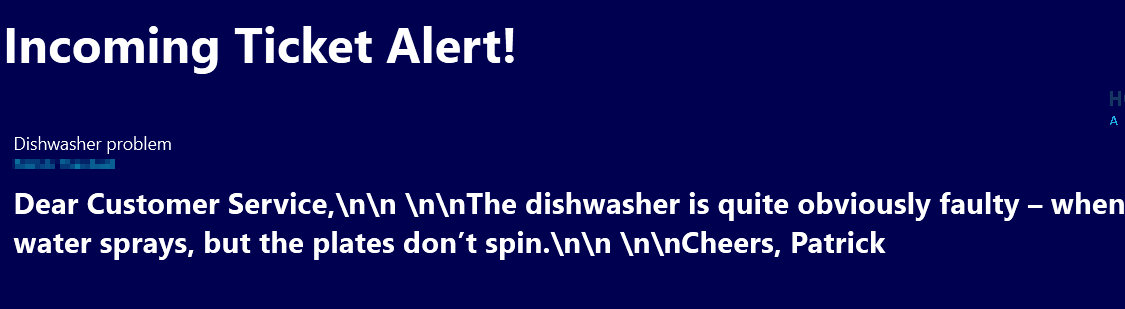
PS: As you can see in the last screenshot, the line breaks are not handled properly. We will discuss this in another article :-)