In our last article, we explained what an auditing app is and how the underlying tables work. The audit definitions are stored in the AuditTemplateHeader and AuditTemplateItem tables. And the audit run data is stored in the AuditHeader and AuditItem tables. We also discussed the sample data that is necessary to conduct a CNC machine walkthrough.
In this second part of our auditing app mini-series, we explain how to build an auditing app in Peakboard, using the architecture that we discussed in our last article.
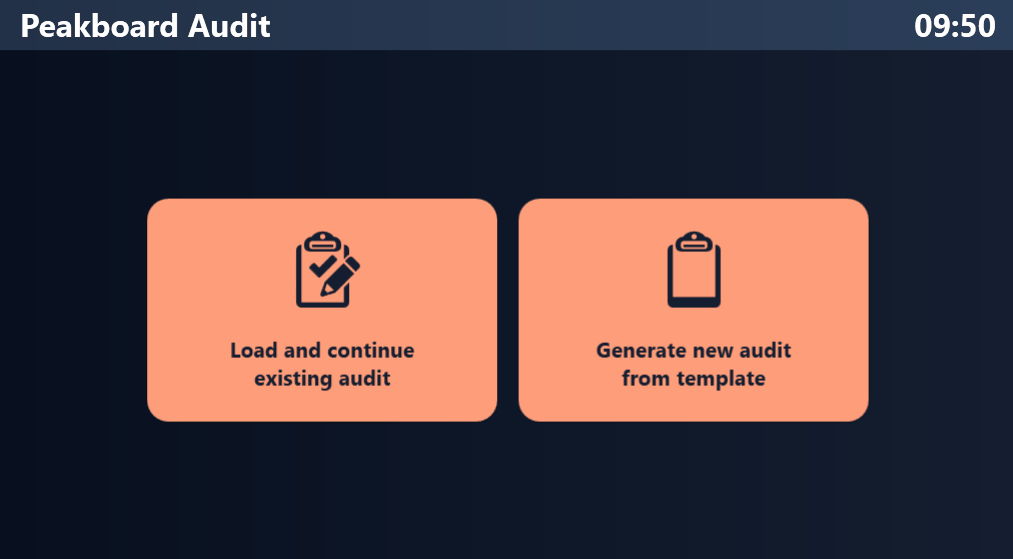
Main screen
The main screen of our app is simple. It has two buttons:
- One for creating a new audit from a template.
- One for loading an existing audit.
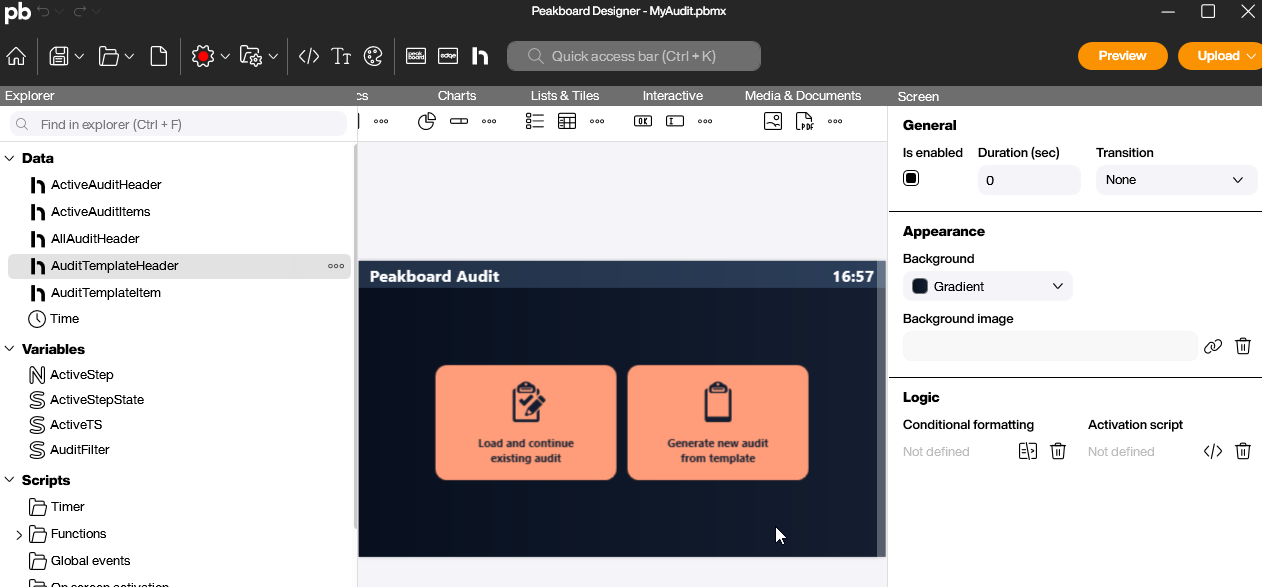
Prepare the data sources and variables
Here are the data sources we need:
ActiveAuditHeaderandActiveAuditItem- These data sources point to the
AuditHeaderandAuditItemtables, respectively. For both of these data sources, we use the filter,TS == {ActiveTS}. That way, the data sources only give information for the active audit.
- These data sources point to the
AllAuditHeader- This data source contains all the possible audits. We need this for the overview screen, so that the user can select the audit they want to perform. We use the filter,
State == {AuditFilter}. This lets the UI switch between open and completed audits.
- This data source contains all the possible audits. We need this for the overview screen, so that the user can select the audit they want to perform. We use the filter,
AuditTemplateHeaderandAuditTemplateItem- These data sources contain all the audit definitions, and they correspond to the same tables in our Peakboard Hub (or whatever storage solution you’re using).
Here are the variables we need:
| Variable | Description |
|---|---|
ActiveStep |
The StepNo (step number) of the step that’s currently being displayed to the user. |
ActiveStepState |
The State of the current step (we need this for the UI). |
ActiveTS |
The TS (start timestamp) of the currently active audit. |
AuditFilter |
The filter that’s used to filter the list of past audits. This is either A or D. |
For more details, you can download the PBMX.
New audit screen
The new-audit screen shows all the possible audits (using the AuditTemplateHeader table). The user can select Create new audit, in order to start a new audit.
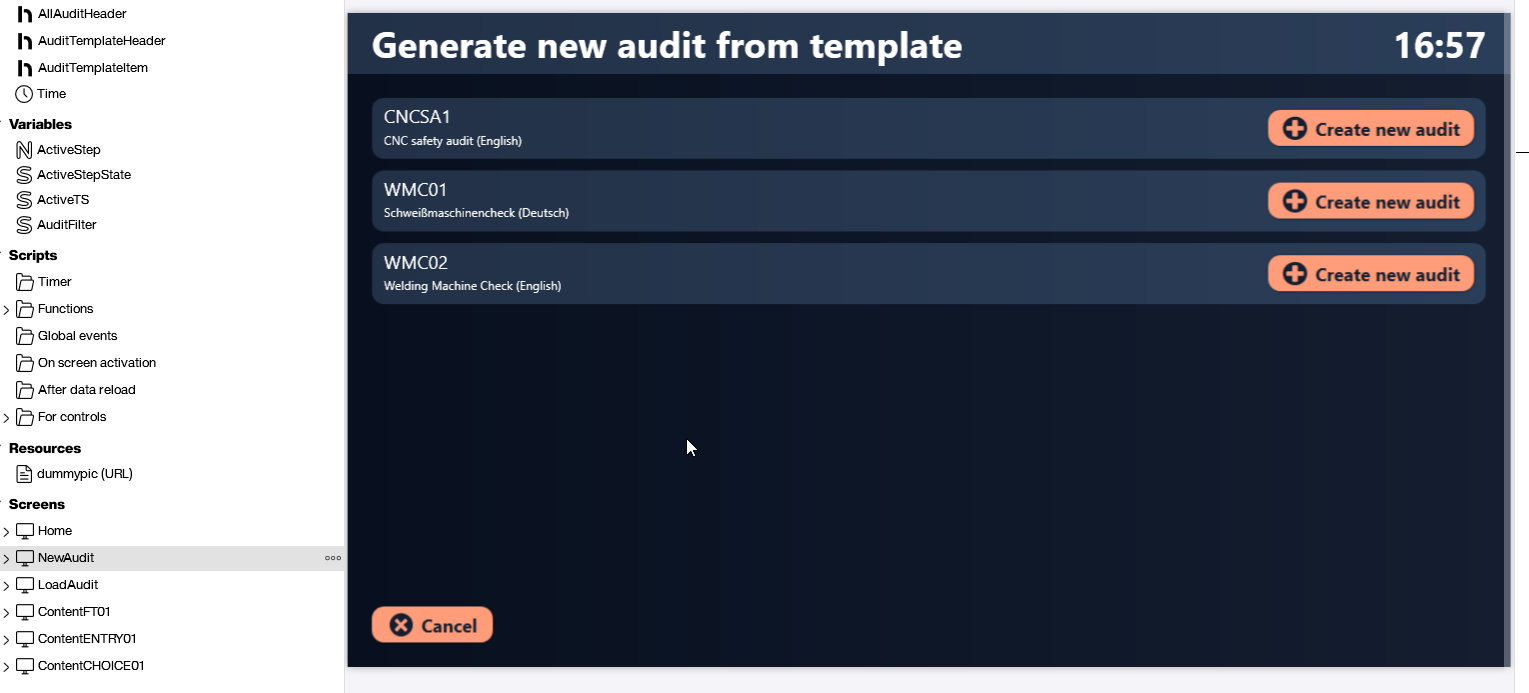
Here is the Building Blocks script for the Create new audit buttons:
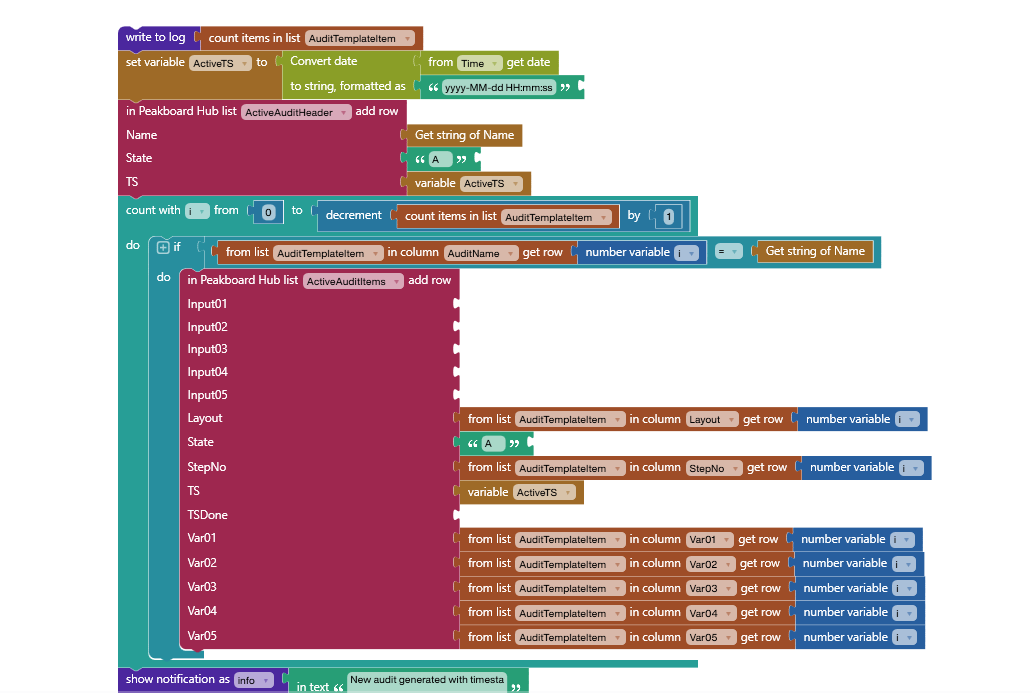
We use TS (timestamp) as a database key to build a relationship between headers and items.
We copy the template header into the new audit header. And we copy all the template items into the new audit items. This includes all 5 variables of the item template.
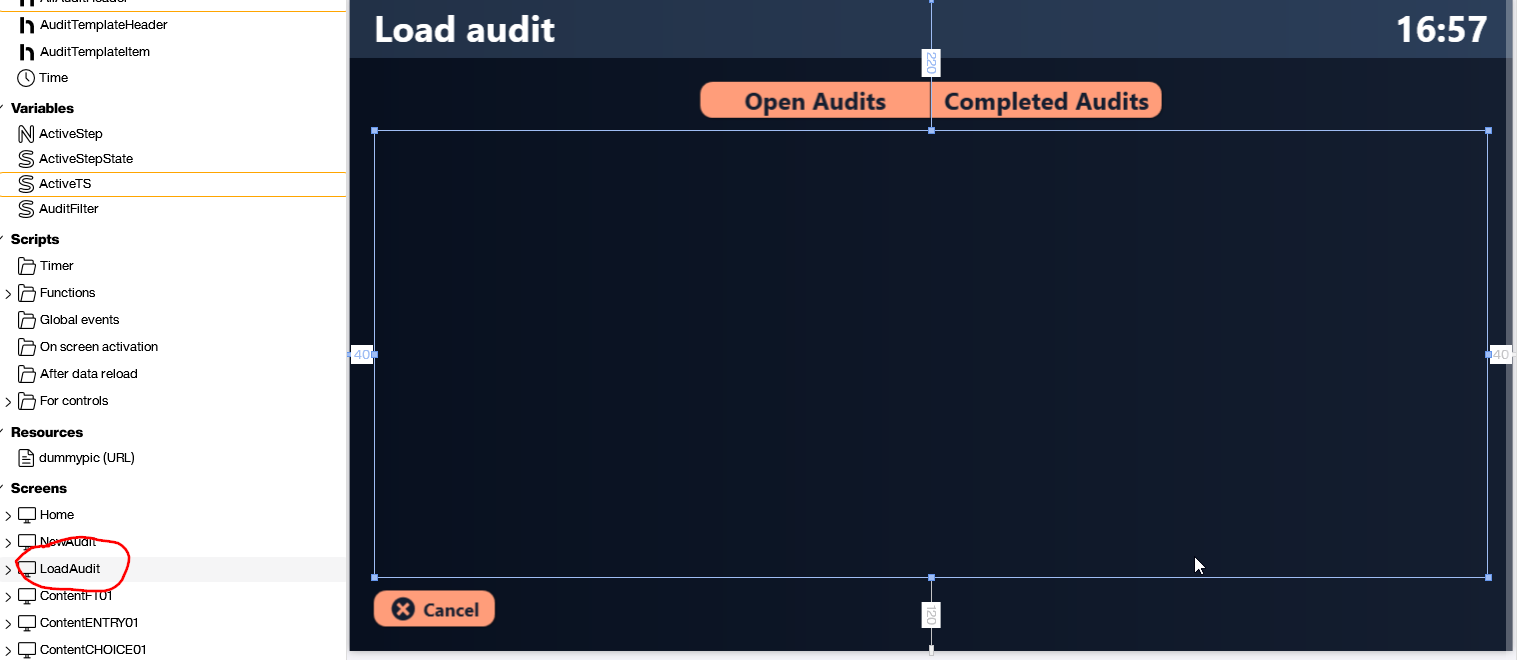
Load existing audit screen
The load-existing-audit screen shows a list of existing audits. The user can select the Open Audits and Completed Audits button, in order to change what type of audits are displayed. These buttons change the {AuditFilter} variable to either A (active) or D (done).
Here is the Building Blocks script:
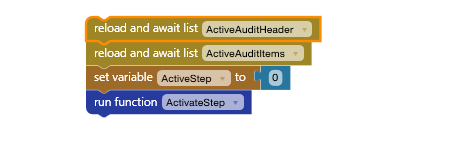
It reloads ActiveAuditHeader and ActiveAuditItems.
It also sets ActiveStep to 0. That way, we always show the user the first step (even if it’s already completed).
Load a single audit step
The ActivateStep function loads a single audit step. This is how the app switches between steps of an audit.
The script is based on an if-statement that checks if the step is valid or not. If the step is not valid (step number is higher than the number of steps in the active audit), then this is what happens:
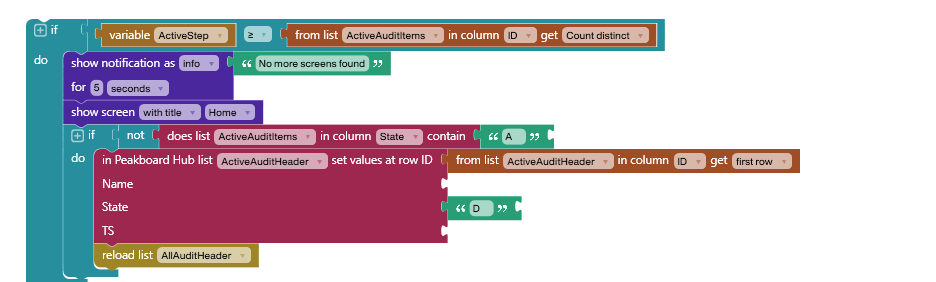
- Send an error message.
- Check if all the steps of the active audit are completed. If all the steps are completed, set the
Stateof the audit toD(done).
If the step is valid, this is what happens:
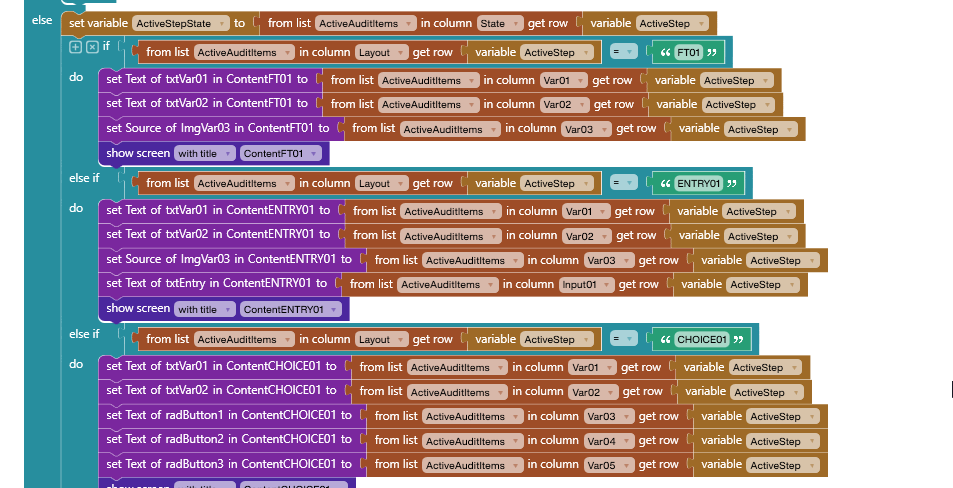
The script gets the Layout of the step. Then, it sets all the appropriate variables, and displays the screen for the step. The exact details of how this works depends on which layout the step uses.
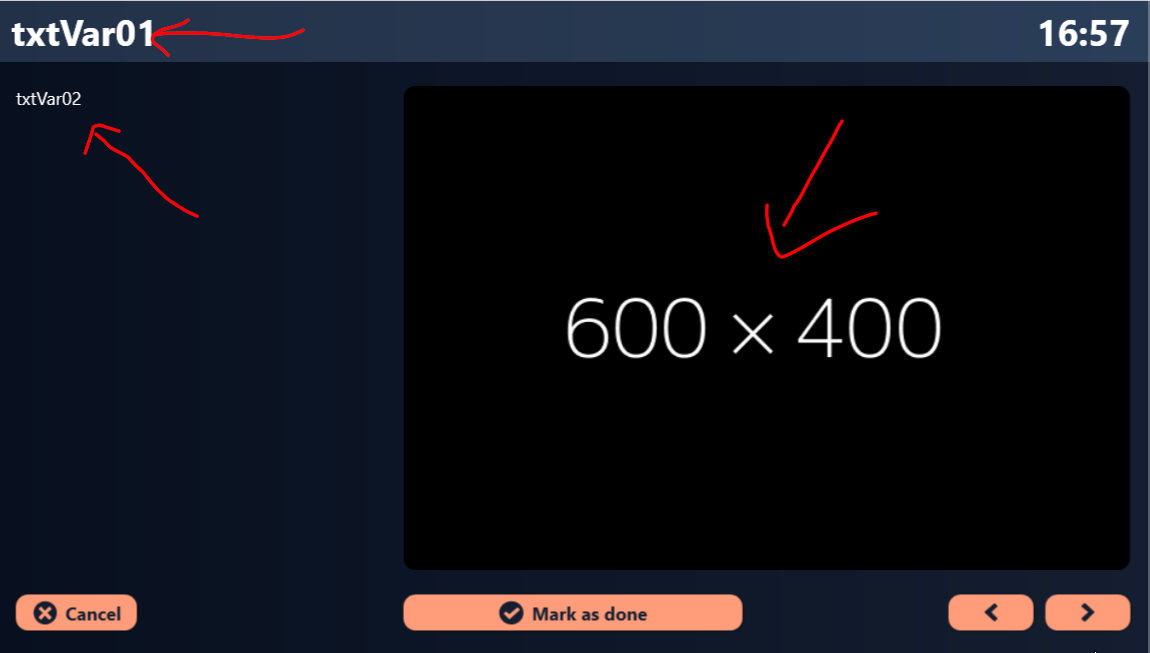
Here’s a screen with the FT01 layout. As you can see, it displays the text from Var1 and Var2. It also displays an image, using the URL from Var3.
Mark as done button
Let’s discuss the script behind the Mark as Done button. Each layout screen has this button. However, the script for the button differs a bit, based on the specific layout. This is because each layout takes different input from the user (no input, text, or multiple choice).
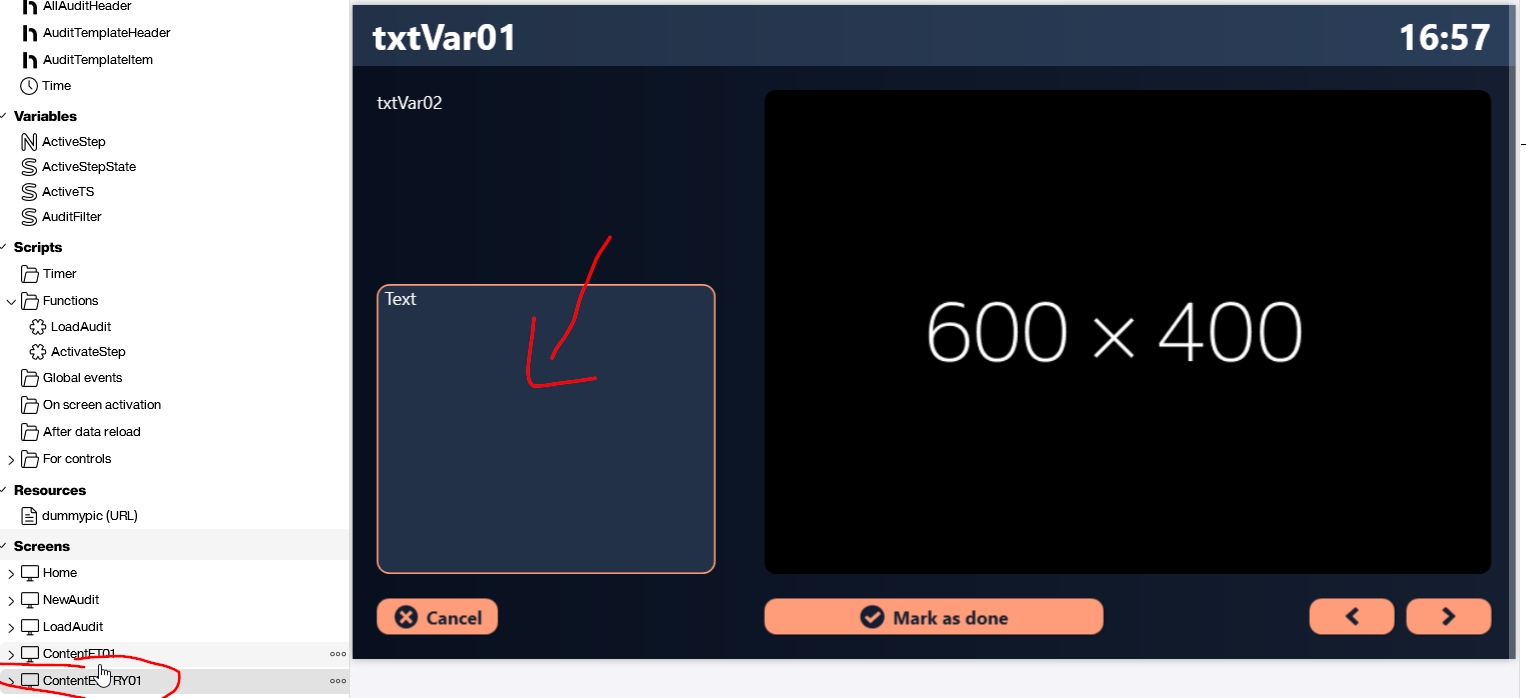
Let’s use the ENTRY01 layout as an example. This layout lets the user enter text:
Here’s the script for the Mark as Done button for the ENTRY01 layout:
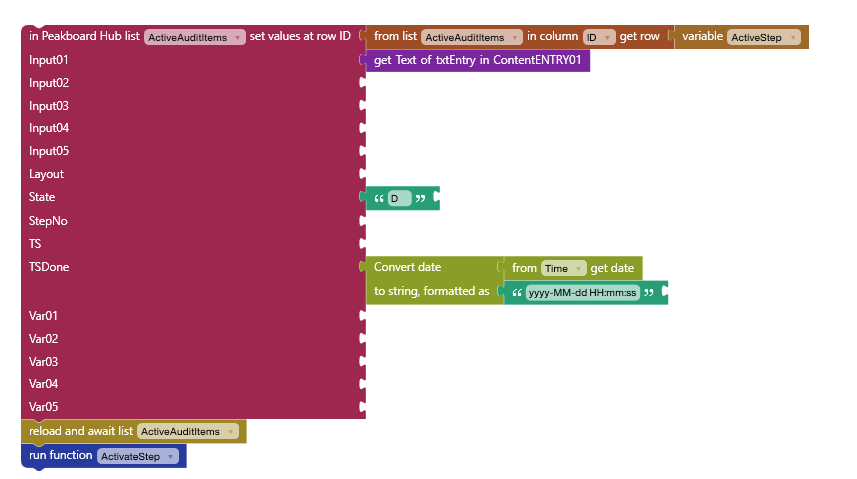
The script adds a row to our ActiveAuditItems table, in Peakboard Hub (you may be using a different storage solution). It sets the following columns of the row:
- Set
Input01to the text that the user entered into the text field for this step. - Set
StatetoD, to mark this step as done. - Set
TSDoneto the current time, to record the time that this step was completed.
Then, the script reloads the ActiveAuditItems list so that our data source can see the updated data.
Finally, the script calls the ActivateStep function, to adjust UI elements appropriately (e.g. disable the Mark as Done button).
Result
The following video shows what our audit app looks like. First, we select the CNC safety audit. Then we mark each step of the audit as done. Two of the steps require user input.
It’s important to note that we only gave a small demonstration of what’s possible with this architecture. It’s easy to use our architecture to build highly complex auditing apps with many different layouts and much more user input.