With Peakboard Hub Online, it’s easy to connect cloud apps and services to applications that run in a worker’s workplace in a factory. That’s one of the main benefits of connecting Peakboard Boxes to the Hub. In this article, we’ll explain how to use an Azure logic app to build a simple workflow that calls functions in a Peakboard app. The possibilities of this technique are endless.
The Azure logic app uses the standard Hub API to communicate with the Hub. And the Hub has a secure connection through the firewall of the customer’s factory, to the Box. This makes it perfectly secure to bridge the gap between cloud services/apps and any entity that sits in the highly secure area of production IT.
The Peakboard app and other requirements
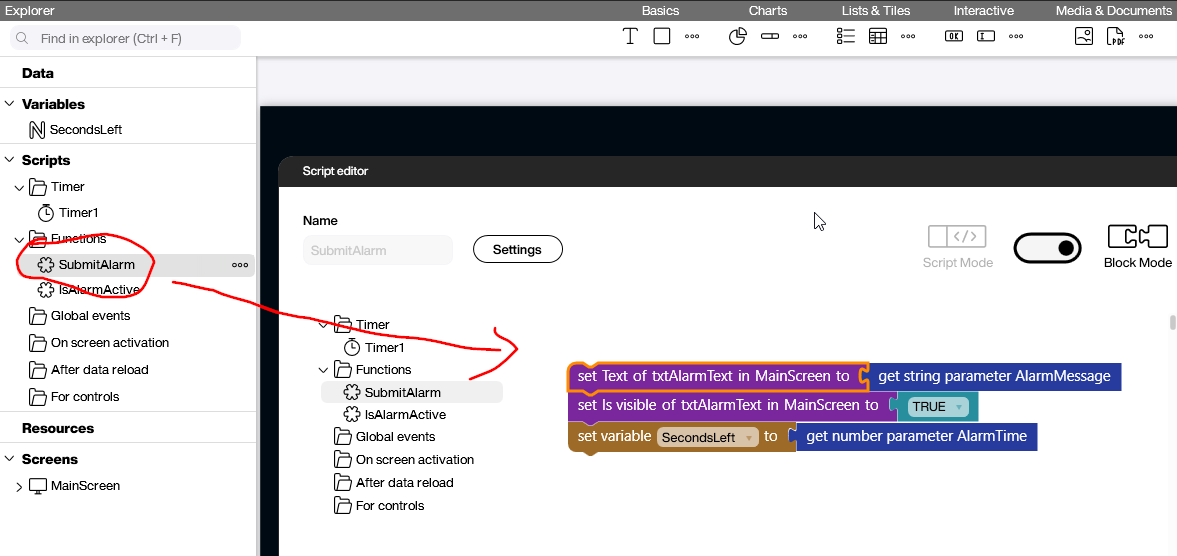
For our Peakboard app, we’ll use the Alarm app that we built in our article about calling functions with the Peakboard Hub API. The app exposes a function called SubmitAlarm. This function displays a message on screen for a number of seconds. The message and number of seconds are the parameters of the function
We want to use the logic app to trigger this function on the Box. The logic of the function is simple:
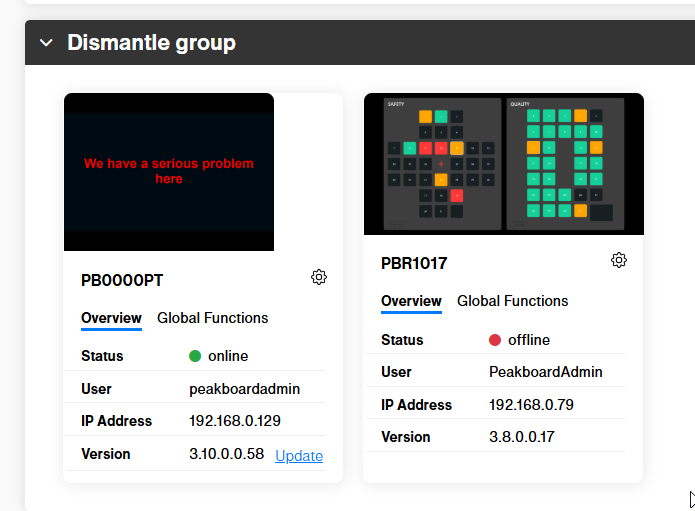
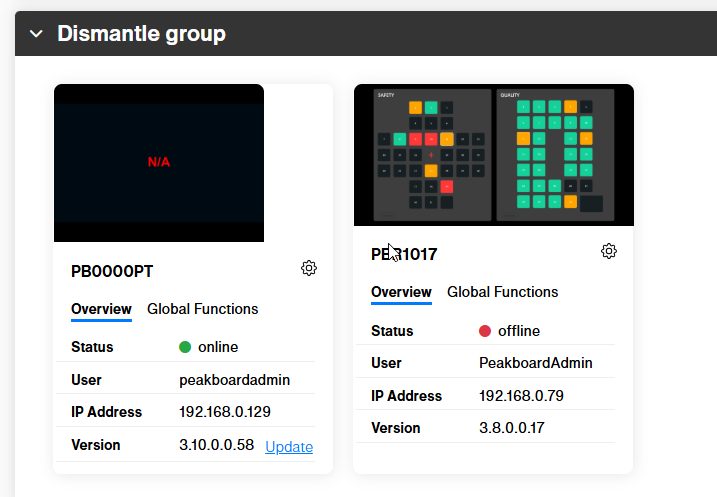
The Box we want to use is registered in Peakboard Hub:
We also need an API key with a minimum scope of write:box. This will allow a third-party caller (like the logic app) to execute the Box function.

Build the logic app
Here’s what the logic app needs to do to call the Box function:
- Authenticate against the Hub API with our API key.
- Parse the JSON string that is returned.
- Call the Hub API to execute the Box function.
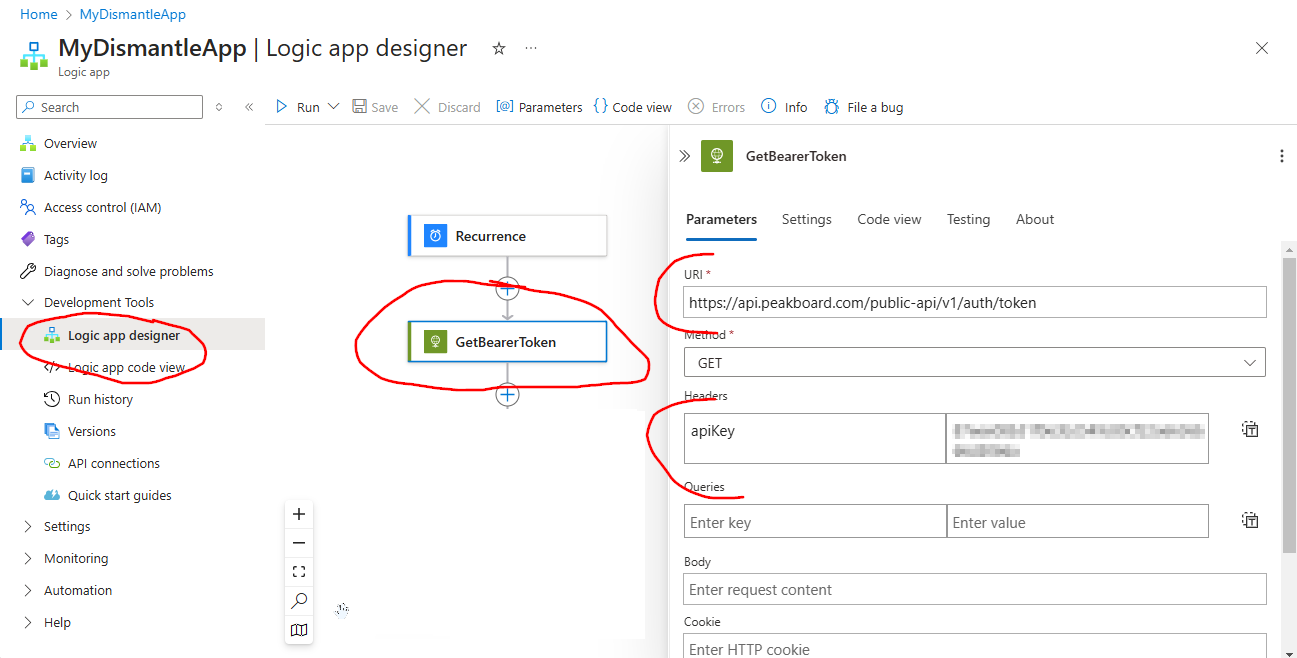
We create a new logic app in the Azure portal. Then, we add the first HTTP call, as shown in the following screenshot. The endpoint GET /auth/token accepts the API key in a header called apiKey.
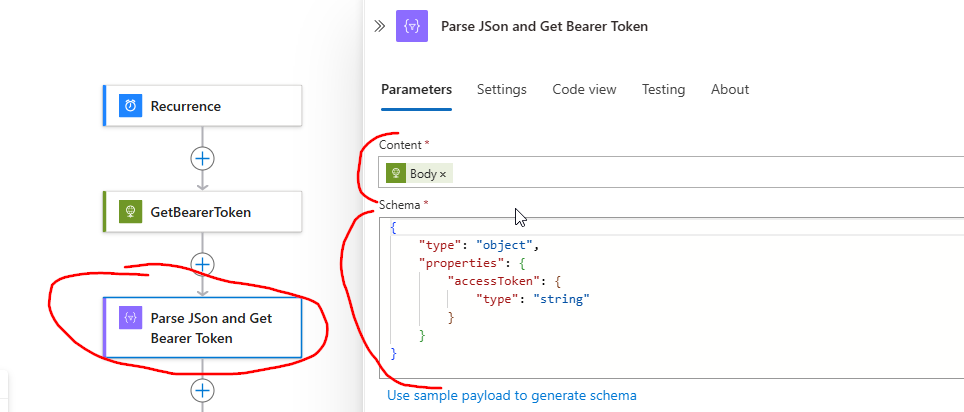
The access token is returned in the JSON string response body. To make the token available, we use a “Parse JSON” block in the logic app. Here’s the schema for parsing the JSON string:
{
    "type": "object",
    "properties": {
        "accessToken": {
            "type": "string"
        }
    }
}
To submit the alarm request, we call the endpoint POST /box/function. The body of the request is a JSON string that specifies the Box, function, and parameters:
{
  "boxId": "PB0000PT",
  "functionName": "SubmitAlarm",
  "parameters": [
    {
      "name": "AlarmTime",
      "value": 10
    },
    {
      "name": "AlarmMessage",
      "value": "We have a serious problem here"
    }
  ]
}
Here’s what the call looks like in the design mode.
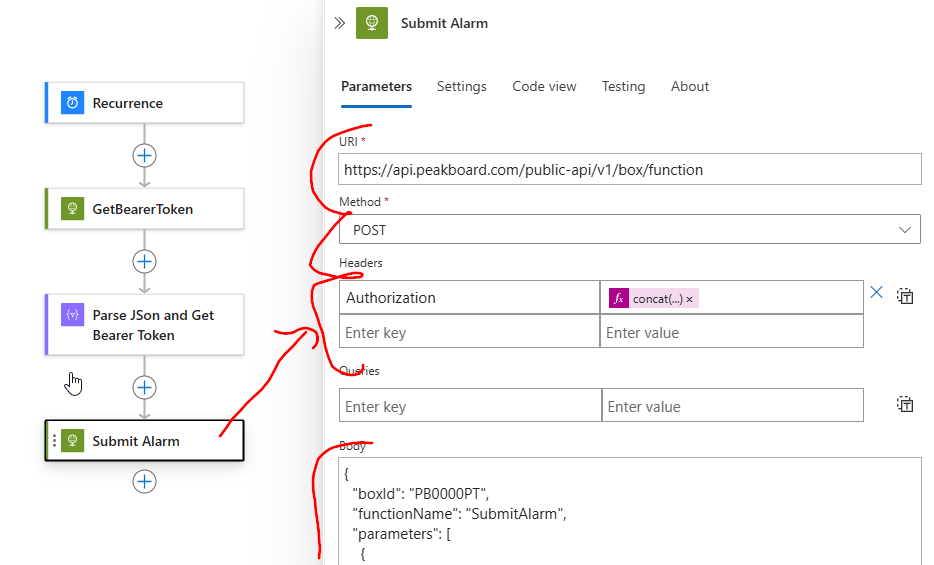
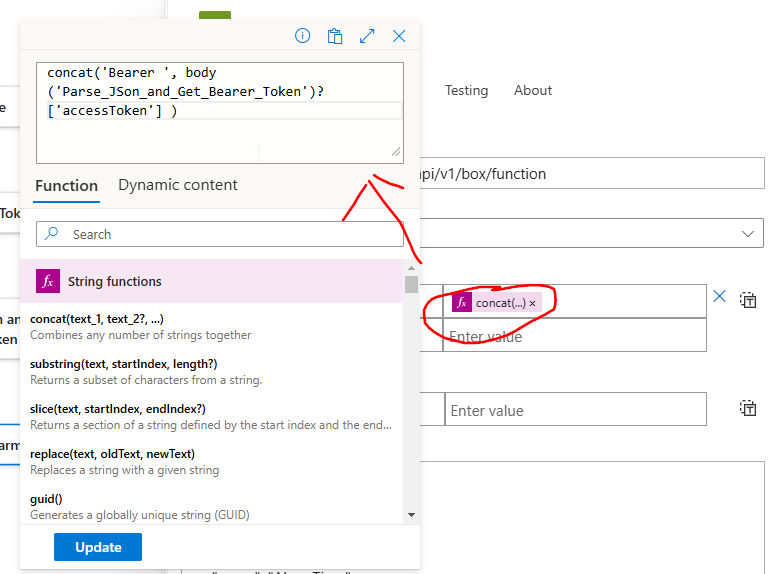
The additional header, Authorization, is a simple concatenation of the term Bearer and the token that is extracted from the JSON string in the previous parsing step.
Of course, in our example, we don’t catch any kind of exceptions or other problems that might occur. This is to make sure the example is easy to understand. In a real world application, we must consider that authentication could fail, or the box might not be available.
Result
You can try out the app by running the logic app manually. All the workflow steps should have green checkmarks if there are no problems.

The alarm request is submitted to the Box and displayed on screen: