
This article is the first part of our two-part series on how to build an auditing app with Peakboard. In this article, we explain the architecture of an auditing app, including how the audit definition and audit data tables work.
In the second part of this series, we discuss how to build and operate an auditing app.
Note that the examples we use in these articles are simple and may not satisfy all the requirements of a real-world audit and visual walk-around. But the basic process is the same, and you can easily customize the auditing app to suit your needs.
What does an audit look like?
This is what an audit, or “digital walk-around,” looks like:
- The user opens an auditing app on their tablet.
- The app presents the user with a list of possible audits.
- The user selects the audit they wish to perform.
- The app gives the user step-by-step instructions for how to perform the audit. For each step:
- The user follows the instructions for that step.
- If the step requires information from the user, the user enters that information into the app.
- The user marks the step as done.
- The user moves on to the next step.
- The audit is finished. The app saves the results into a document and persists them.
Example audit
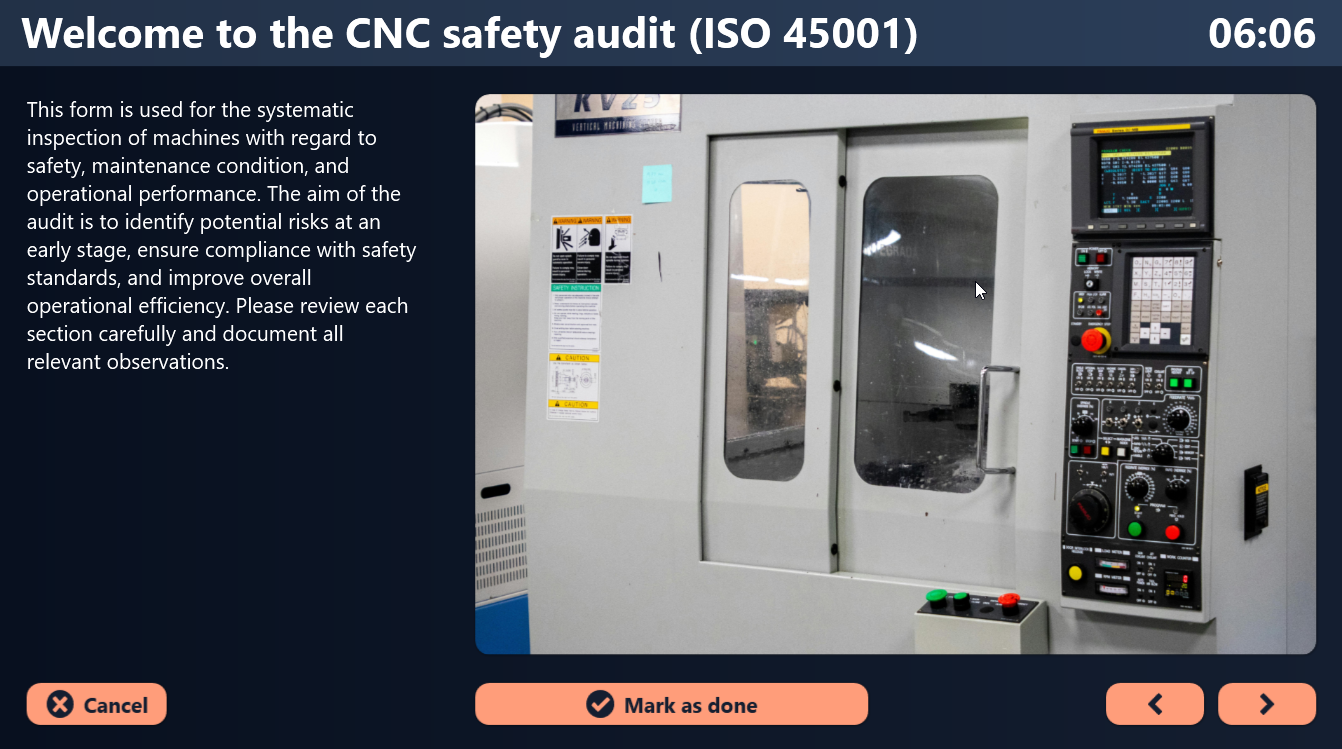
The following is an example of an audit. It tells the user how to perform a safety check for a CNC machine. Steps 4 and 5 require the user to enter information into the app.
-
Welcome the user and explain the purpose of the audit.
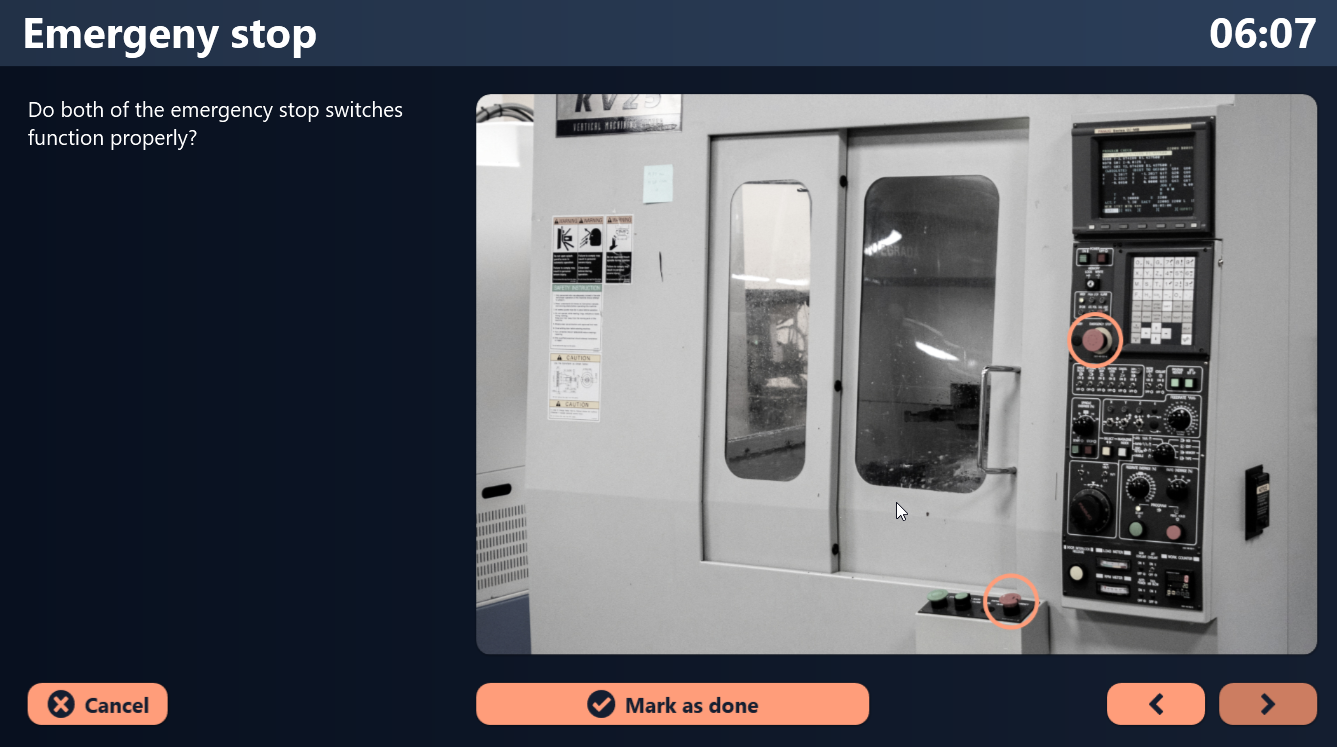
-
Tell the user to inspect both emergency stops.
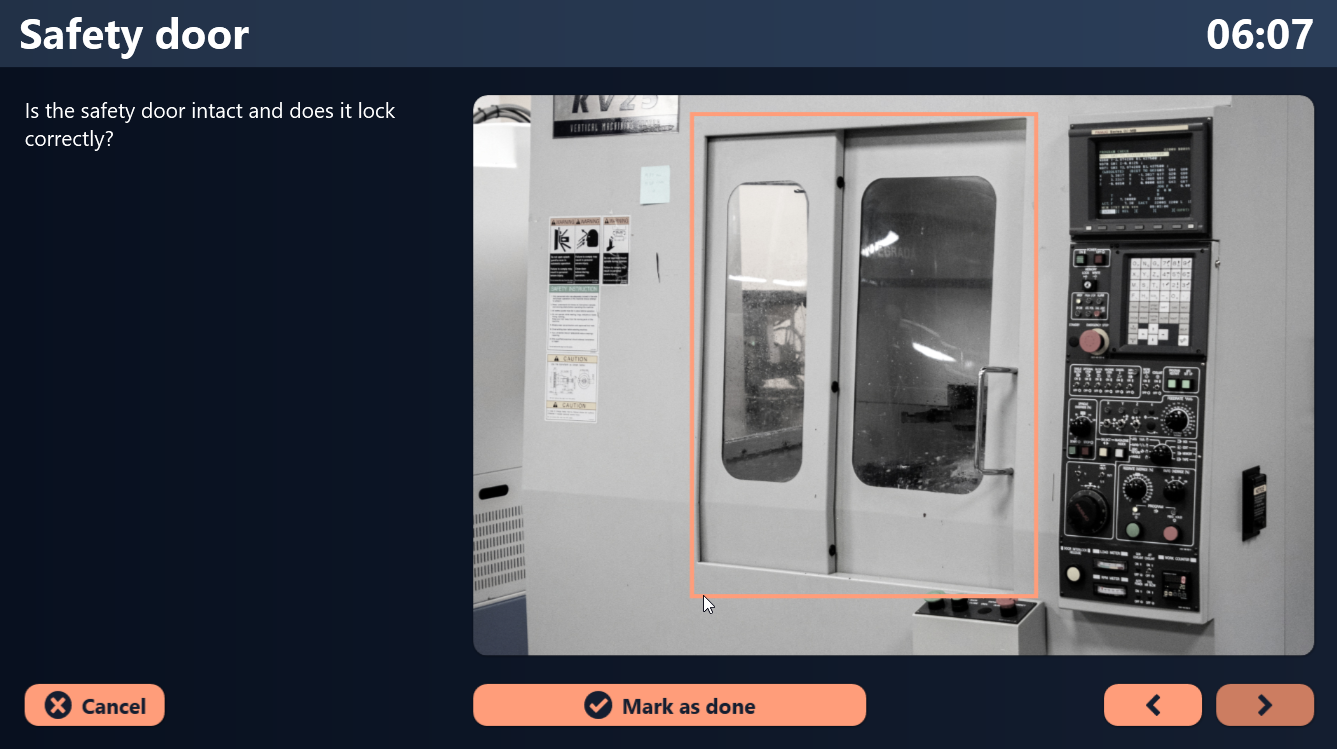
-
Tell the user to test the safety door to make sure it works properly.
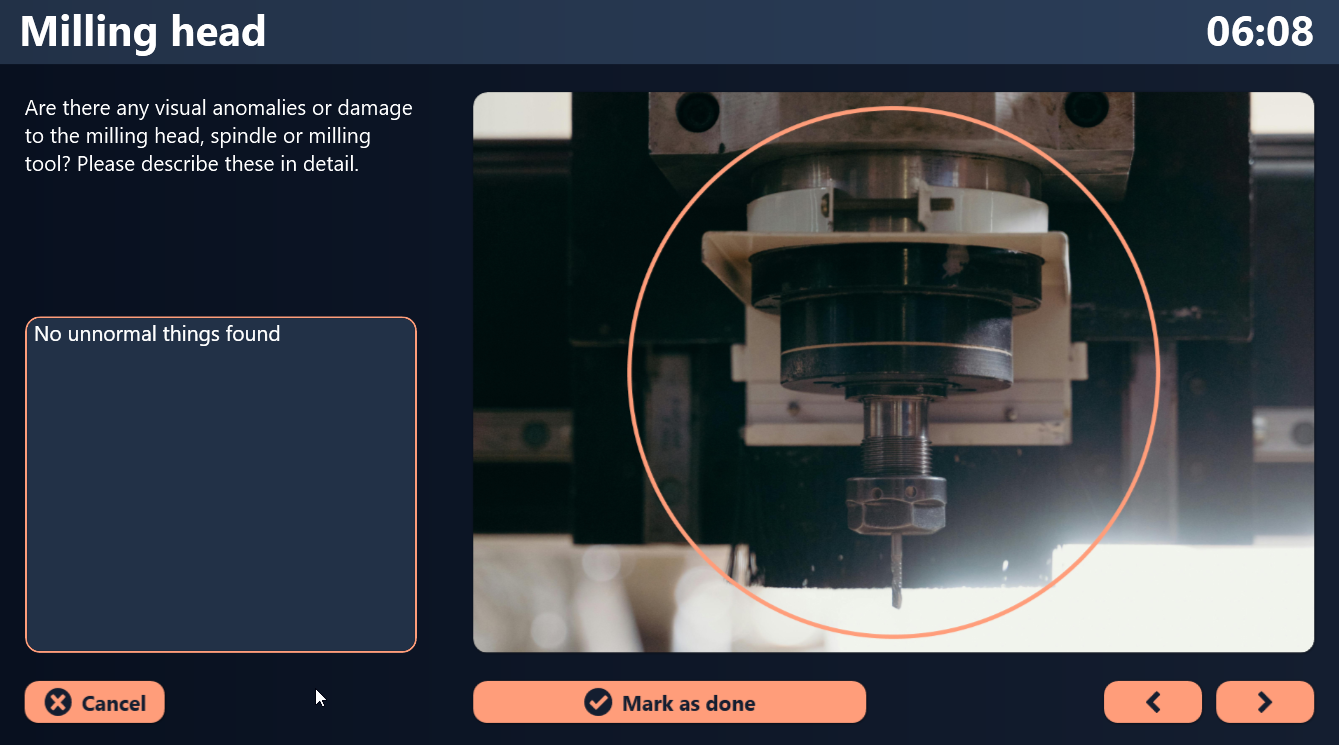
-
Tell the user to visually inspect the milling head, and record their observations in the app.
-
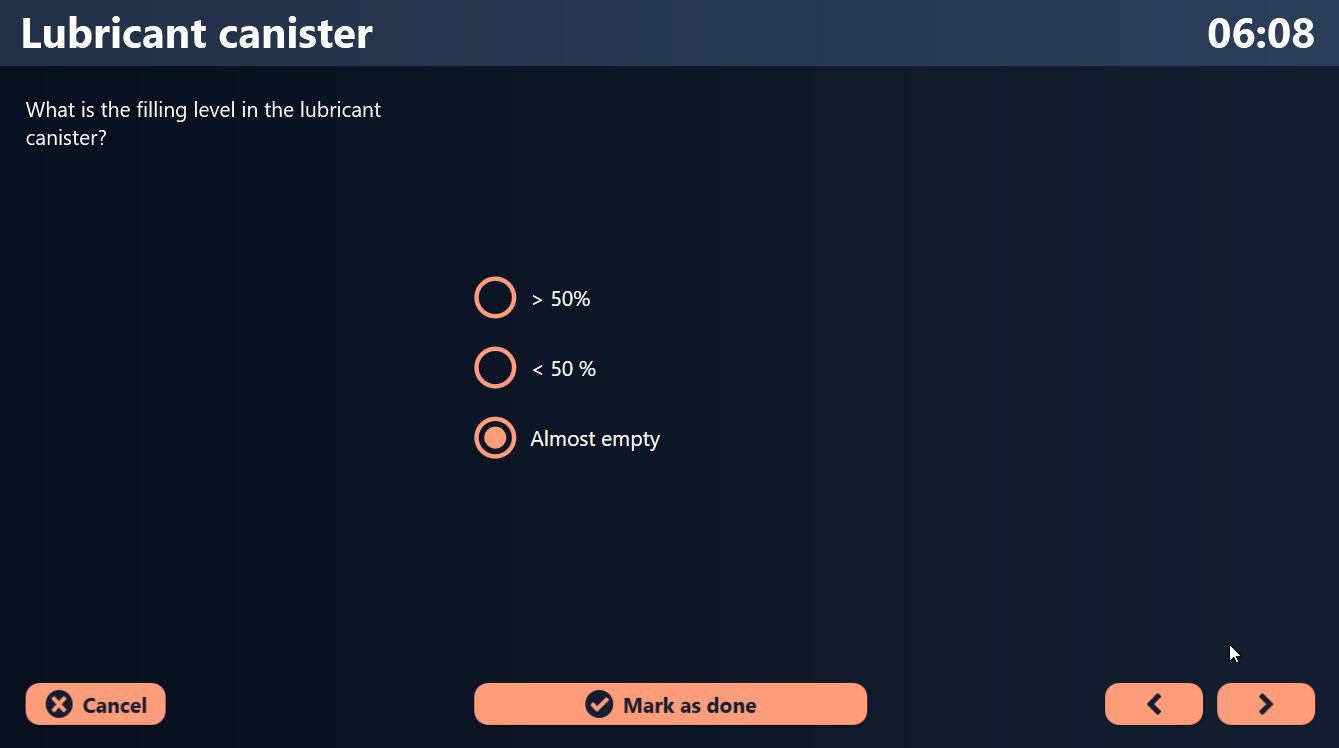
Tell the user the inspect the lubricant canister, and record the amount of remaining lubricant in the app.
How to define audits
Audits are defined by two tables: AuditTemplateHeader and AuditTemplateItem. These tables specify the structure and content of every audit.
In our example, we used Peakboard Hub to store these tables. But you can any storage solution that is supported by Peakboard.
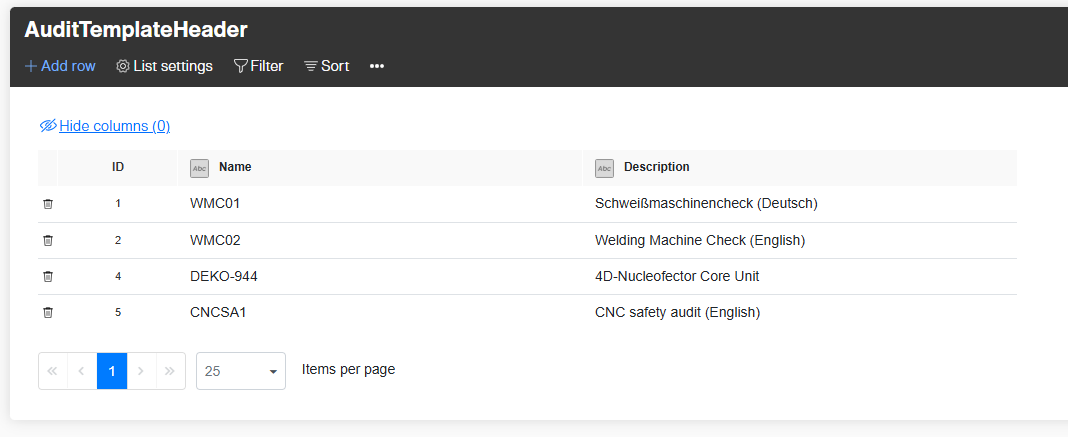
The AuditTemplateHeader table
The AuditTemplateHeader table is a list of all the audits. It contains one row for each audit. Each row has two columns:
| Column | Description |
|---|---|
Name |
The name of the audit. |
Description |
A short description of the audit. |
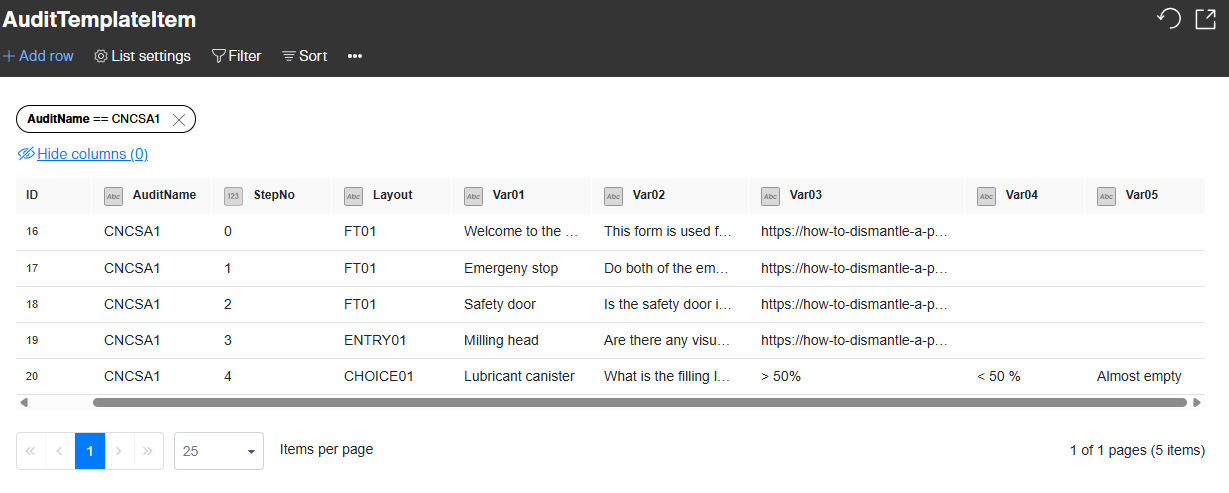
The AuditTemplateItem table
The AuditTemplateItem table defines the steps of all the audits. Each row represents a single step in an audit. The following is an overview of all the columns in this table.
Audit name
AuditName specifies the audit that the step belongs to. Remember that the AuditTemplateItem table contains the steps for all the audits. This column tells Peakboard which steps belong to which audits.
The AuditName column must match the Name column of the corresponding audit in the AuditTemplateHeader table. Notice that CNCSA1 also appears in our example AuditTemplateHeader table.
Step number
StepNo specifies the number of the step. So the first step has StepNo 0, the second step has StepNo 1, etc. This column tells Peakboard how to order the steps of each audit.
Layout
Layout specifies the visual layout of the step. Our example CNC safety audit from before uses three different layouts:
| Layout | Description |
|---|---|
FT01 |
Text and an image. The user can only mark this step as done. No other input is possible. |
ENTRY01 |
Text and an image plus a text field. The text field lets the user enter whatever text input they want. |
CHOICE01 |
Text and an image plus a three-option multiple choice form. The form lets the user select one of three pre-determined options. |
Variables
The columns Var01 to Var05 are variable columns that specify the data for each step. Here’s an explanation of how they work.
For every layout:
Var01is the title of the step.Var02is the text instructions of the step.
If the layout is FT01 or ENTRY01:
Var03is the URL of an image that appears in the step.
If the layout is CHOICE01:
Var03,Var04, andVar05are the three multiple choice options.
It’s important to understand how the layout and variables work, because they are central to our data structure.
The three layouts mentioned above are what our example uses. But in the real world, you might use other layouts, or more layouts. It’s even possible to use 10 or 15 variables, if necessary. It all depends on your specific use case.
Audit data storage
When an audit is performed, the data for that audit run is stored in two tables: AuditHeader and AuditItem. These tables store the data for every audit run.
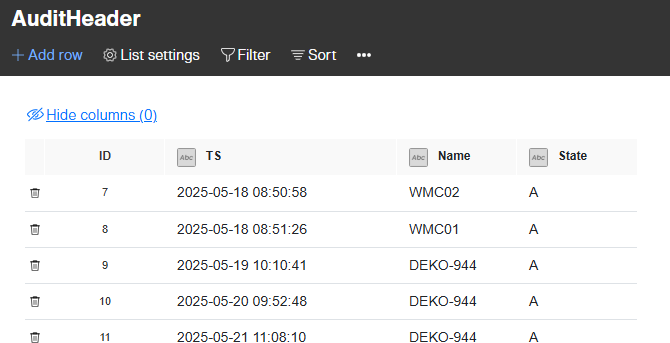
The AuditHeader table
The AuditHeader table is a list of every audit run. It contains one row for each audit run.
Here’s an overview of the columns:
| Column | Description |
|---|---|
TS |
A time stamp of when the audit was started. This column is the table’s primary key. |
Name |
The name of the audit. This matches the name used in the audit definition tables (e.g. CNCSA1 for our CNC safety audit). |
State |
The completion status of the audit. This is either A for active, or D for done. This column is automatically set to D when each of the audit’s individual steps have a State of D (in the AuditItem table). |
The AuditItem table
The AuditItem table is a list of every step in every audit run. It contains one row for each step, for each audit run.

Here’s an overview of the columns:
| Column | Description |
|---|---|
TS |
The time stamp of the audit run that this step belongs to. This is a foreign key that connects to the AuditHeader table. |
StepNo |
The step number of this step. This matches the StepNo column of the step’s definition, in the AuditTemplateItem table. |
State |
The completion status of this step. This is either A for active, or D for done. |
TSDone |
The time stamp of when this step was completed (the time when State was set to D). |
Input01 to Input05 |
Columns that store user-submitted data. |
Var01 to Var05 |
Columns that match the Var01 to Var05 columns of the step’s definition, in the AuditTemplateItem table. |
Layout |
The layout of this step. This matches the Layout column of the step’s definition, in the AuditTemplateItem table. |
Conclusion
To build an audit application, you need to understand the architecture of the underlying data structure: both the audit definition and audit data tables. That’s what we discussed in this article. In the second part of this two-part series, we will explain how to build the actual application and run the audit.