Peakboard applications are often used in paperless environments. But what if a piece of paper is necessary to identify a pallet, a package, or a warehouse bin? One answer is to use a paperless e-ink display.
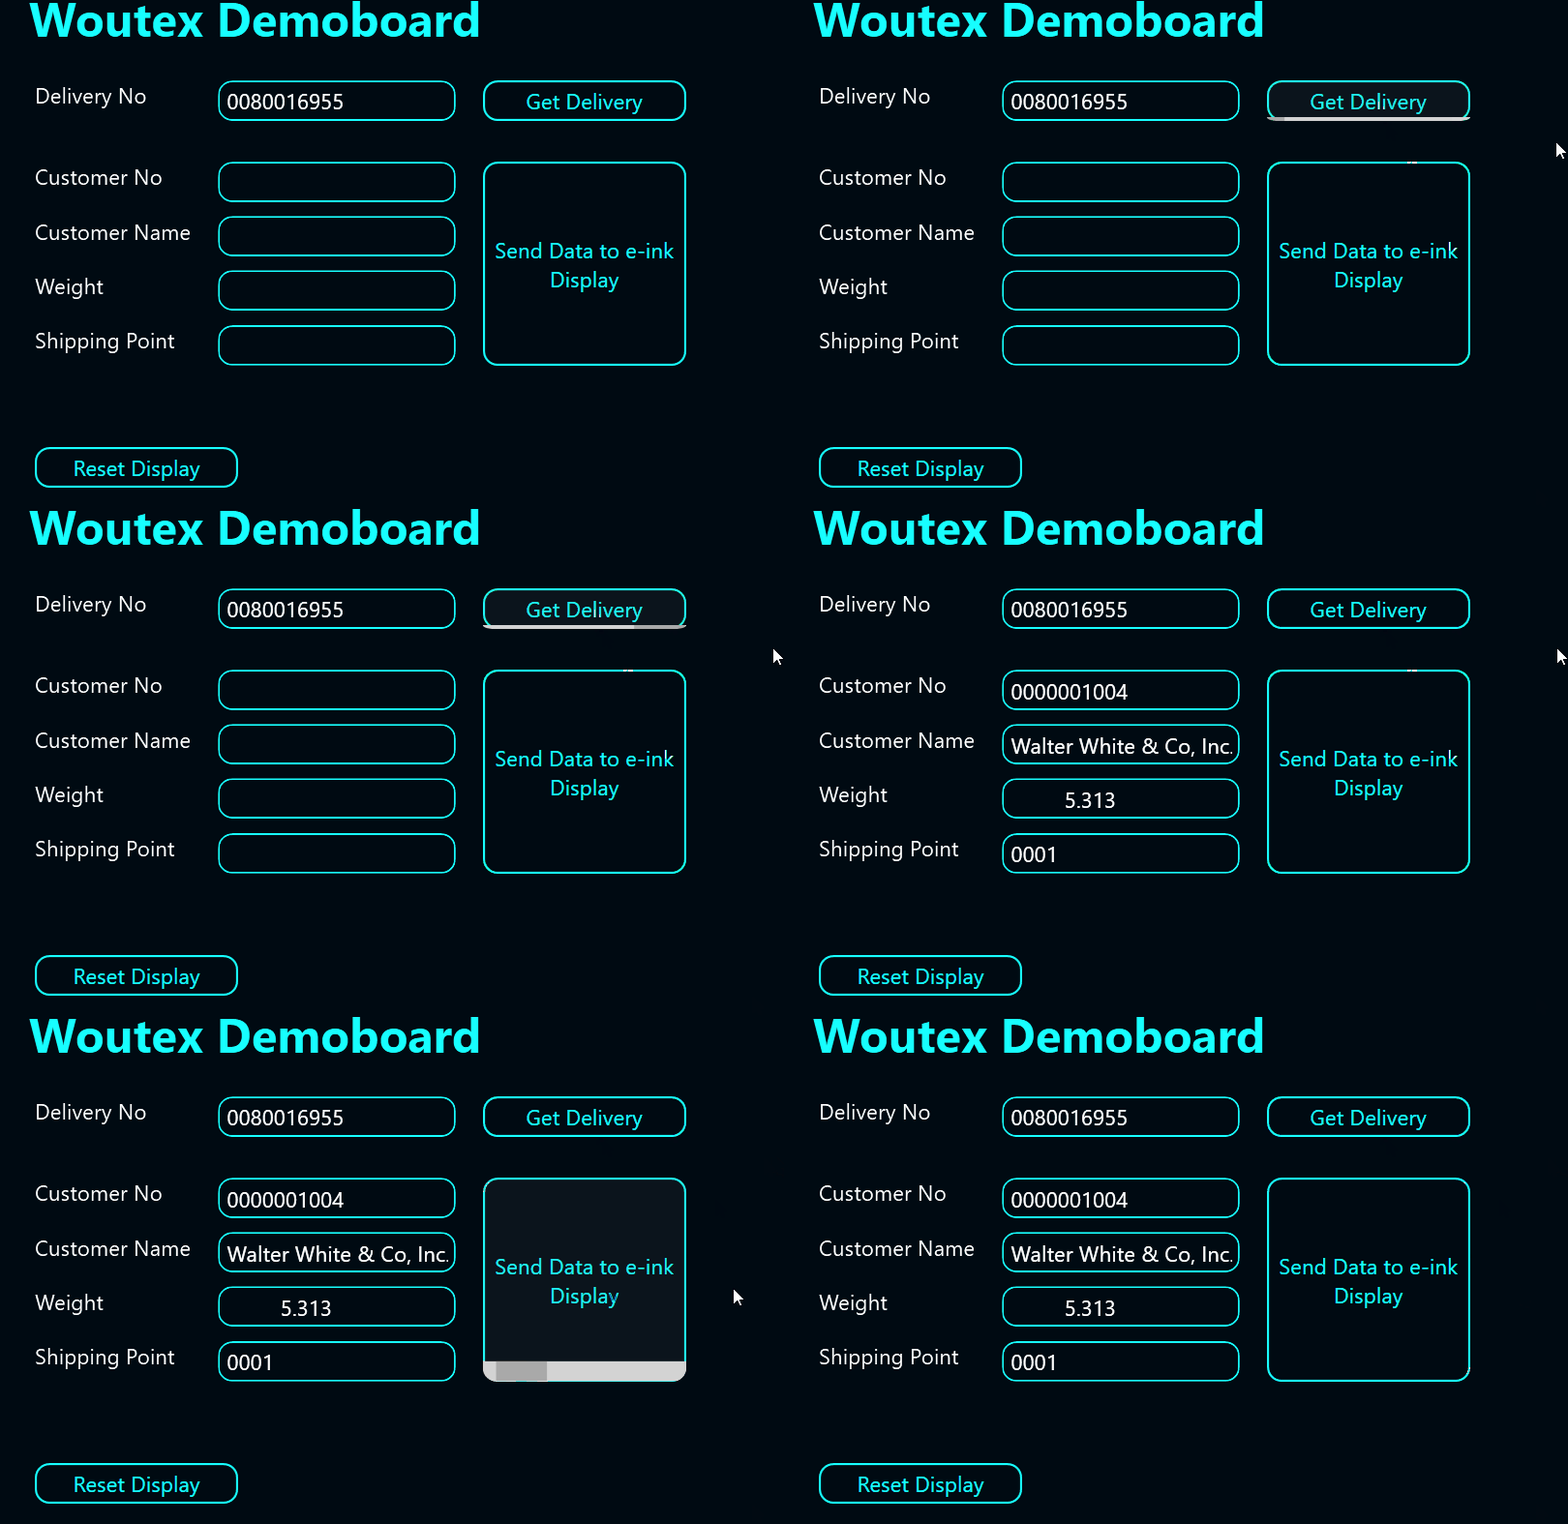
In this article, you will learn how to transfer data from a Peakboard app to a Woutex e-ink display. And to make things even more fancy, we won’t just use random information. Instead, we’ll use an outbound delivery from SAP as the logical basis for the display.

Most Woutex e-ink displays have a low-energy architecture. This means the batteries in the display will last for years. To achieve this, the display doesn’t consume any energy unless the image changes. Also, the display doesn’t use Wi-Fi. It uses a low energy radio connection to a hosting station, or central hub. This hub is connected to a regular server within the company network that exposes JSON/REST endpoints. These endpoints adjust the content of the displays.
Get data from SAP
We’ve discussed SAP connectivity many times in this blog. For our dashboard, we let the user provide a delivery number (for example, by scanning a barcode). The delivery data is then queried from SAP with the push of a button.

The following is the LUA code that gets the data from SAP. It reads two tables:
- It reads LIKP, the delivery header data, with the given delivery number.
- It reads KNA1, which contains customer master data, with the customer number from the first table query.
The resulting columns, like customer number, shipping point, weight, and customer name, are written to the text boxes on the screen. For more details on Lua and SAP, see our article on integrating LUA scripting with SAP.
local vals = {}
local con = connections.getfromid('pryG92a+fHDgAKI6hdZ6DiNGqtw=')

vals.MyVBELN = screens['Screen1'].DeliveryNo.text

con.execute("SELECT KUNNR, BTGEW, VSTEL FROM LIKP INTO @MyLIKP WHERE VBELN = @MyVBELN;", vals)

screens['Screen1'].txtShippingPoint.text = vals.MyLIKP[0].VSTEL
screens['Screen1'].txtWeight.text = vals.MyLIKP[0].BTGEW
screens['Screen1'].txtCustomerNo.text = vals.MyLIKP[0].KUNNR
vals.CustomerNo = vals.MyLIKP[0].KUNNR

con.execute("SELECT NAME1 FROM KNA1 INTO @MyKNA1 WHERE KUNNR = @CustomerNo;", vals)

screens['Screen1'].txtCustomerName.text = vals.MyKNA1[0].NAME1
Connect to the Woutex server
The easiest way to connect to the Woutex server is by using the Woutex extension, which is available through the extension dialog. For information on how to install an extension, see the Manage extensions documentation.

The data source is easy to use. Just fill in the Woutex server URL and credentials. As a rule, a data source must produce some output, even if we don’t need it. So we must click on the data load button to load a dummy column. Otherwise, the data source can’t be saved.

Build Woutex connectvity
After having installed and configured the Woutex extension, we can use functions that send data to the display or reset the display. The first parameter is always the display ID—a number that corresponds to the barcode on the display.
To send data to the display, we use the ChangeContent function. Besides the display ID, we pass in a JSON string with the following fields:
- The name of the template (as defined in the backend of the Woutex server).
- Values for all the variables in the template. In our case, these are things like order number and customer number.
Here’s an example of a JSON string we’d send:
  { "template" : "peakboard-7.5",
         "data":{
             "order-nr": "9273618",
             "customer-nr": "123456789",
             "customer-name": "Customer GmbH",
             "text-1": "Lorem ipsum dolor sit amet",
             "text-2": "consectetur adipiscing elit."
         }
  }
To build the JSON string in a way that is easy to maintain, we put placeholders in the JSON string, and we use the Placeholder Text Building Block to replace the placeholders with actual values. The actual values come from the text boxes where we stored the data from SAP. And that’s it. This call is all we need to apply a template to the display.

To reset a display, we use the ResetContent function:

Result
Getting data from SAP and sending it to a Woutex e-ink display is straightforward and can be done with only few steps. Note that when the data is transferred to the display, it usually takes between 5 and 20 seconds. The reason for this is that the radio connection to the base station is designed to save as much energy as possible.


