A while ago, we discussed how to query data from Databricks. Back then, we used the Databricks extension to call and process a RESTful HTTP endpoint for submitting a SELECT statement to the database.
In this article, we will learn how to insert data into a Databricks table. We’ll use the same endpoint for executing this command. But in this case, we won’t need any extension. We’ll just use the built-in function for calling HTTP endpoints to accomplish this task.
In our example, we will submit sensor data to the Databricks table.
The Databricks side
First, we need an access token for the call. We explain how to do this in the first Databricks article.
We also need a table to store the data. Here’s the SQL command for creating the table:
CREATE TABLE sensor_data (
timestamp DATE,
sensorid INT,
temperature DECIMAL(5, 2),
humidity DECIMAL(5, 2)
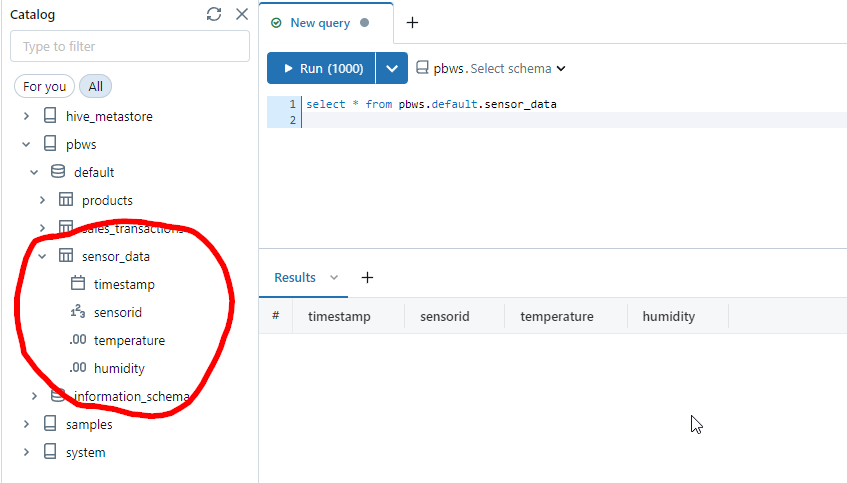
);And here’s the empty table after having created it in the Databricks workbench:
The call
The call to insert the data into the table looks like this:
INSERT INTO sensor_data (timestamp, sensorid, temperature, humidity)
VALUES ('2023-01-01', 1, -2.35, 76.29);
However, we need to make it more dynamic. That’s why we use #[XXX]# placeholders instead of fixed values:
INSERT INTO sensor_data (timestamp, sensorid, temperature, humidity)
VALUES (getdate(), #[sensorid]#, #[temperature]#, #[humidity]#);
From the first article, we know that the SQL command must be wrapped inside a JSON call, in order to be submitted to the endpoint:
{
  "warehouse_id": "fcf3504ab6b8eb3b",
  "statement": "INSERT INTO sensor_data (timestamp, sensorid, temperature, humidity) VALUES (getdate(), #[sensorid]#, #[temperature]#, #[humidity]#);"
}
Build the script
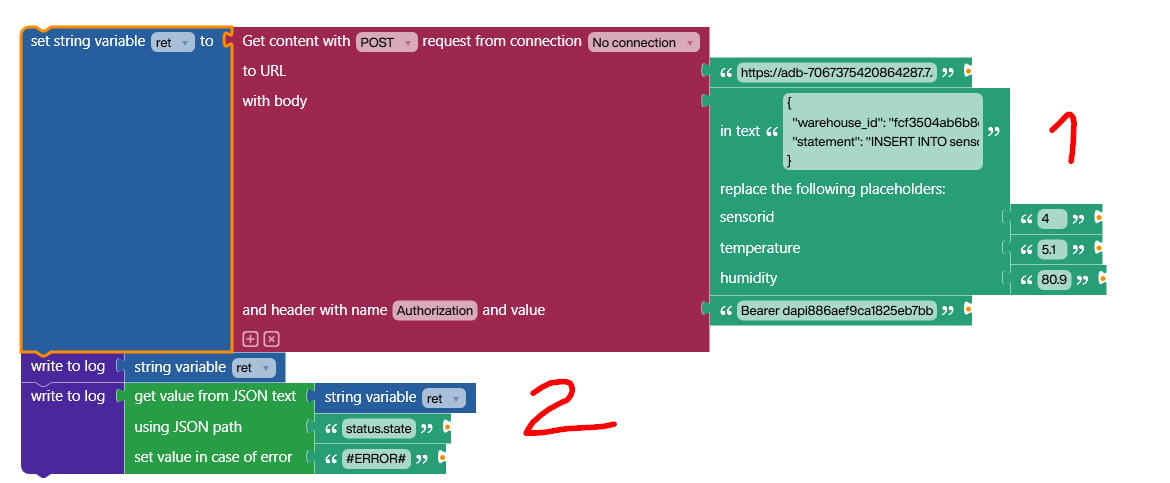
We’re using Building Blocks to create the call. The actual project is quite simple (feel free to download it here). We start with a dynamic placeholder replacement block and put in the string we prepared earlier.
The script generates sockets for each placeholder where the dynamic values can be plugged in. Of course, in our example, we still use fixed values to replace the placeholders. This is only to showcase how dynamic placeholders work.

In part 1, we submit the JSON string to the HTTP endpoint. We plug in the endpoint URL, as well as the access token.
In part 2, we process the HTTP response by using a JPath. The actual response from Databricks contains a lot of information about the call and potential errors. But if the call succeeded, the path status.state will be SUCCEEDED.
Result
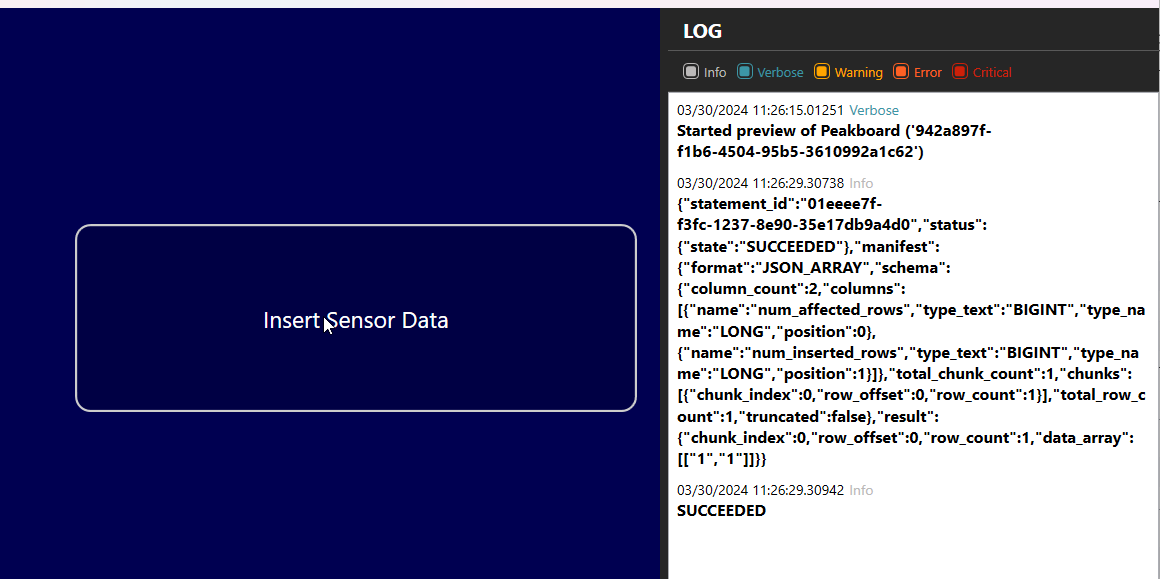
Here’s the final result. On the right side, in the log, we can see the Databricks JSON response, as well as the status.state string, which is SUCCEEDED.
A good exercise would be to implement the error case. Let’s assume the status.state string is FAILED. Then, we can use the same JPath method from before to get the error message from the JSON string. Take a look at this article on how to use JPath in Peakboard scripts.
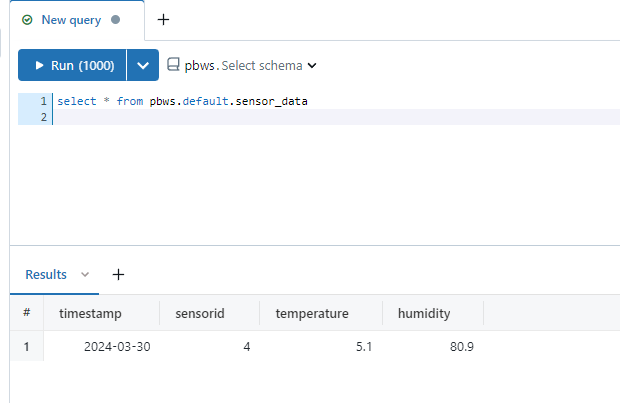
Finally, we can find the inserted data in the Databricks table. Yay!