In the first part of our series on how to build Peakboard applications with wheel.me, we learned how to connect to the wheel.me API and get information about floors, positions, and robots.
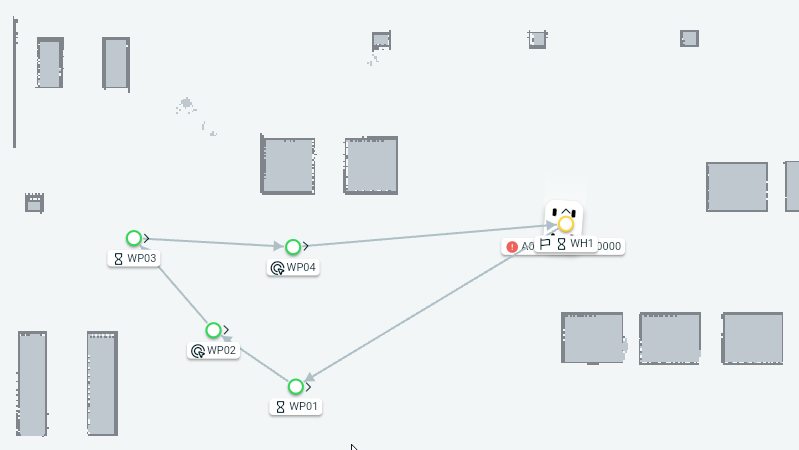
In this article, we will learn how to move the robots, and how to build a command stand for the wheel.me fleet inside a production environment. Just as a reminder, we will stick to the floor and positions of the simulation environment, as shown in this map from the wheel.me portal:
Move the robot
You can send a command to move the robot by using a function that is provided by the wheel.me extension. That is, the function is a part of the robot’s data source. To trigger the function with Building Blocks, we use the Run Function block, and select the robots list. All available functions are shown.
To command the robot to move to a certain position, there are two functions available, depending on whether we want to use the position’s name or ID. In our case, we will provide the name, so we use NavigateToPositionName.
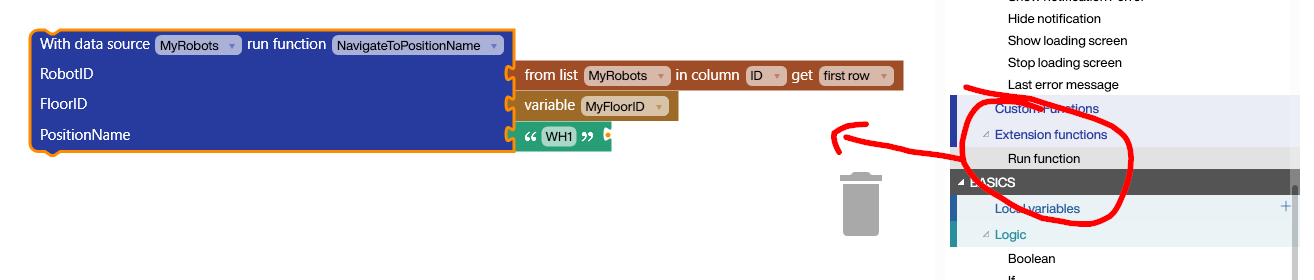
Here’s how the script works:
- The robot’s ID is taken from the first line of the robots data source.
- The floor ID is taken from a variable, in order to make things a bit more dynamic.
- The destination position is just the name. In our example, WH1 is the starting point. So, we use it to order the robot back to the starting point.
For all the script lovers out there, here is the same function, but in LUA:
data.MyRobots.NavigateToPositionName(data.MyRobots.first.ID, data.MyFloorID, 'WH1')Build an application
In this part, we’ll take a look at a simple application. Let’s say that the robot’s mission always starts at position WH1, and we want it to go to 4 other points, WP01 to WP04, in a circle.
As the following screenshot shows, the user can enable or disable certain positions. If a position is disabled, the robot will skip it and go to the next available position. When the worker at a certain workplace is finished, we click the Next Goal button to command the robot to the next position.
An icon next to the position indicates where the robot is currently located. On the right side, the current metadata of the robot is shown (like the coordinates, the next position, and the current state).
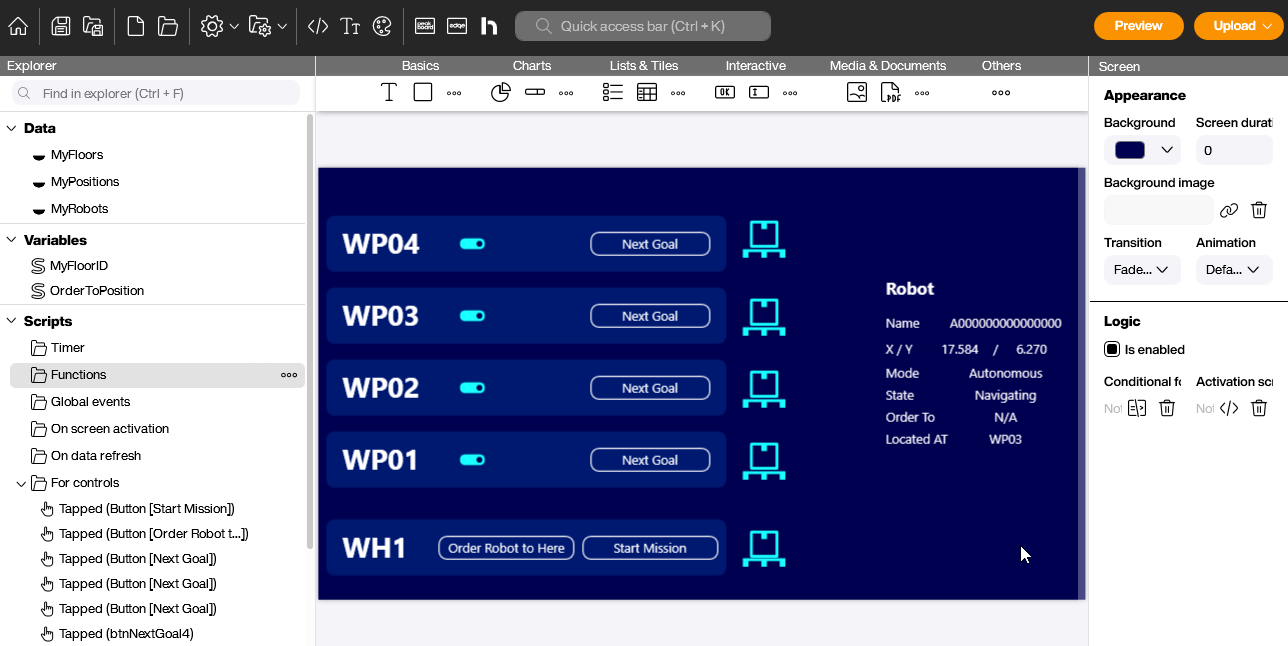
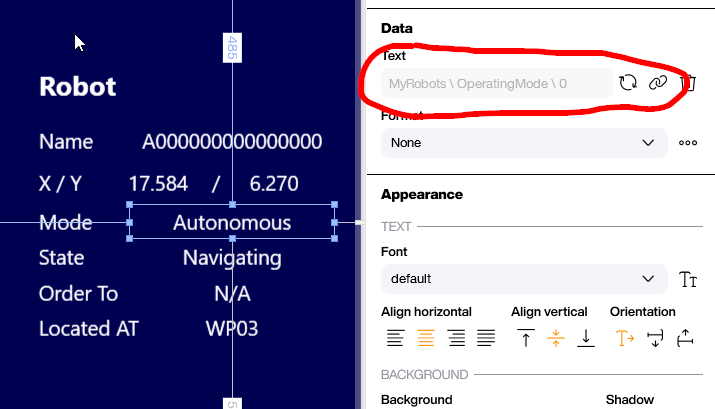
The robot information on the right side is directly bound to the robot’s data source. It shows how the robot is moving and at the position it’s currently located at.
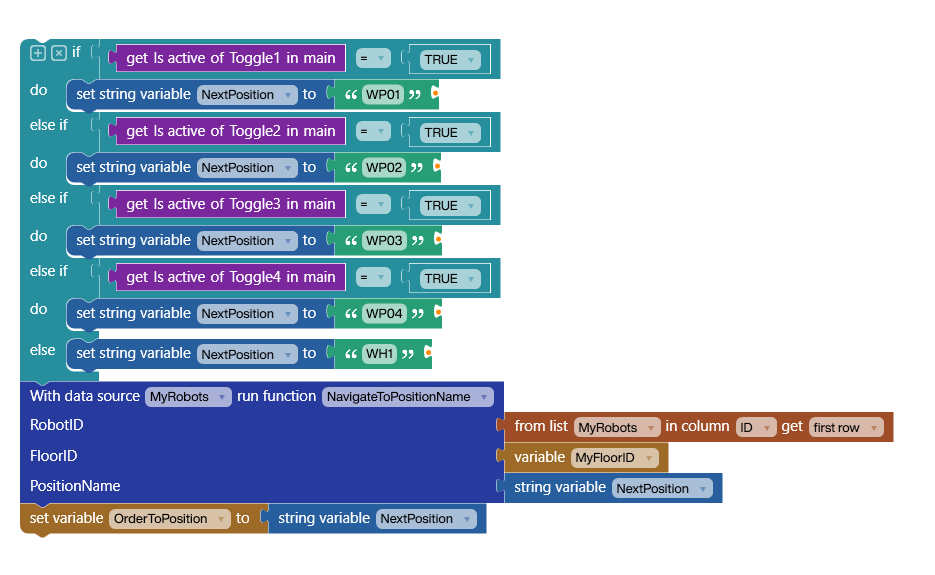
Let’s see what’s going on behind the Start Mission button. We can see in the Building Blocks that the script works like this:
- We check if any of the workplace-related toggle buttons are active.
- We set
NextPositionaccordingly. - We send a command for the robot to move to
NextPosition, using the wheel.me API. - We set a separate variable to
NextPosition.
Other workplaces work similarly, but only check the remaining toggle button and workplace.

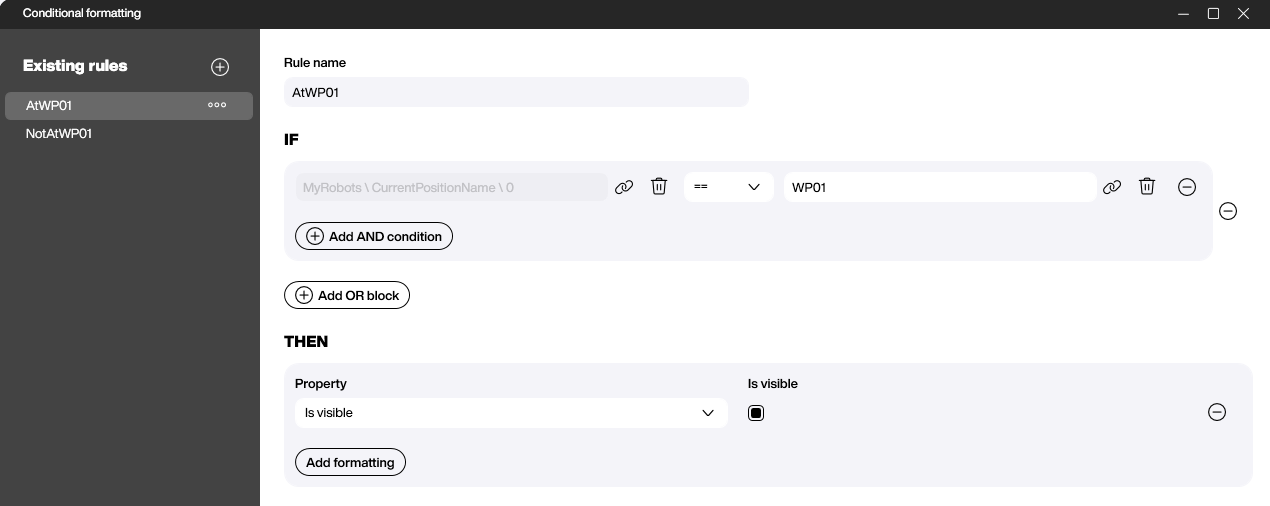
The following screenshot shows the icon. There’s an icon at every position, and we put it to visible = true if the icon’s position is the same as the robot’s position.
Result
In the following video, we can see how the app works. On the left is the Peakboard app. On the right, there’s the wheel.me web portal.
- The mission is started by clicking the button.
- The command is sent to wheel.me API and the robot moves to the new position WP01.
- After the robot has left the WH1 position, the icon disappears and the X/Y coordinates change constantly.
- As soon as the robot is about to arrive at WP01, the icon also pops up at the WP01 place in the app.