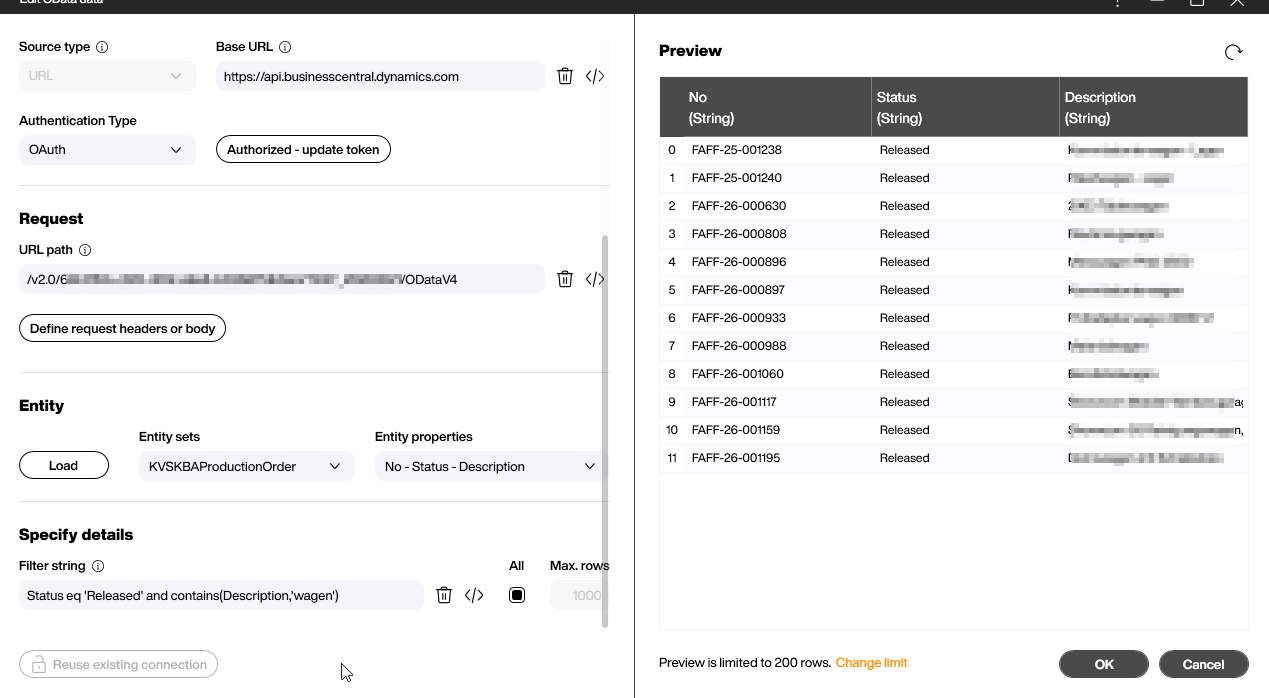
Microsoft Dynamics 365 Business Central is where a lot of mid-market manufacturers land when SAP feels like too much ceremony. It stores what any ERP does - items, purchase orders, sales orders, production orders, stock movements - and exposes almost all of it through a REST/OData API secured by the same Azure AD identity we already use for the rest of our Microsoft stack. That combination makes it a natural backend for Peakboard the moment we step out of the office and onto the shop floor. Logistics is the obvious first fit: a goods-in screen reading open purchase orders straight from Business Central, a picker’s terminal walking through outstanding sales orders line by line, an andon board driven by item stock levels. Production is the next: a tile next to the line showing the active production order, the target quantity and how much has been reported back - so the operator sees ERP truth without ever alt-tabbing into it. Business Central plus Peakboard earns its keep the moment the real-time decision the operator has to make already has its source of truth in the ERP. The rest of the playbook walks through exactly how.
The one-time Entra setup
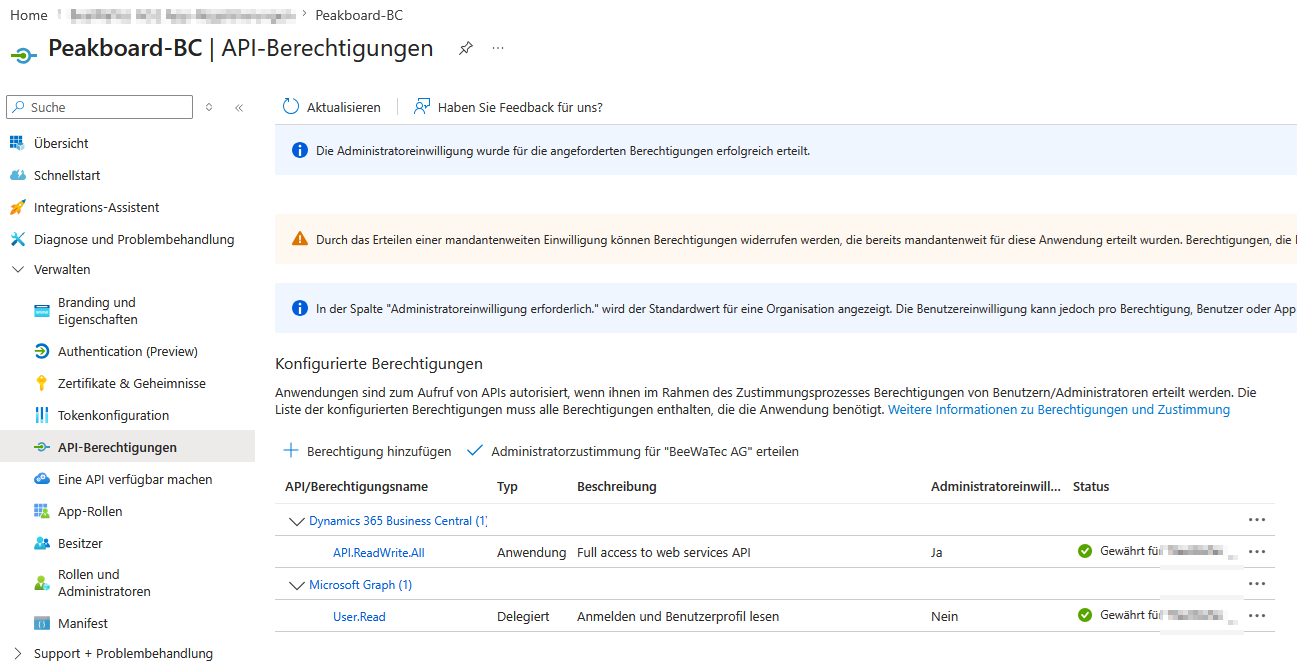
Before Peakboard can call the Business Central API we need an identity to call it as. In the Microsoft Entra admin center we register a new application - we called ours Peakboard-BC - and under API permissions add two entries: Dynamics 365 Business Central > API.ReadWrite.All as an Application permission (which gives Peakboard full read/write access to the BC web services API) and Microsoft Graph > User.Read as a Delegated permission for sign-in. Both need an admin to click Grant admin consent for the tenant before the green ticks land next to them.
While we are still in the portal we generate a client secret under Certificates & secrets > New client secret and copy the value straight away - it is only shown once. That secret, together with the tenant ID and the application (client) ID from the Overview page, is what Peakboard will use to authenticate against the API in the next section.
The Business Central side
Entra now knows about the app, but Business Central does not - and until it does, no amount of valid tokens will get us in. Inside the Business Central client we open the search bar and type Microsoft Entra Applications. That opens the list of external apps that BC will accept API calls from. We add a new row, paste the client ID from our Entra app, set State to Enabled, and click Grant Consent to approve the two-way trust from the BC side as well.
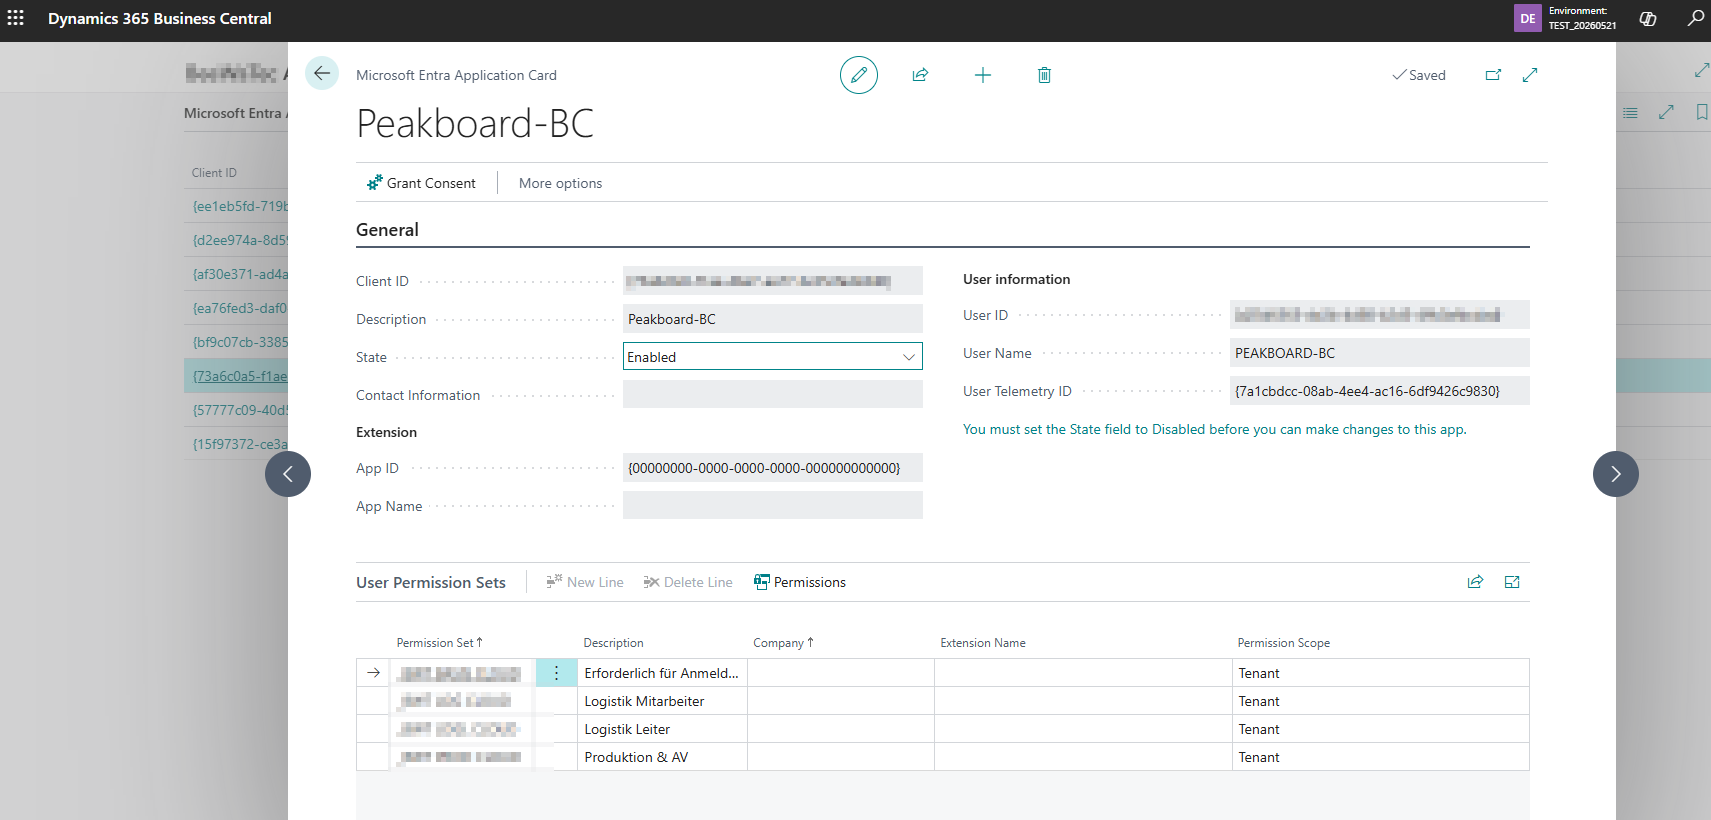
The half that is easy to forget is the User Permission Sets table further down the card. Anything the app is allowed to do inside Business Central runs through those sets: leave the table empty and every API call authenticates fine and then comes back with nothing but “insufficient permissions” errors.
Wiring up the OData data source
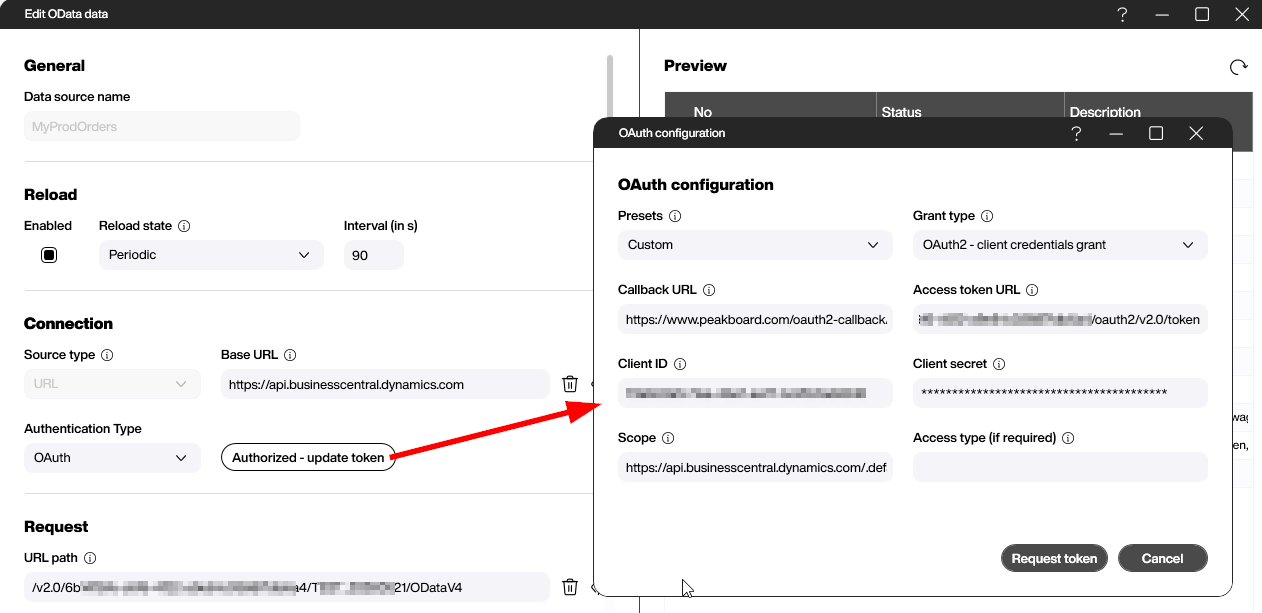
With the app registered on both sides and the client credentials in hand, we can finally point Peakboard at the API. In the Designer we add an OData data source, set Base URL to https://api.businesscentral.dynamics.com and switch Authentication Type to OAuth. Clicking through into the OAuth configuration is where most of the actual work lives:
- Grant type: OAuth2 - client credentials grant (the service-to-service flow that matches the Application permission we granted in Entra).
- Access token URL:
https://login.microsoftonline.com/<TenantID>/oauth2/v2.0/token- swap in the tenant ID from the Entra overview. - Client ID and Client secret: the values we saved off the app registration.
- Scope:
https://api.businesscentral.dynamics.com/.default- the.defaultsuffix tells Entra to use whatever permissions we already consented to.
Hit Request token, get an Authorized state back, and the hard part is behind us.
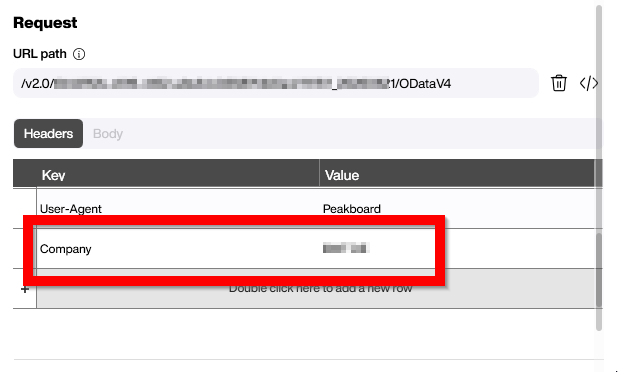
The URL path on the data source becomes /v2.0/<tenant-ID>/<environment-name>/ODataV4 - the environment name is whatever the target Business Central instance is called (a sandbox in our case). Business Central also needs a company hint on every request, which the Designer takes as a request header. Under Headers we add a Company key with the company code as its value.
From here the data source behaves like every other OData source in the Designer. Clicking Load in the Entity section pulls the $metadata document and populates the Entity sets dropdown with everything Business Central exposes to us. In our example we pick KVSKBAProductionOrder, choose the columns we care about (No, Status, Description), and drop a standard OData filter into the Filter string box - Status eq 'Released' and contains(Description,'wagen') in our screenshot, narrowing the preview to released production orders whose description contains the word “wagen”. The Preview panel on the right fills in with real rows straight from Business Central.