
In early 2024, we discussed how to access Microsoft Dynamics CRM data. Since then, Microsoft has changed the backend, and the architecture for handling extensions on the Peakboard side has shifted significantly. As a result, starting with Peakboard version 4.1, the Dynamics Extension is no longer available. It has been officially replaced by the Dataverse extension. In this article, we will explore how to use the new Dataverse extension.
One of the main differences is that the new extension supports only client secret and app registration for authentication — no more username/password. When accessing Dataverse data, you can either query an entity directly or use FetchXML, which is a common and powerful way to define Dataverse queries.
Setting up the necessary requirements
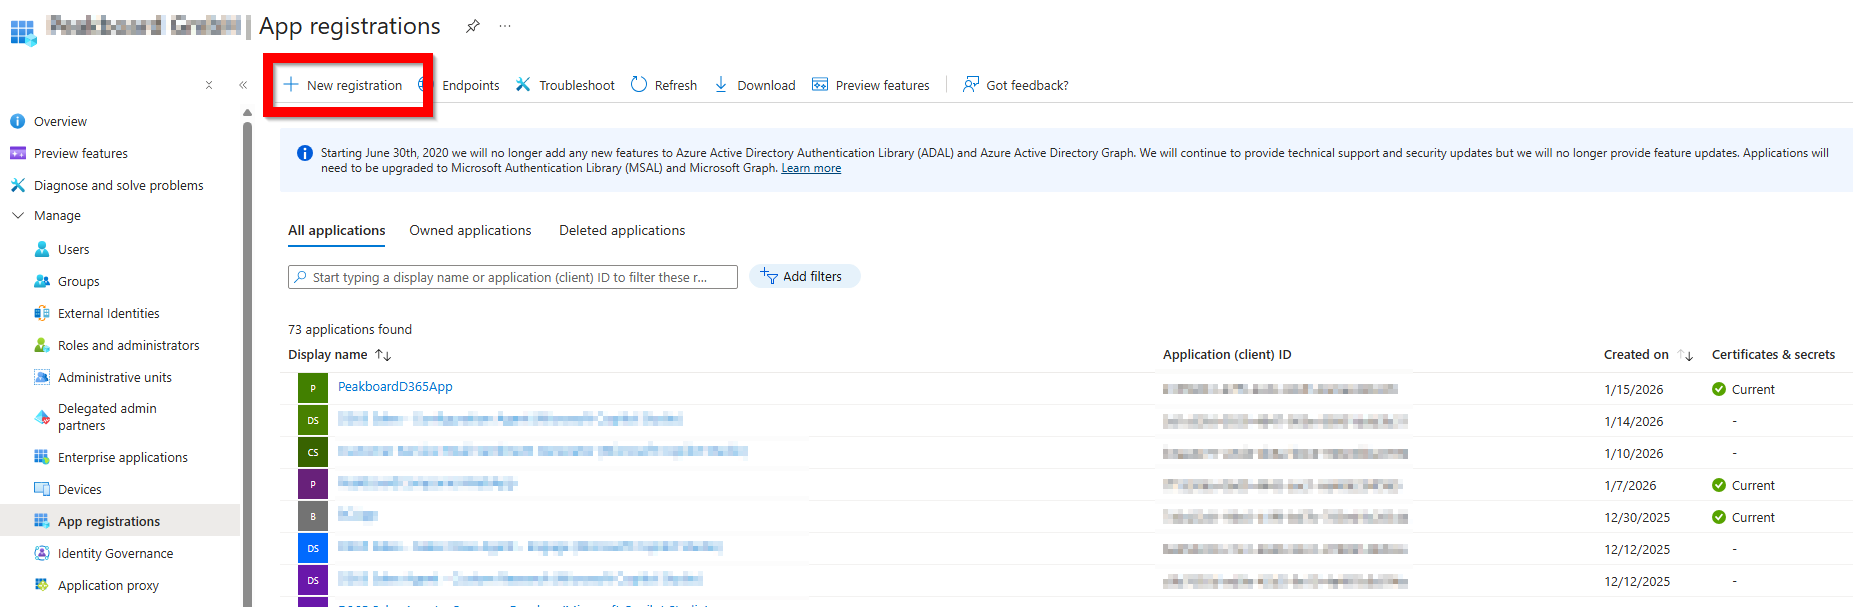
The security layer of Dataverse is built on Microsoft Entra ID. We need to create a registered app there.
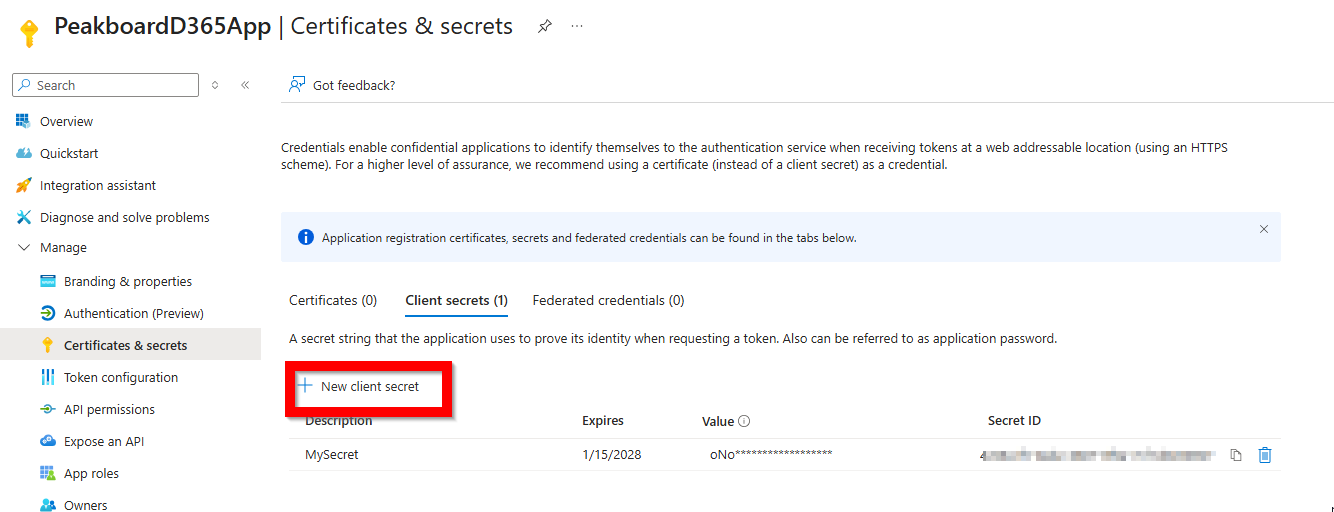
Within the registered app, we need to create a new client secret and note down the secret value for later use.
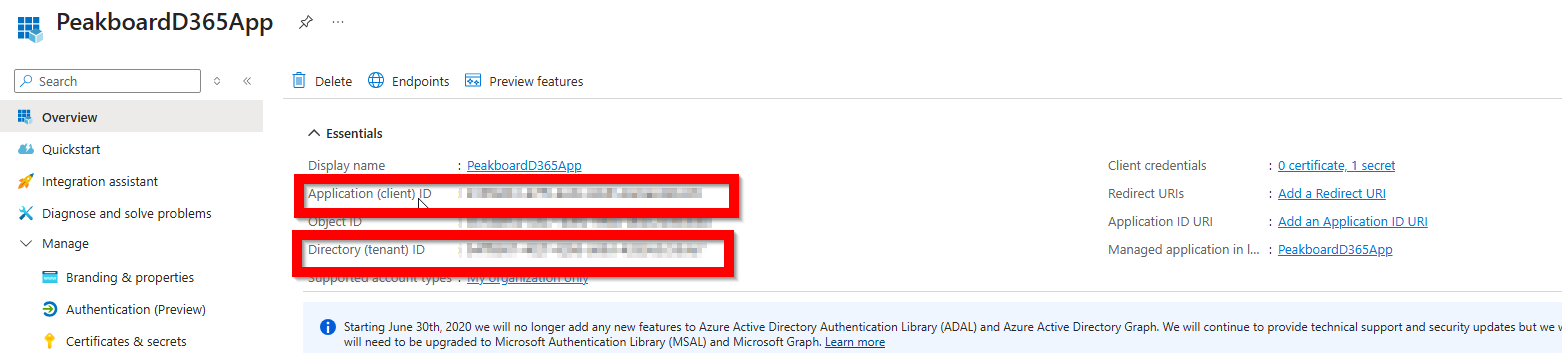
Besides the client secret, we also need the Client ID and Tenant ID.
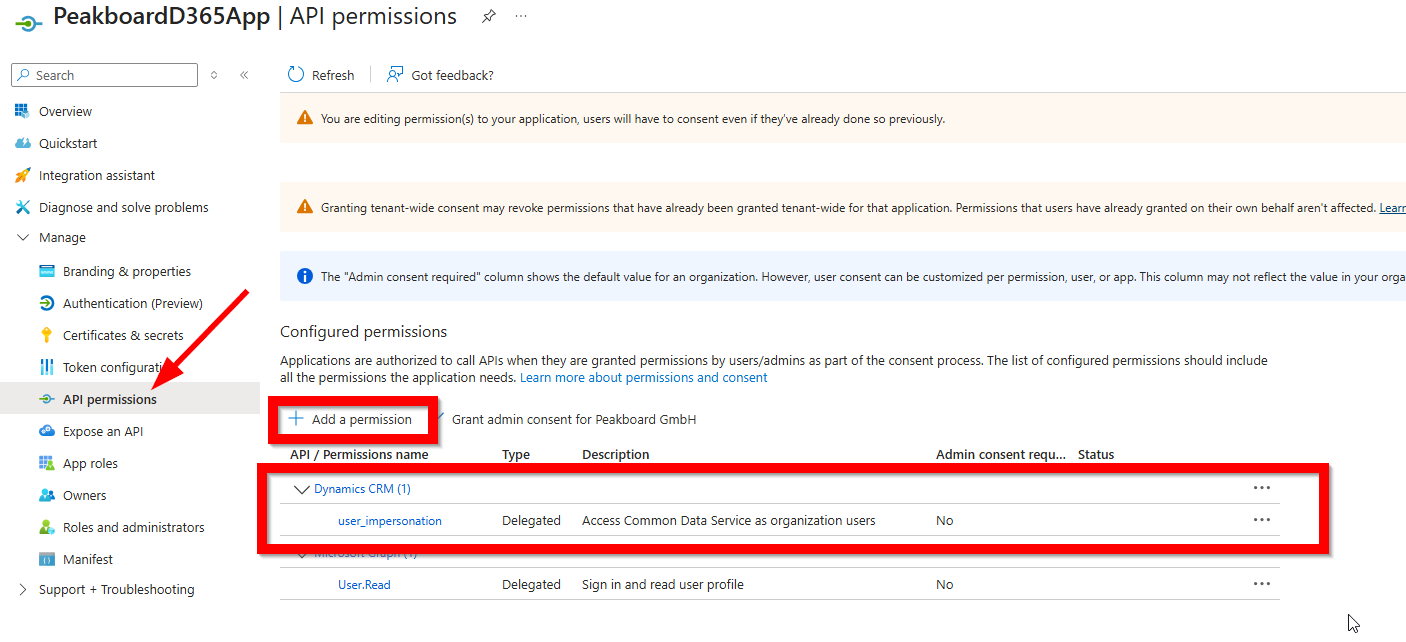
For the API permissions, we need to add “user_impersonation” from the “Dynamics CRM” area.
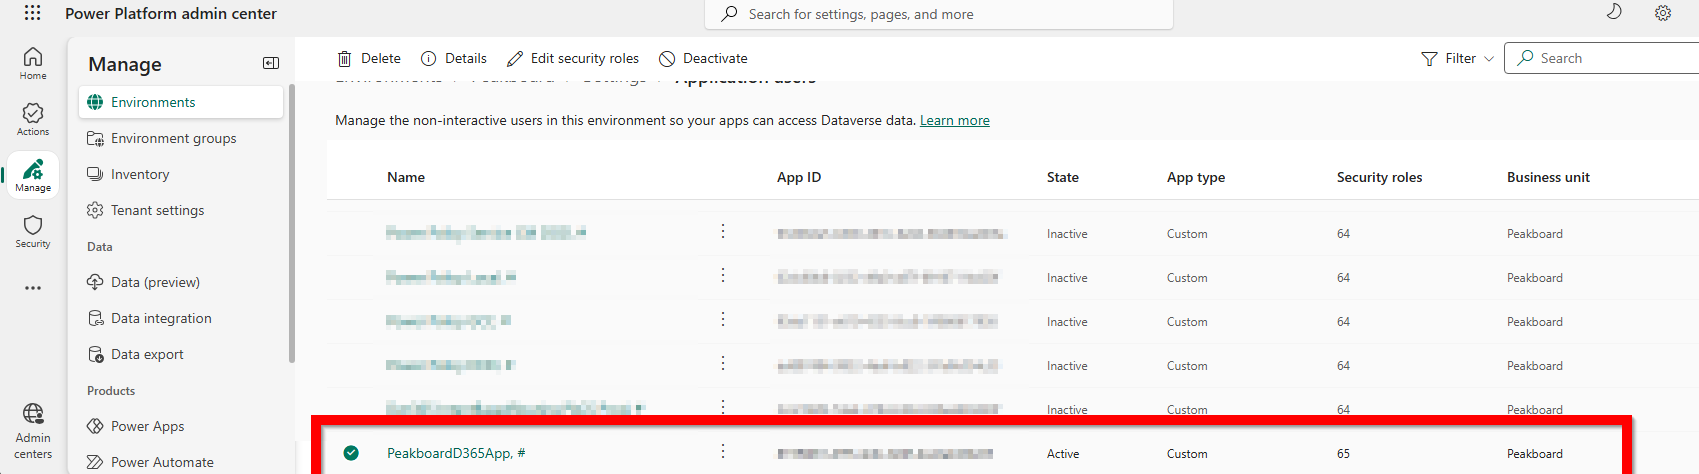
The final step is to set the correct permissions and roles in Power Apps. Follow these steps to link your Entra ID app to a specific environment and apply the necessary permissions:
Select the Environment:
- Log in to the Power Platform admin center.
- In the left-hand navigation pane, select Manage -> Environments.
- Click on the Name of the environment where you want the app to have access.
Navigate to Application Users:
- On the environment details page, select Settings from the top command bar.
- Expand the Users + permissions section and select Application users.
- Create the New App User:
- Select + New app user on the command bar.
- Click + Add an app in the side pane that appears.
- Search for your application by its Name or Application (Client) ID. Select it and click Add.
Assign Business Unit and Security Roles:
- Business Unit: Select the appropriate business unit (usually the root business unit).
- Security Roles: Click the Edit (pencil) icon next to Security roles. Choose the roles that grant the necessary permissions (e.g., System Administrator for full access or a custom role for restricted access).
- Click Save and then click Create.
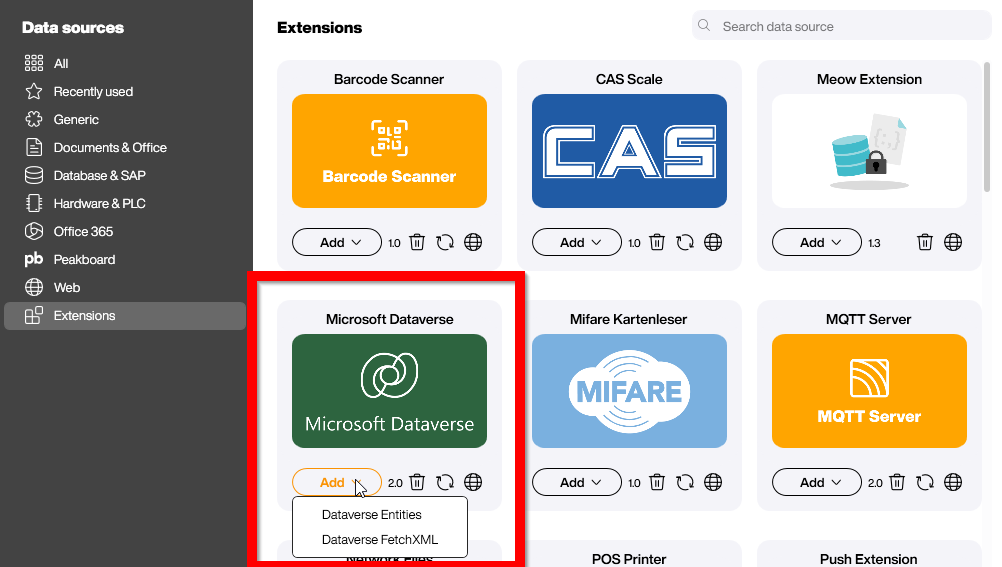
First steps with the Dataverse extension
The Dataverse extension can be installed from the extension area within the data source dialog. After installation there are two customer lists available:
- The
Dataverse Entitieslist downloads entity data with the defined attributes. It’s ideal for entities that don’t contain too much data. - The
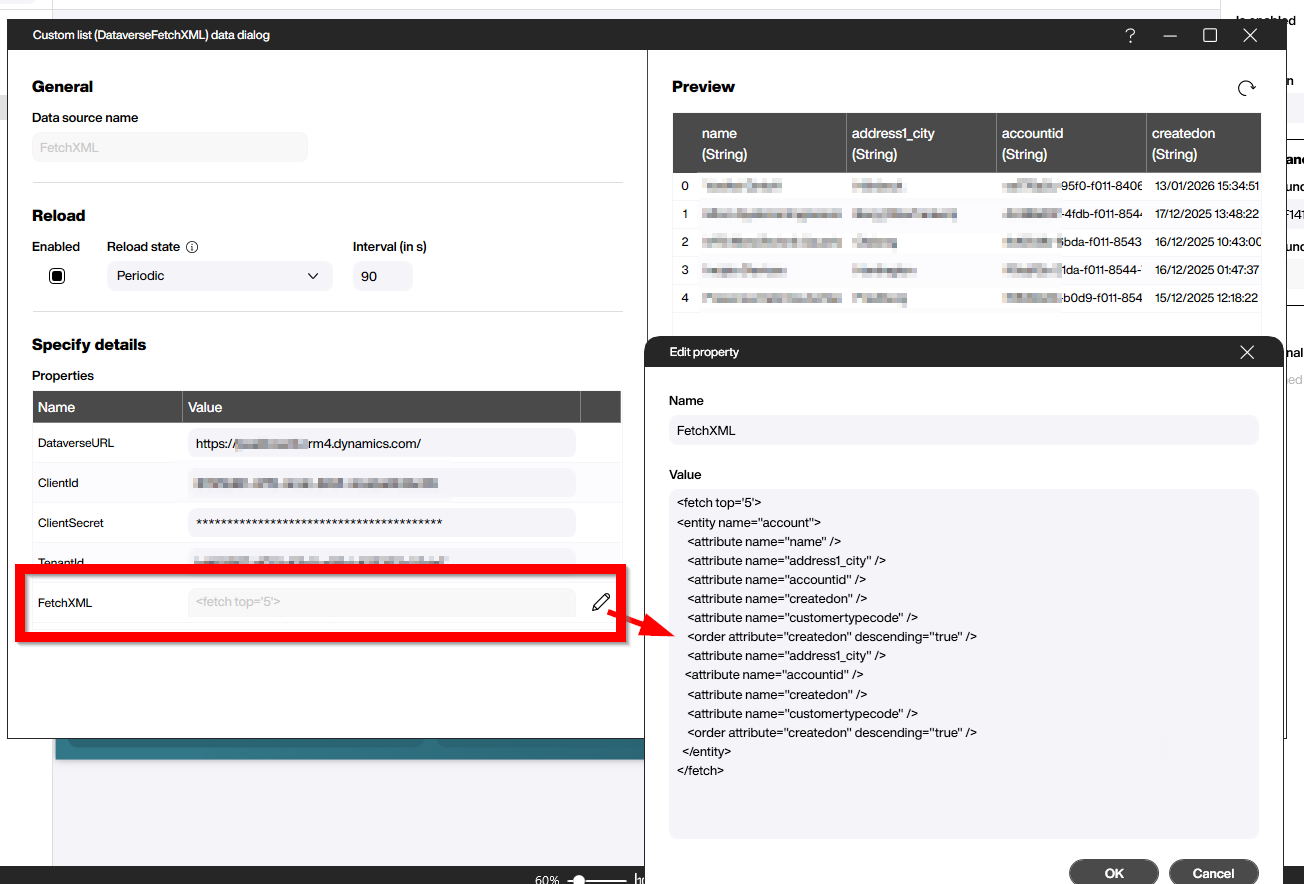
Dataverse FetchXMLlist can be used for complex queries that involve multiple entities or require advanced filtering.
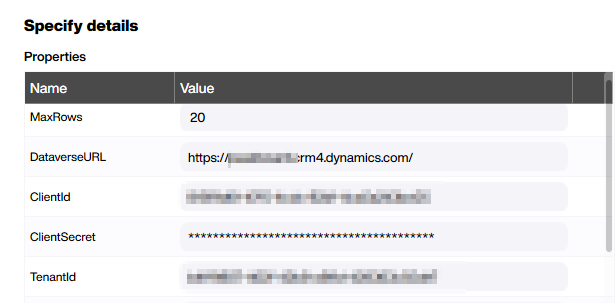
Let’s start with the simpler option: Dataverse Entities. For this, we need to provide three values from the setup earlier: Client ID, Tenant ID, and Client Secret. Additionally, we need to provide the URL to the backend. For a Dynamics CRM backend, the most common URL is MyCompany.crm4.dynamics.com. If the URL is unclear, you can find it in the environment settings where you added the app user.
For the data definition, we need to provide the name of the entity and the attributes to download. It’s important to use the logical names of these artifacts—these are lowercase, technical names. The values are case-sensitive. Attributes must be separated by commas with no spaces between them.
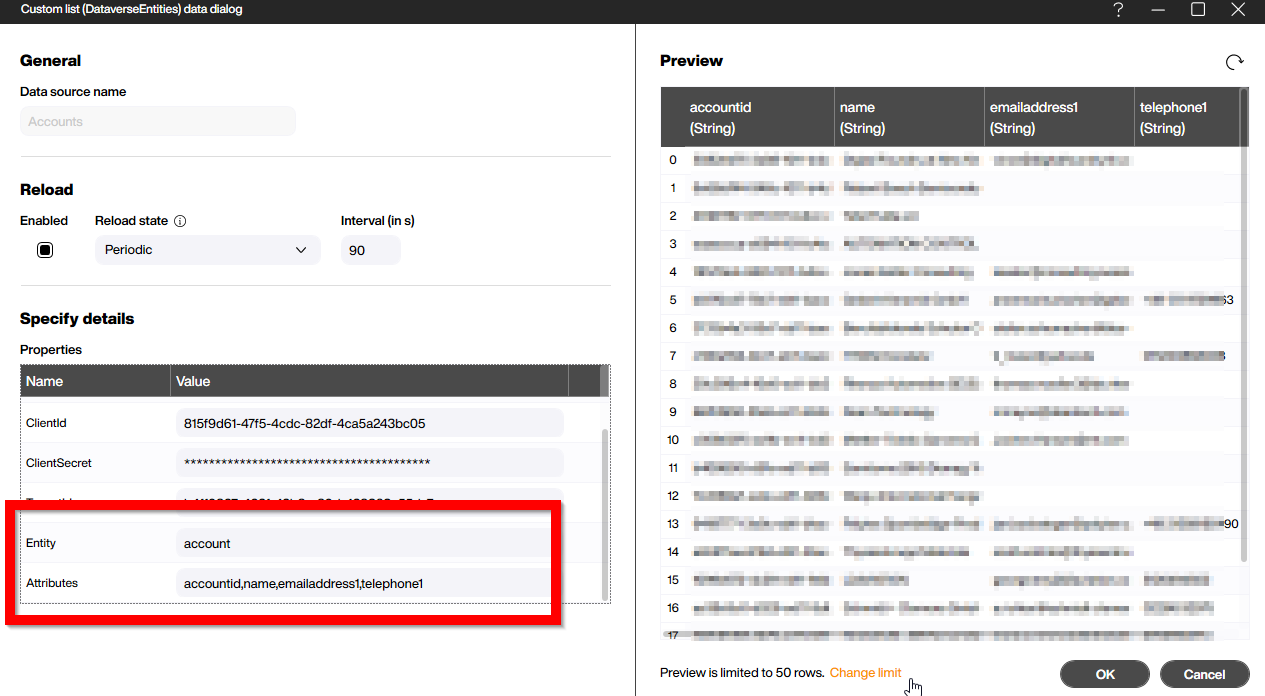
All Dataverse data types are mapped to Peakboard data types. Linked entities are represented by the GUID, so you can easily create a second data source with the linked entity and then join them using a dataflow. For option sets, the plain text value is used as the payload, not the underlying numeric value.
FetchXML
For more sophisticated queries, you can use the second data source available in the Dataverse extension. Like the entities list, it functions similarly for data access, but instead of selecting entities and attributes, it provides a multiline text field where you can enter FetchXML to define your query. FetchXML supports multiple entities, data ordering, and aggregation. For a good introduction, check out this tutorial.
Conclusion
The new Dataverse extension is designed to cover all common requirements for extracting data from the Dataverse backend. FetchXML, in particular, handles even complex cases with ease. With the help of the XRM Toolbox, creating the necessary XML should be straightforward. Sometimes it may require a bit of patience, but the results are worth it.