
Over the past few years, Snowflake has become one of the world’s leading vendors for cloud-based data warehousing and BI backends. Snowflake combines flexibility, governance, and impressive elasticity—all in one platform—and all while remaining remarkably approachable for new teams.
In this article, we’ll explain how to connect a Peakboard application to a Snowflake database, by using an ODBC driver. (However, there may be other options for connecting to Snowflake.)
Snowflake offers a JSON-based REST API and a full range of language-specific connectors. Check out their REST API docs to learn more, and to compare the different interfaces and find the one that’s most suitable for your application.
Install the ODBC driver
Our first step is to download the ODBC driver for Windows (be sure to read the ODBC driver download docs). Once it’s downloaded, we install the driver on two machines:
- The machine with Peakboard Designer. This is the machine where we’ll build the Peakboard app on.
- The Peakboard Box or Peakboard BYOD instance. This is the machine where the Peakboard app will run on.
We explained the ODBC setup process for Peakboard in a previous article. Check it out for the full step-by-step guide.
During installation, make sure to select the correct architecture (either 32 or 64 bit) for the Peakboard runtime. And make sure to keep the driver updated—Snowflake regularly releases new drivers with security patches and performance improvements.
Set up the Snowflake database
In the Snowflake backend, we manually create a new table called ACLOG, which
our example app will use:
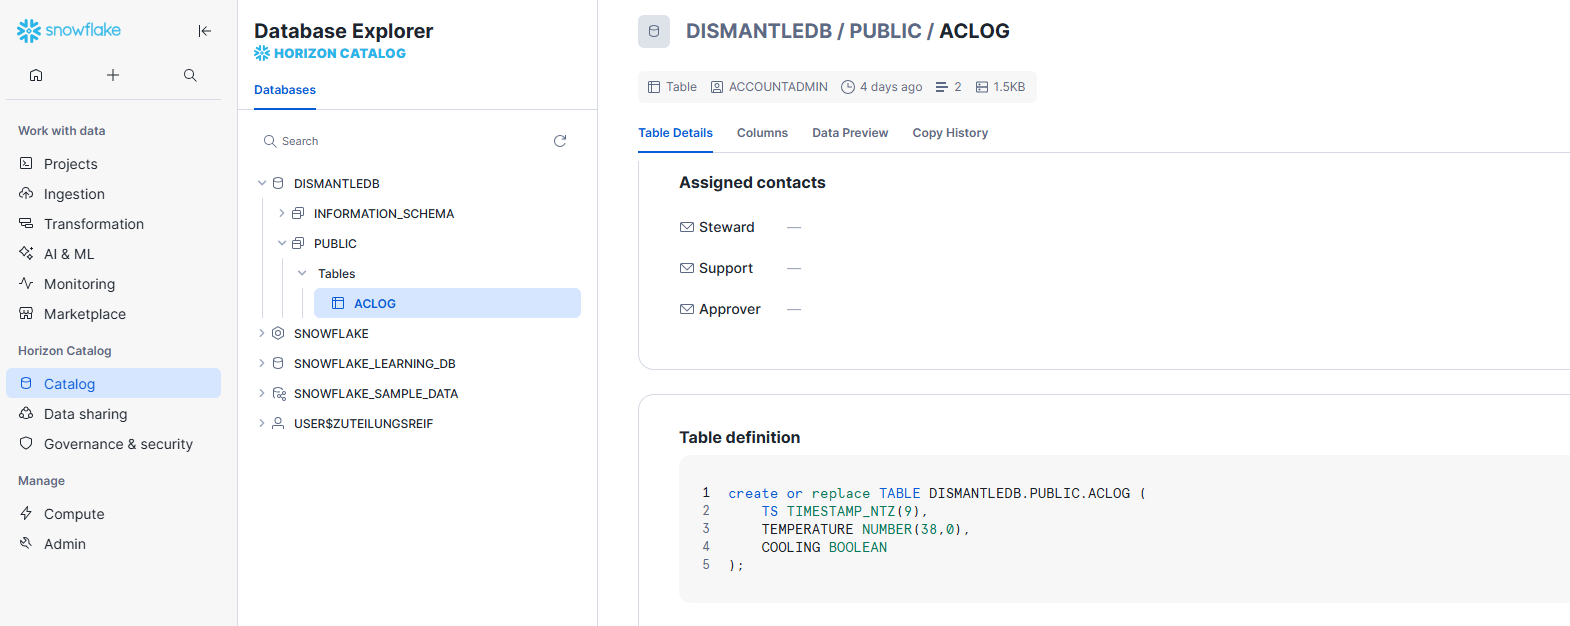
The table contains time series data from an air conditioning system. It has the following columns:
TS, the timestamp.TEMPERATURE, the temperature.COOLING, a boolean for whether or not the A/C is actively cooling.
This app idea is based on an OPC UA article we did two years ago, about how to connect to an A/C via OPC UA.
For production workloads, you would typically create the table through an automated deployment script, apply proper clustering keys, and enable time travel retention for safer rollbacks and audits.
Create the connection string
We need a connection string to connect to our Snowflake database. Here’s the connection string that we use for our database:
Driver=SnowflakeDSIIDriver; Server=VAAHZZD-XF03787.snowflakecomputing.com; UID=zuteilungsreif; PWD=supersecret; Warehouse=COMPUTE_WH; Database=DISMANTLEDB; Schema=PUBLIC; Role=SYSADMIN;You can use our connection string as a template, and replace the parameters with
your own server, UID, etc. To learn more, check out the official ODBC
connection parameters
documentation.
The document also explains how to add additional settings, like
Authenticator=externalbrowser or Tracing=6, for troubleshooting purposes.
The docs will come in handy, so keep them open while you’re configuring the
driver and documenting your setup!
Create the ODBC data source
Now, the hard part is over. Next, we add a new the ODBC data source in Peakboard Designer:
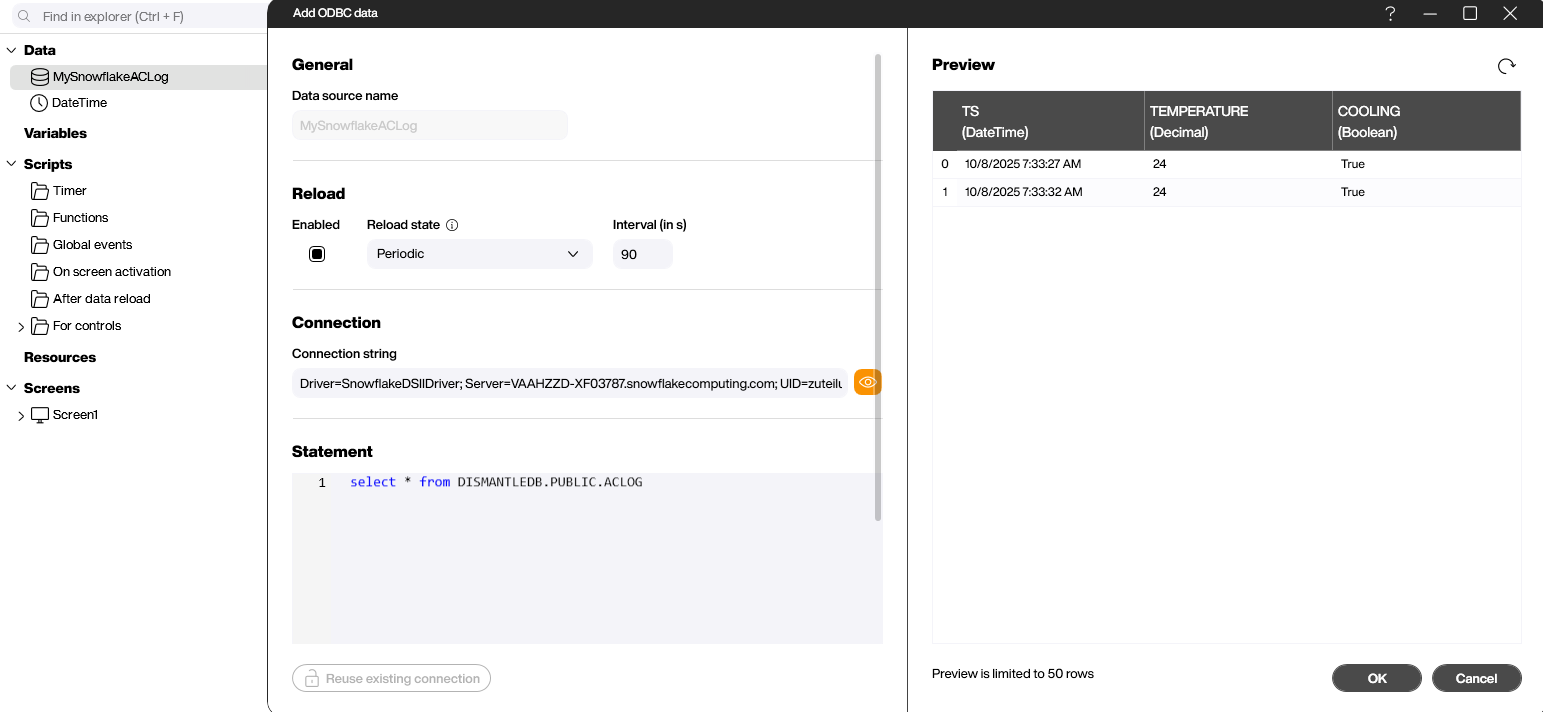
In the Connection string box, we enter our connection string.
In the Statement box, we enter a SQL statement that specifies the data we want to get from our Snowflake database. Here’s what we use:
select * from DISMANTLEDB.PUBLIC.ACLOG
It says to get all the columns from the ACLOG table in the DISMANTLEDB
database.
When you write your own SQL statement, make sure you use the correct namespace for the tables you want to access. Our connection string already has a default schema, so technically, we don’t need to use the fully qualified name in our SQL statement—as long as we don’t need to access any tables outside of the default namespace:
select * from ACLOG
If you need to join other schemas, prefix them with the database name or adjust the default schema in the connection string. And double-check that the assigned Snowflake role has the necessary permissions.
Write data to a Snowflake database
Uploading large amounts of data efficiently is a USP of Snowflake’s database product. Usually, you upload the data as a CSV file to some data store (like Azure Blob Storage). Then, the CSV file is uploaded from the data store to the Snowflake database. This process is usually triggered by REST API calls.
For our example, however, we’ll do things in a different way. We’ll use a
SQL INSERT statement, and rely on Snowflake’s automatic transaction handling
to keep the data consistent. This is less efficient, but it’s easier to do, and
it keeps the process manageable for smaller teams. And it’s very reliable if the
amount of data being inserted is not huge.
Here’s what an example of an INSERT statement might look like:
INSERT INTO DISMANTLEDB.PUBLIC.ACLOG (TS, Temperature, Cooling)
VALUES    ('2025-07-03 15:15:01', 27.5, False);
And here’s the statement template with conditional values, which we can use in Peakboard Designer:
INSERT INTO DISMANTLEDB.PUBLIC.ACLOG (TS, Temperature, Cooling)
VALUES    ('#[TS]#', #[Temperature]#, #[Cooling]#);
The following screenshot shows how to run the SQL statement and use a placeholder Building Block to fill the placeholders with actual values:

You can also enhance the workflow by adding pre-validation logic to check for duplicate timestamps—or by wrapping the execution in a simple retry block, to cope with transient connectivity issues (especially when the Peakboard Box is deployed in networks with fluctuating bandwidth).
Result and conclusion
You just saw how easy it is to use ODBC to access a Snowflake database for both
reading and writing. And remember that for uploading data—as long as the
throughput is not unreasonably large—it’s much easier to use SQL INSERT
statements, rather than the traditional method of uploading data through a
file-based interface.
Make sure to secure the credentials in your connection string, monitor warehouse usage to avoid unexpected costs, and leverage Snowflake roles to restrict access to only the tables that are required by the Peakboard application.