Many people have been using Peakboard Hub as a file management system. And with Peakboard version 4.1, you can now use Hub files directly in your Peakboard applications, with the new Hub files data source. This opens the door to a wide array of exciting possibilities!
In today’s article, we’re going to explain how to use the new Hub files data source. We’ll build a dynamic bulletin board application that lets the user view informational PDFs.
If you want to follow along, you can download the official Peakboard bulletin board application template.
Add the PDFs to Peakboard Hub
The first step is to upload our informational PDFs to Peakboard Hub. So, we open Peakboard Hub and click on the Files tab. Then, we create a new folder for our bulletin board PDFs:
Template_Company_Information_PDF/
Next, we create sub-folders inside Template_Company_Information_PDF/, in order to group our PDFs by category. This makes everything more organized, and it also lets our Peakboard app see which category each PDF belongs to.
For our demo app, we have three categories of PDFs:
- General announcements
- Lunch menus
- Shift schedules
So, we create one sub-folder for each PDF category:
Template_Company_Information_PDF/
├── Announcements/
├── Lunch/
└── Shifts/
Another language
Now, suppose that we work in a bilingual workplace and all our PDFs have a German version too. We want to store the German PDFs in Peakboard Hub as well, so that our bulletin board app can access them. So, we add a German sub-folder for each PDF category:
Template_Company_Information_PDF/
├── Announcements/
├── Lunch/
├── Shifts/
├── Ankuendigungen/
├── Kantinenplan/
└── Schichtplan/
However, for simplicity, we won’t actually use the German PDFs in our demo app.
Add the PDFs
Now, we add all our PDFs into the appropriate sub-folders:
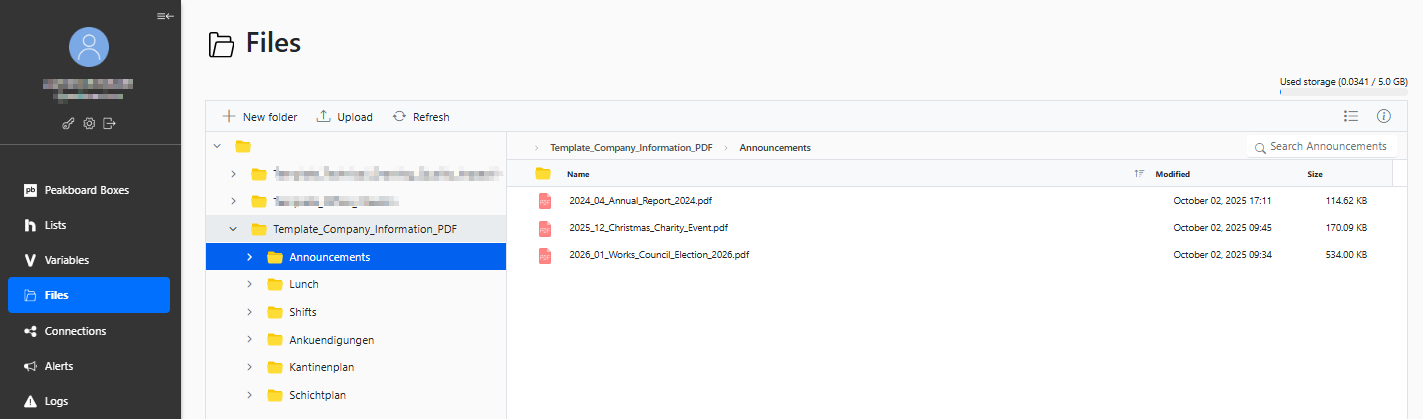
We try to name our PDFs like this:
YYYY_MM_TITLE.pdf
That way, our app can figure out the date and title of each PDF by reading the file name.
Create the Peakboard app
Now, let’s create the Peakboard app.
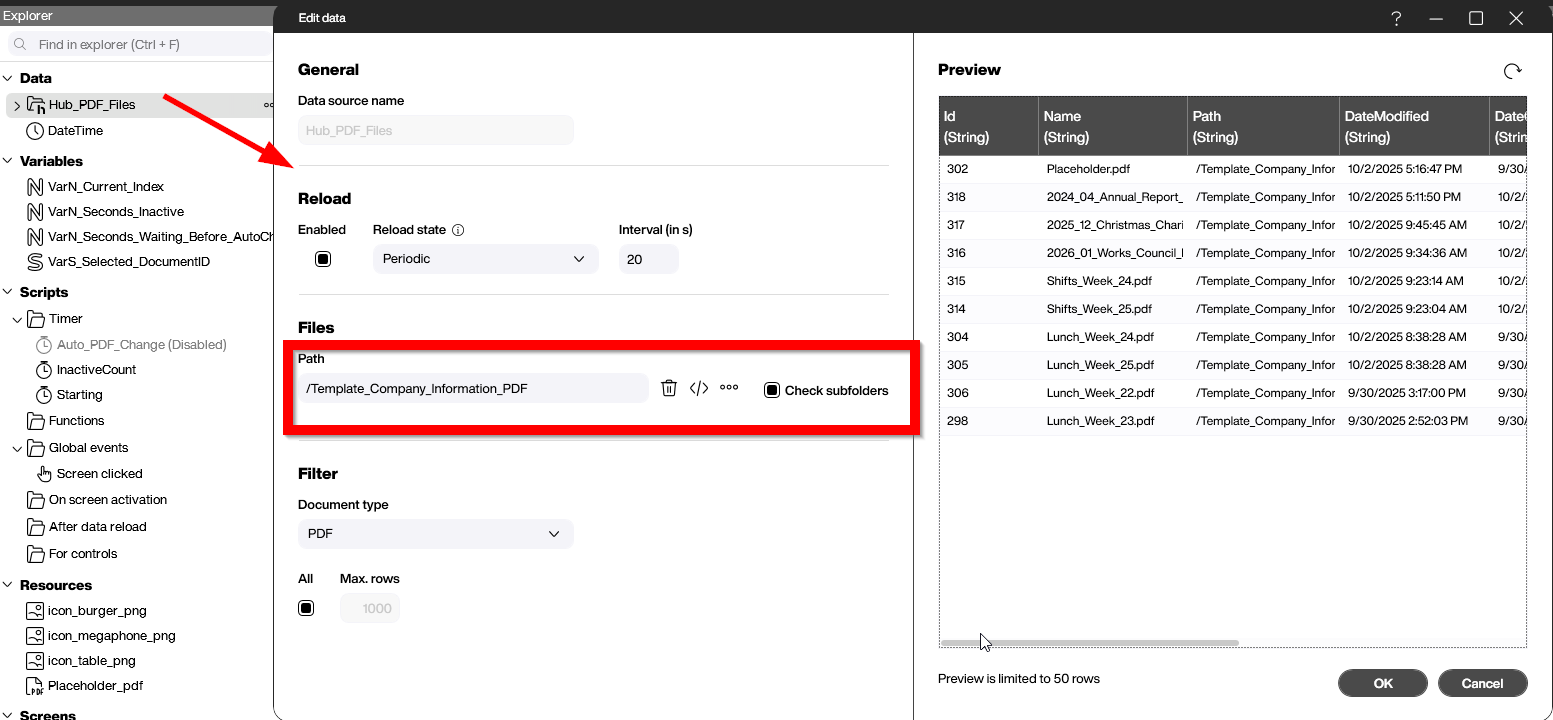
Add a Hub files data source
First, we add a Hub files data source. We set the data source’s Path to the main PDF folder that we created in Peakboard Hub, Template_Company_Information_PDF/. Then, we enable Check subfolders, so that the data source includes all our sub-folders, where the PDFs are actually stored.
Add a data flow
Next, we create a data flow to process the data source’s output. We use the data flow to clean up the data, sort the rows, and get the titles. Here’s what the finished data flow looks like:

The first few steps of the flow are pretty basic. (Download the template to see how they work.) So, let’s skip to the step where we get the PDF’s title from the file name.
Get the title
In the Update column step, we get the title from the file name and put it in the Name column. For example, we get My Announcement from the file name 2025-05-MyAnnouncement.pdf file. We do this by trimming the start and end of the file name to remove the date (2025-05-) and file extension (.pdf). Note that we use an if block to see if the file name actually has a date at the start. If it has no date, then we only need to remove the file extension.
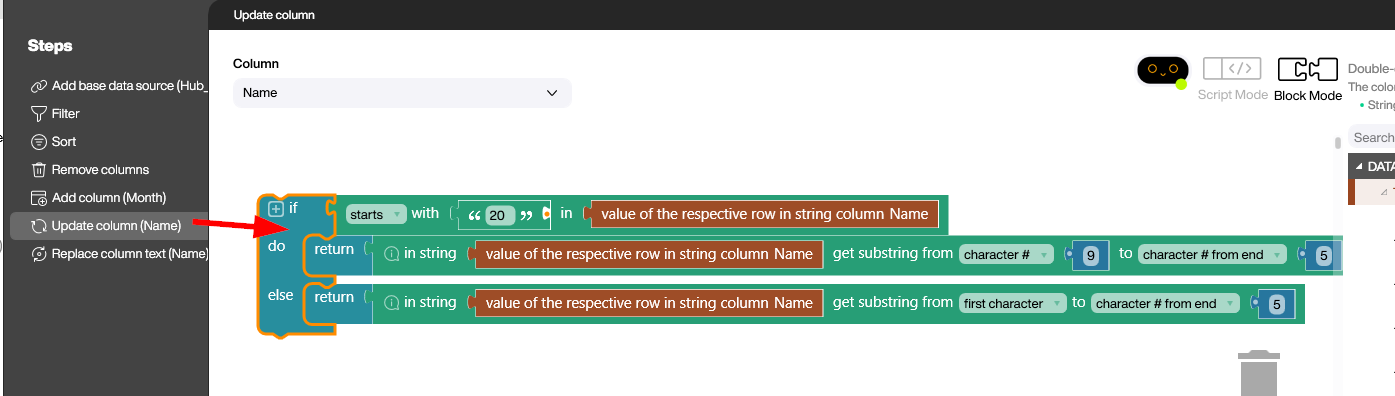
This results in nice, human-readable titles:

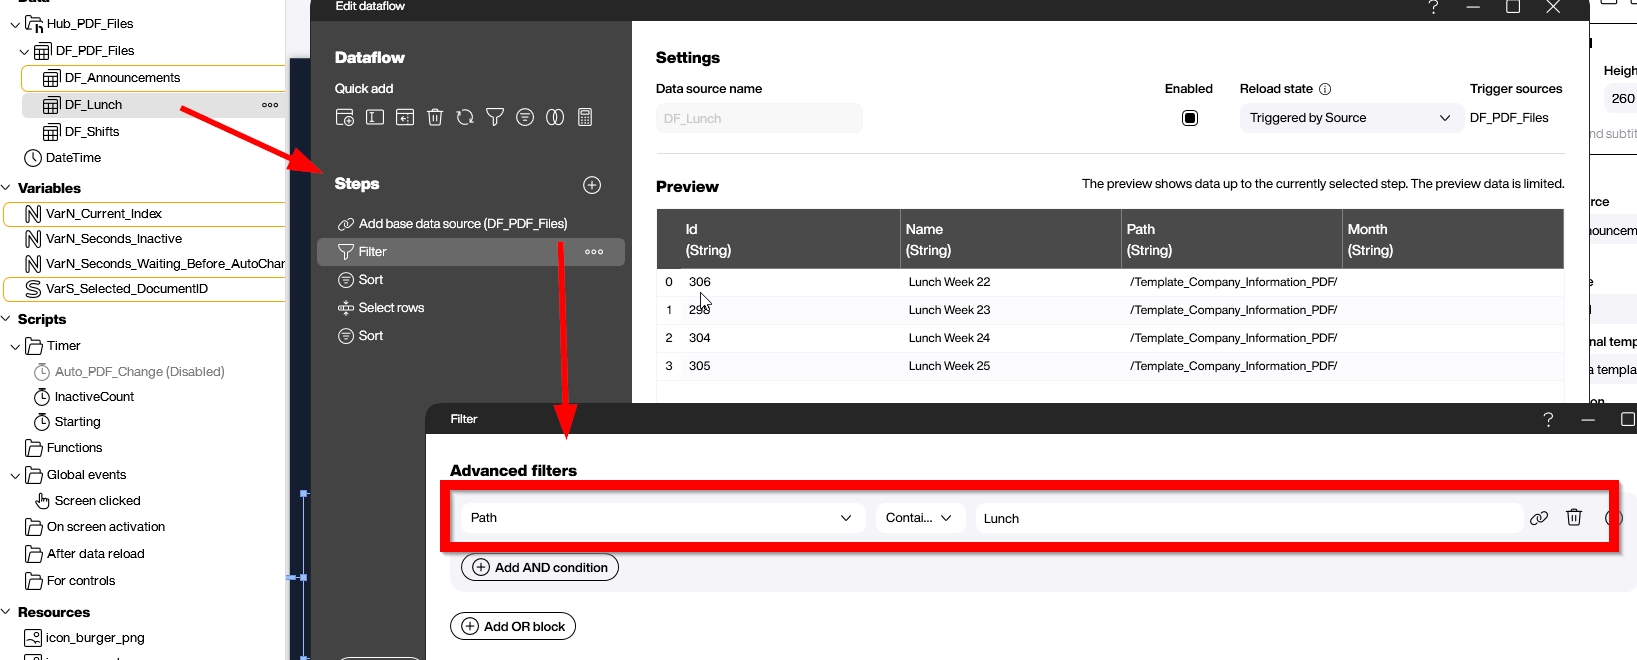
Add category data flows
Nested under the main data flow, we add an additional data flow for each PDF category. These data flows filter the output of the main data flow and return only the files for their respective category. For example, in our lunch data flow, we filter for rows where the Path column equals Lunch.
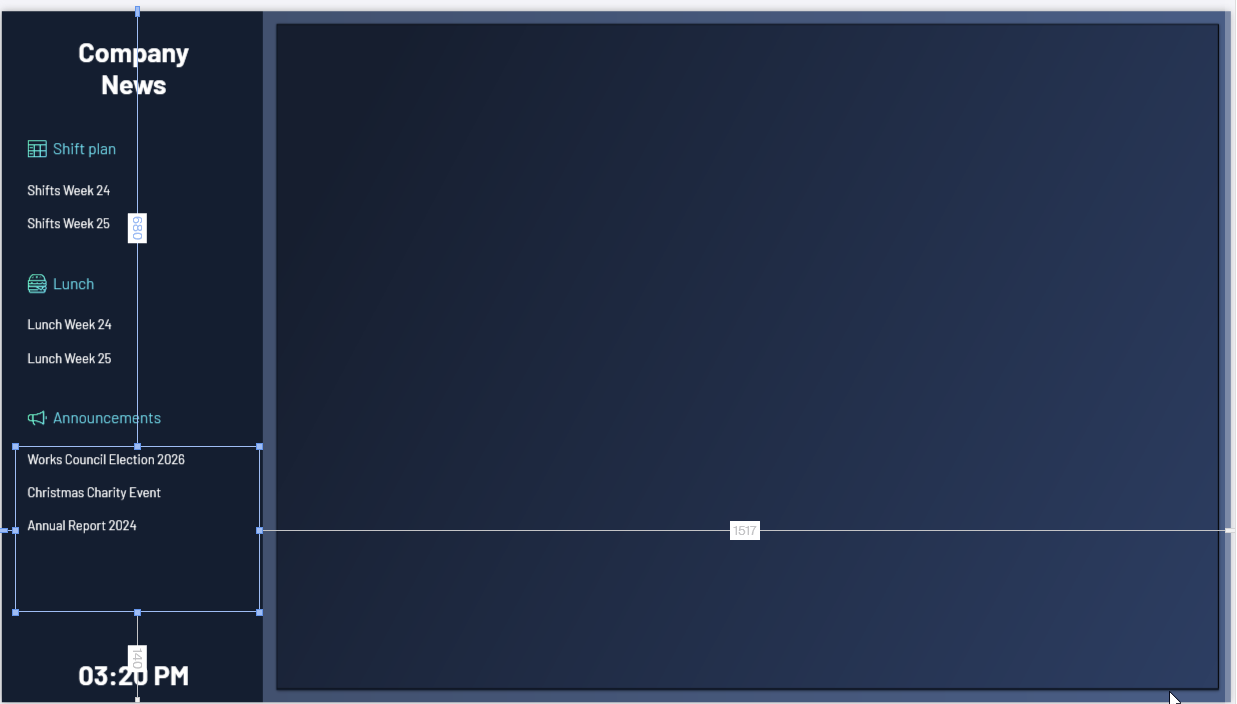
Build the dashboard
Now, let’s build the application dashboard.
In the left pane of the dashboard, we add three styled lists to show the available PDFs for each category—one styled list per category. We set the data sources for the styled lists to the category data flows we made.
In the right pane of our dashboard, we add a PDF control to display the PDF that the user selects. We set the default PDF to placeholder.pdf, which is an empty PDF file that we added to our main directory. That way, nothing appears by default.
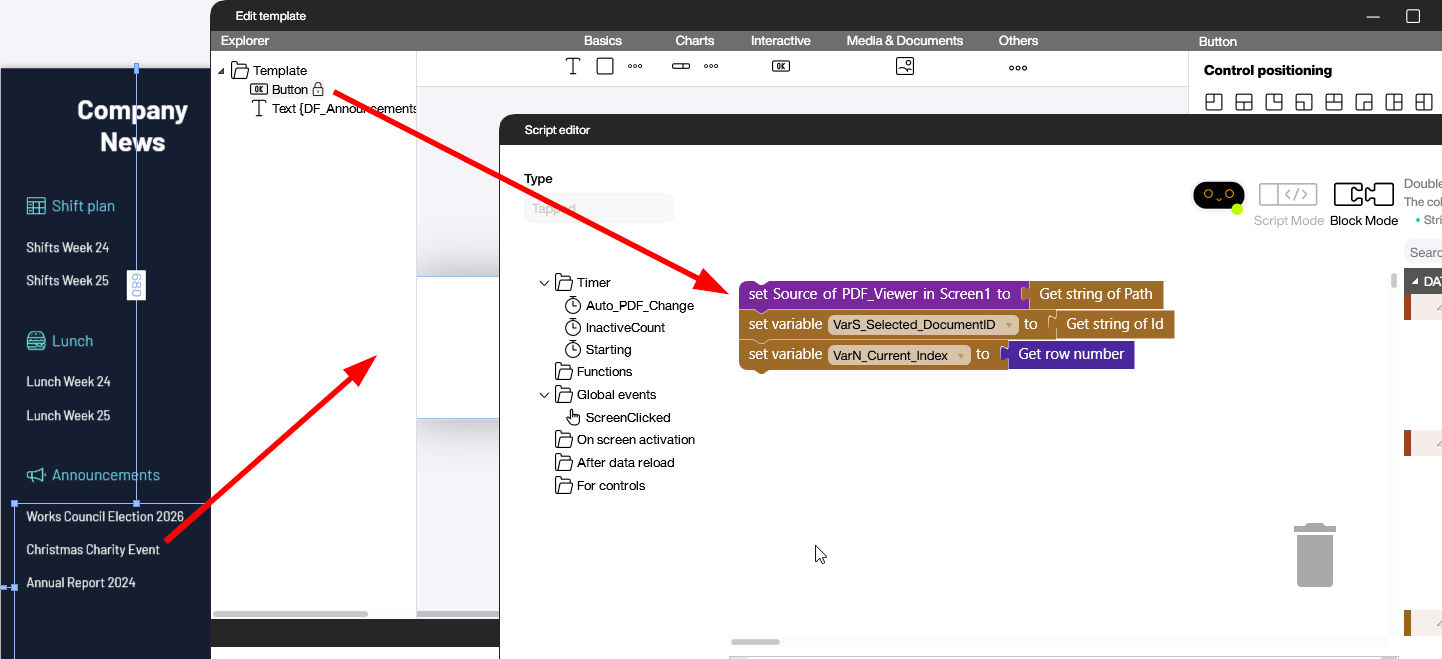
Handle the styled list tapped events
Finally, we need to handle the tapped events of our styled lists. We want to display the PDF that the user clicked on. To do this, we open the template editor for each styled list and add a script that updates the PDF control to show the PDF that the user selected.
We also store the index of the document ID. That way, we can change the color of the PDF title to indicate that the user selected it. This is optional, but it’s a nice quality-of-life improvement.
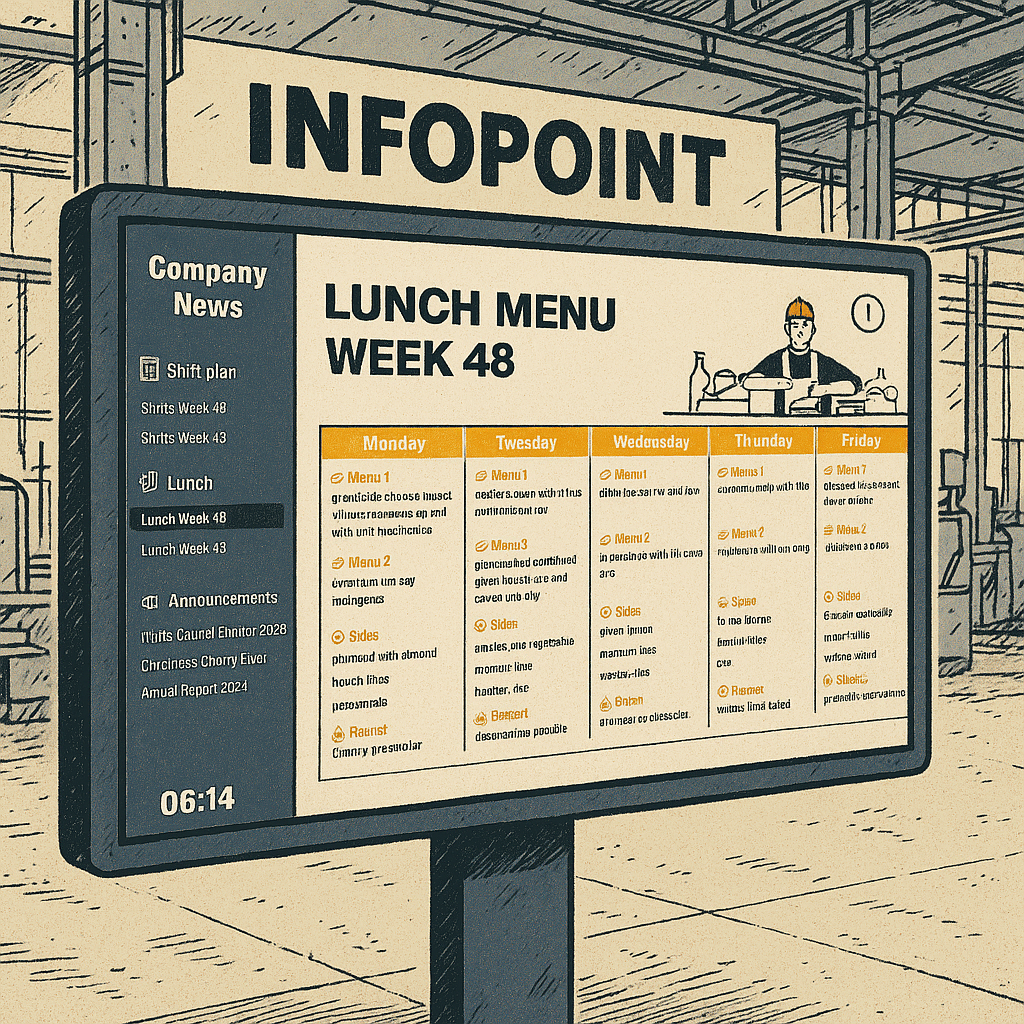
Result
When building Peakboard apps that use Hub files, remember to name the Hub files according to some consistent pattern. This lets the app read metadata directly from the file name. It also significantly reduces the complexity in maintaining the files.
Here’s what the final app looks like:
