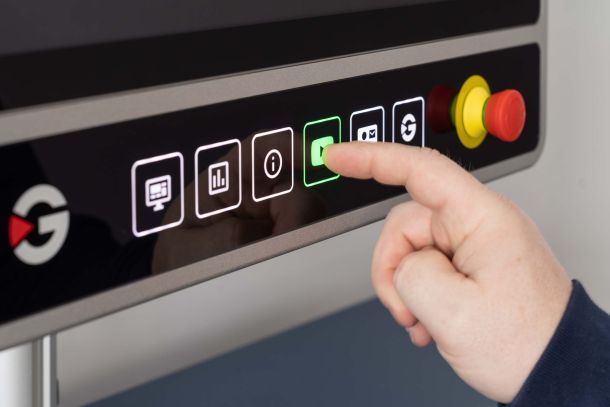
Since the official release of Peakboard BYOD in 2023, more and more Peakboard users have installed the BYOD runtime on their own devices. This is especially popular in environments with special requirements for screens—for example, in food production or in extreme heat or dirt.
Some of the screens commonly seen in these environments are the BlackLine Panel PCs by German manufacturer GETT. These come with an RFID reader and 6 special-purpose buttons.
In this article, you’ll learn how to let Peakboard applications interact with these buttons. If you’re a proud owner of a BlackLine PC, feel free to download the showcase and try it out on your own.

Get the button press event
GETT designed their buttons to simulate a normal keyboard press. This makes it super easy to catch the event within the Peakboard application by using the global “Key pressed” event.

Within the “Key pressed” event, we check if the pressed key is one of the function keys (F1 to F6), and then show the corresponding screen. That’s all!

Make the keys light up
The GETT BlackLine offers more than a simple button press. The buttons also have LED lighting.
For Peakboard to be able to use the button lights, we need the “Gett HMI Keys” extension. It can be installed like any other extension, in the Extensions section of the data sources.

To control the lights, we need exactly one instance of the data source in the project. So we add the data source and refresh the data.
You can see this as a fake data source without any real data. The only reason we need it is to give us access to the built-in functions, in Building Blocks.

Let’s say we want to give the buttons a white light. And we want the button to turn orange when the corresponding screen is activated. The following screenshot shows how we do this.
We use the SetMultipleKeyColor function. We set the five inactive buttons to white (color code #FFFFFF). And we set the active one to orange (color code #FFA500).
Also, here’s a website for converting hex codes and RGB values.

In our script, we don’t change the colors at the exact same time that we change the screen. We use the activation event of a screen to start a timer of 300ms. Once that timer expires, we change the colors.
The reason for this is that it always takes some factions of a second before the screen loads. The added delay makes the screen show up at the exact same time that the buttons change color.

One more thing
Setting the colors of the buttons as explained above is by far the most common use case of the GETT extension. However, it also allows you to do some others things:
- Activate/deactivate the blink mode (makes the button blink).
- Activate/deactivate the switch mode (use the button to swap between states).
- Force the user to use a long press to activate the button.
Whether the feature makes sense is usually determined by the use case. Most customers use customized buttons, not just F1 to F6 like in our example.

Result
The following short video shows the script from above in action when running on a GETT BlackLine PC.
