A couple of weeks ago, we took introduced SAP BTP and the SAP Integration Suite. We explained how to connect an integration flow to Peakboard Hub. In this article, we will explain how to build an integration flow that exposes a JSON endpoint that Peakboard can call.
This integration flow calls an RFC function module in SAP. The SAP system is connected to BTP with a Cloud Connector. This setup is typical of a customer who has on-prem SAP systems, but would like to use BTP and the Integration Suite to communicate with the non-SAP programs (like a Peakboard application).
The RFC function module
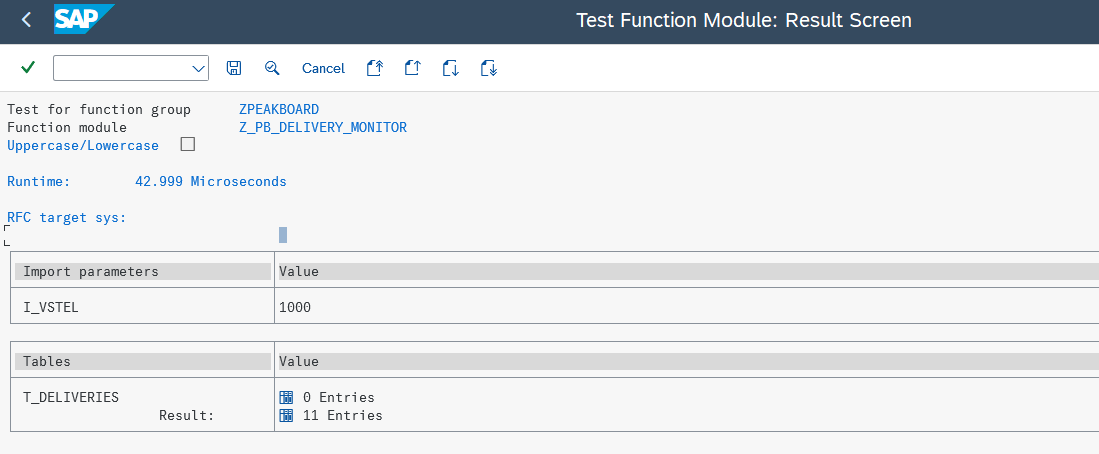
In our example, we use a simple custom function module called Z_PB_DELIVERY_MONITOR. It has one import parameter, I_VSTEL, which represents a shipping point. It returns a table of delivery rows that are in the shipping process on the shipping point.
The following screenshots show a call in the test cockpit of transaction SE37. When we submit the shipping point I_VTEL = 1000, it returns 11 deliveries that are about to be shipped. We want to build an integration flow that does this:
- Receive the shipping point,
I_VSTEL, as query parameter. - Return the deliveries as a JSON table.

Set up the Cloud Connector
The SAP Cloud Connector must be installed in the on-prem side of the SAP system. To connect it to the BTP portal, follow these steps:
- Configure the installed instance of the Cloud Connector through
https://localhost:8443/. - In the Cloud Connector configuration, enter the sub-account of the BTP instance you want to connect to. You need the ID and region. You can look these up directly in BTP.
- In the sub-menu of the sub-account, select Cloud to on-premises and create a new Mapping virtual to Internal System. In our case, the system is an ABAP system.
- Enter all the standard attributes, like application host, instance number, and credentials.
- Below the system entry, provide the resources you want to connect to. That’s the name of your function module. The following screenshot shows the configured sub-account, mapped system, and resource.

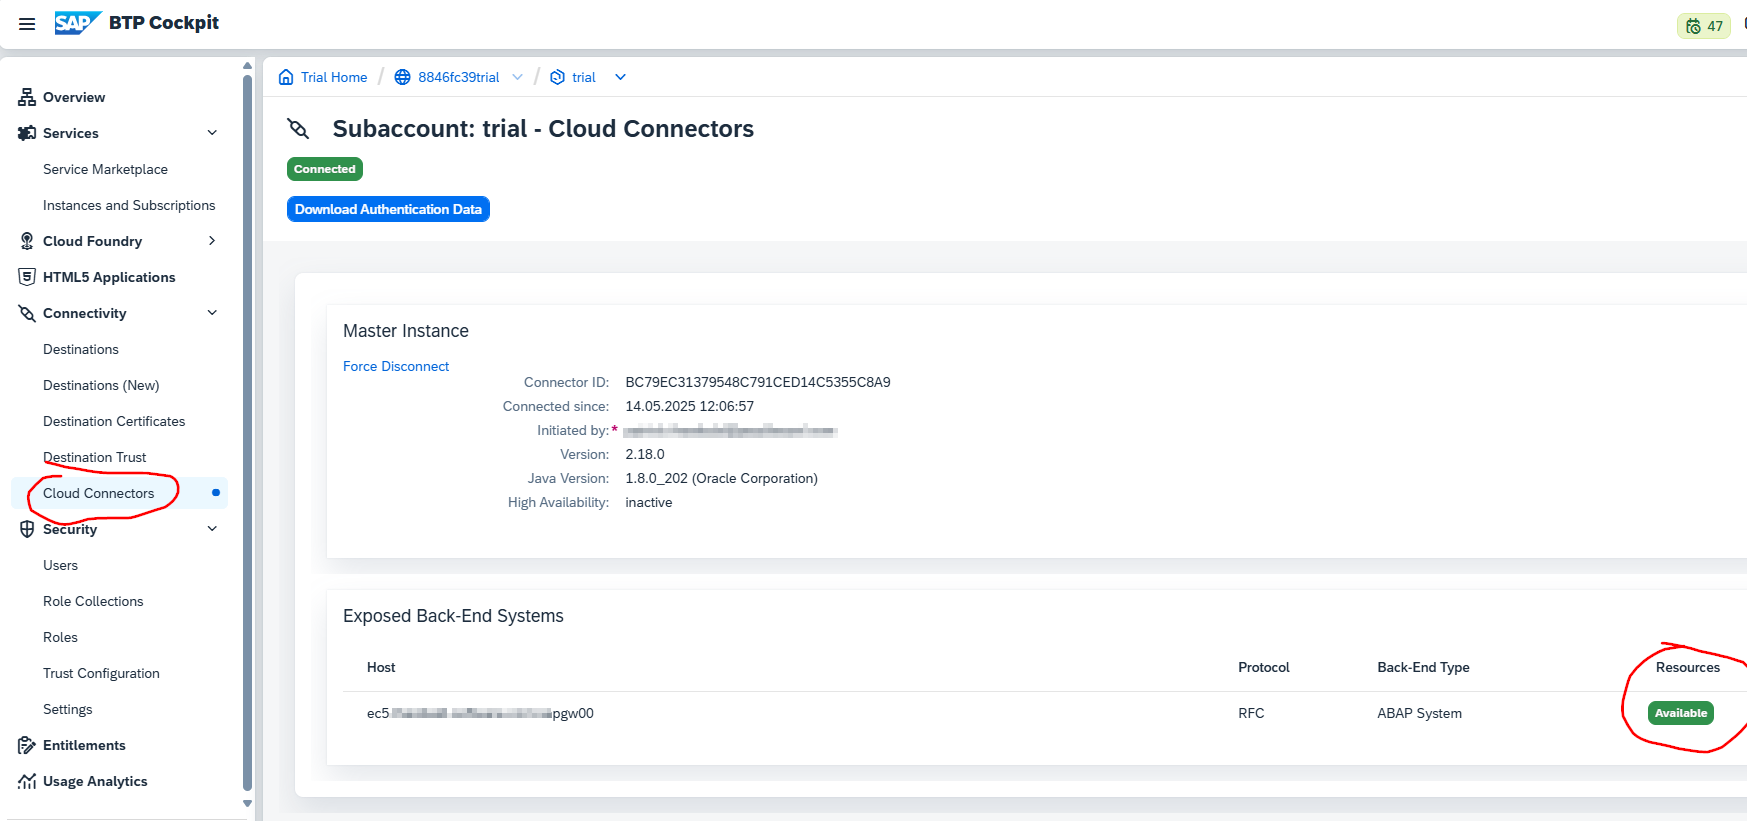
- Go to the BTP portal and select the corresponding sub-account. Select the Cloud Connectors tab. You can see the active connection under Exposed Back-End Systems.
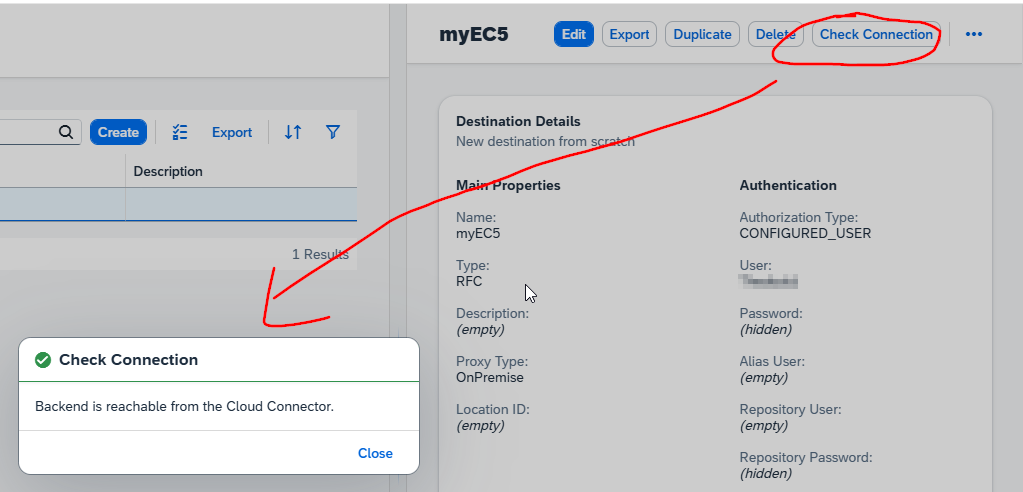
- Select Destination. Enter the standard attributes like the application server, instance number, etc. Later, in the integration flow, we refer to the destination name. The integration flow finds its connection through the corresponding attributes. It “finds” the route through Cloud Connector.

- Click the Check Connection button to verify the connection works.
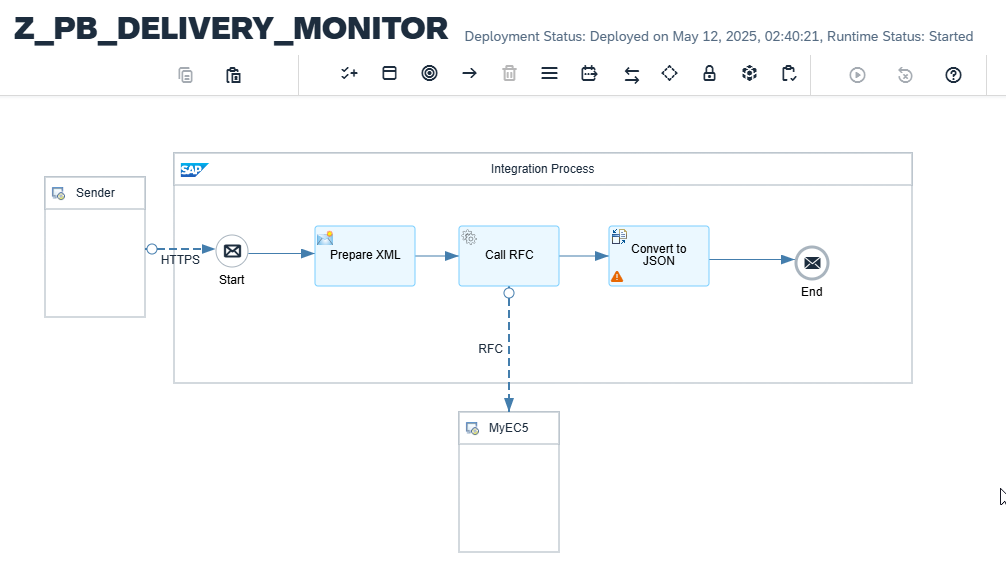
Build the integration flow
Our integration flow translates an incoming HTTP call into an RFC call. Here’s an overview of the steps it takes:
- Configure the incoming HTTP call.
- Prepare the XML for the RFC call.
- Make the RFC call.
- Translate the RFC call’s response from XML to JSON.
- Return the JSON string to the caller.
This screenshot shows the whole integration flow:
Now, let’s explain each step in more detail.
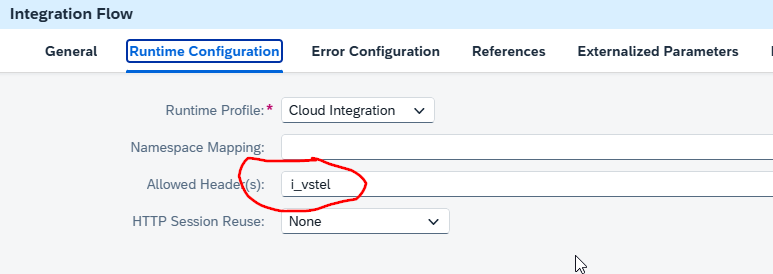
Configure the incoming HTTP call
We define the route for the external call. In our case, we use the name of the function module.
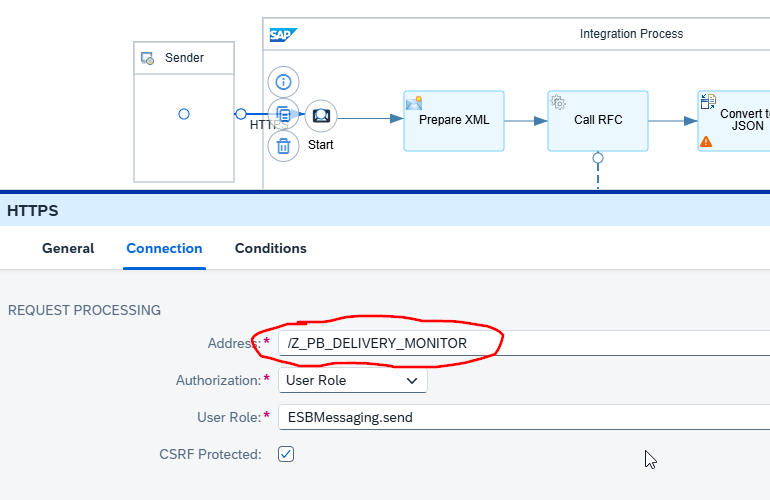
It’s also important to allow the parameter i_vstel to be routed from the external caller into a header within the integration flow.
Prepare the XML for the RFC call
The payload that represents the RFC call is in XML. For our relatively simple function module, this is the XML. The actual value of shipping point for the parameter I_VSTEL is filled with the script expression ${header.i_vstel}. So, it’s taken dynamically from the header.
<ns1:Z_PB_DELIVERY_MONITOR xmlns:ns1="urn:sap-com:document:sap:rfc:functions">
     <I_VSTEL>${header.i_vstel}</I_VSTEL>
</ns1:Z_PB_DELIVERY_MONITOR>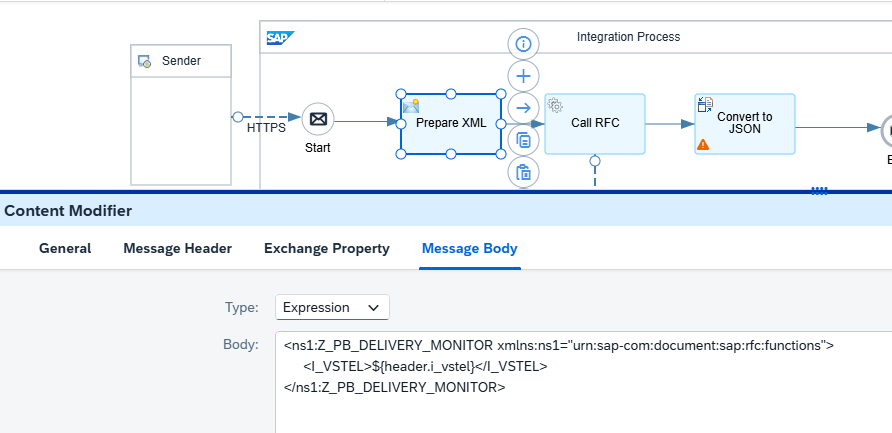
There are different steps if you want to form the XML with complex function modules.
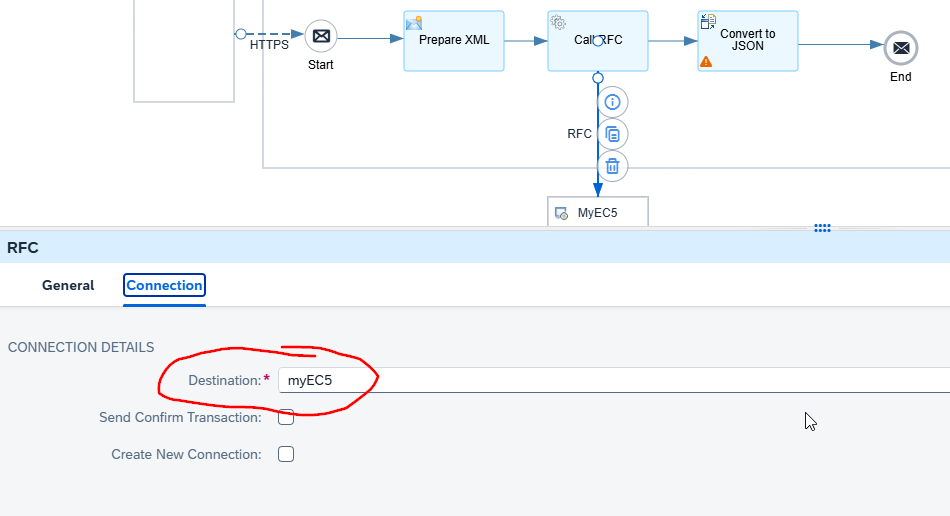
Make the RFC call
We send the RFC call with a request reply step. The only thing we need to configure is the name of the destination (see above). The payload and the name of the function module to call is defined in the XML.
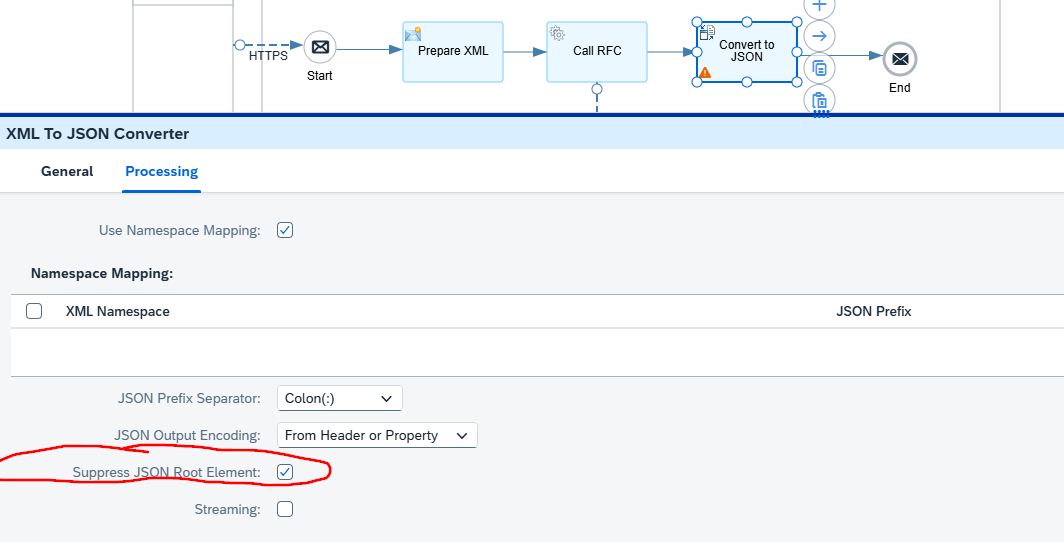
Translate the RFC call’s response
The response from the RFC call is in XML, as part of the message body. It’s easier to deal with JSON than RFC, when we’re in Peakboard. So, we translate the XML code into JSON with an XML to JSON converter.
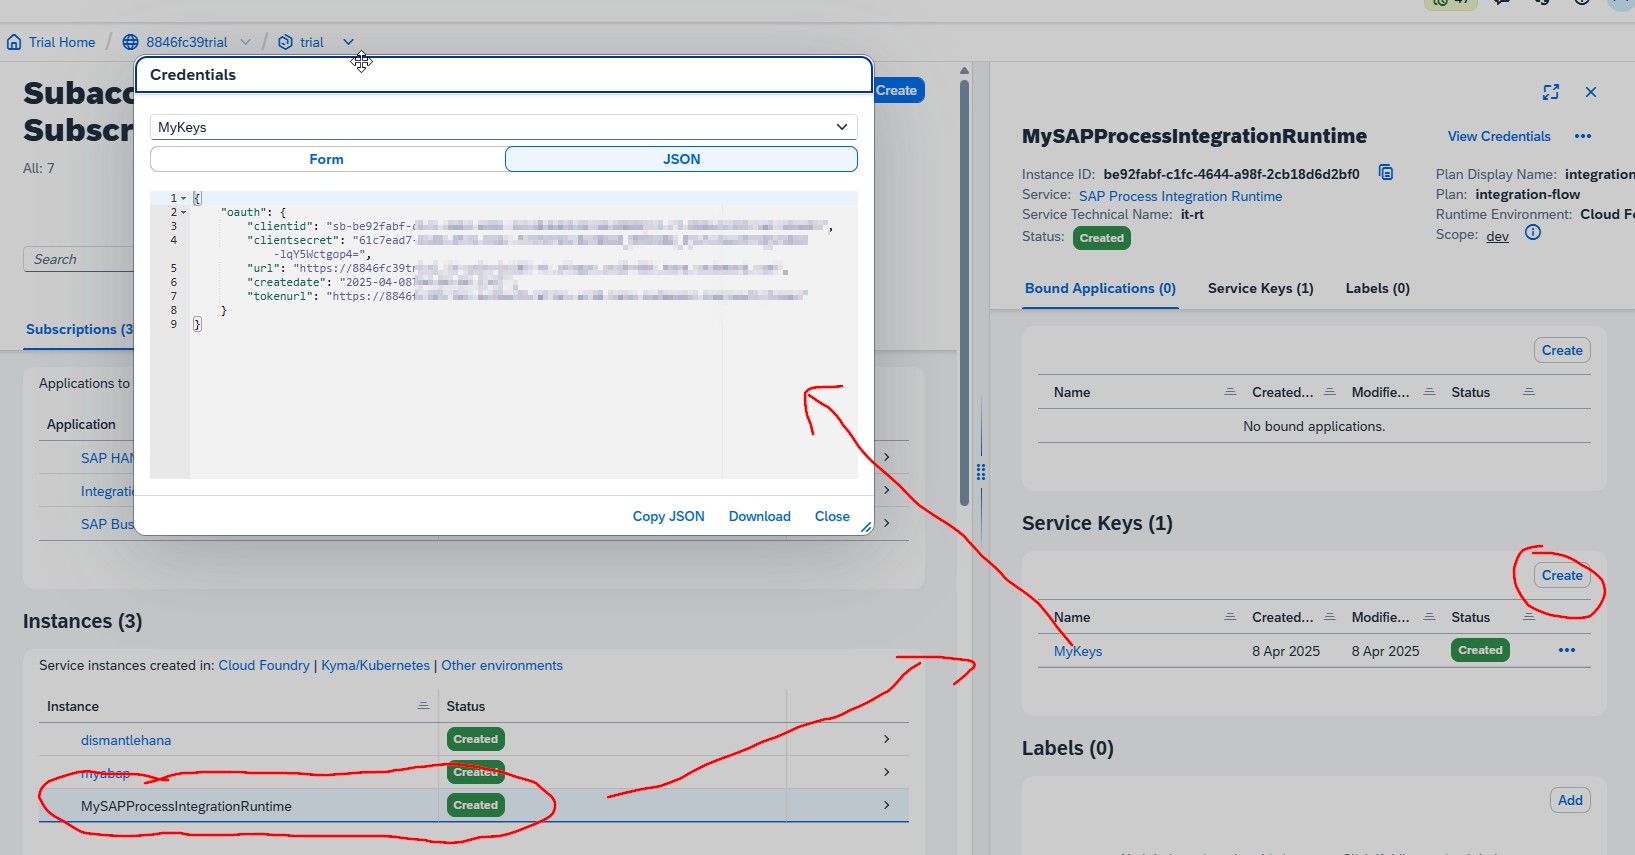
Authentication
The caller of the service must be authenticated. The easiest way to do this is to go to the integration runtime in the BTP portal and generate a pair of service keys. You can use the client ID and client secret to authenticate the call, with basic authentication.
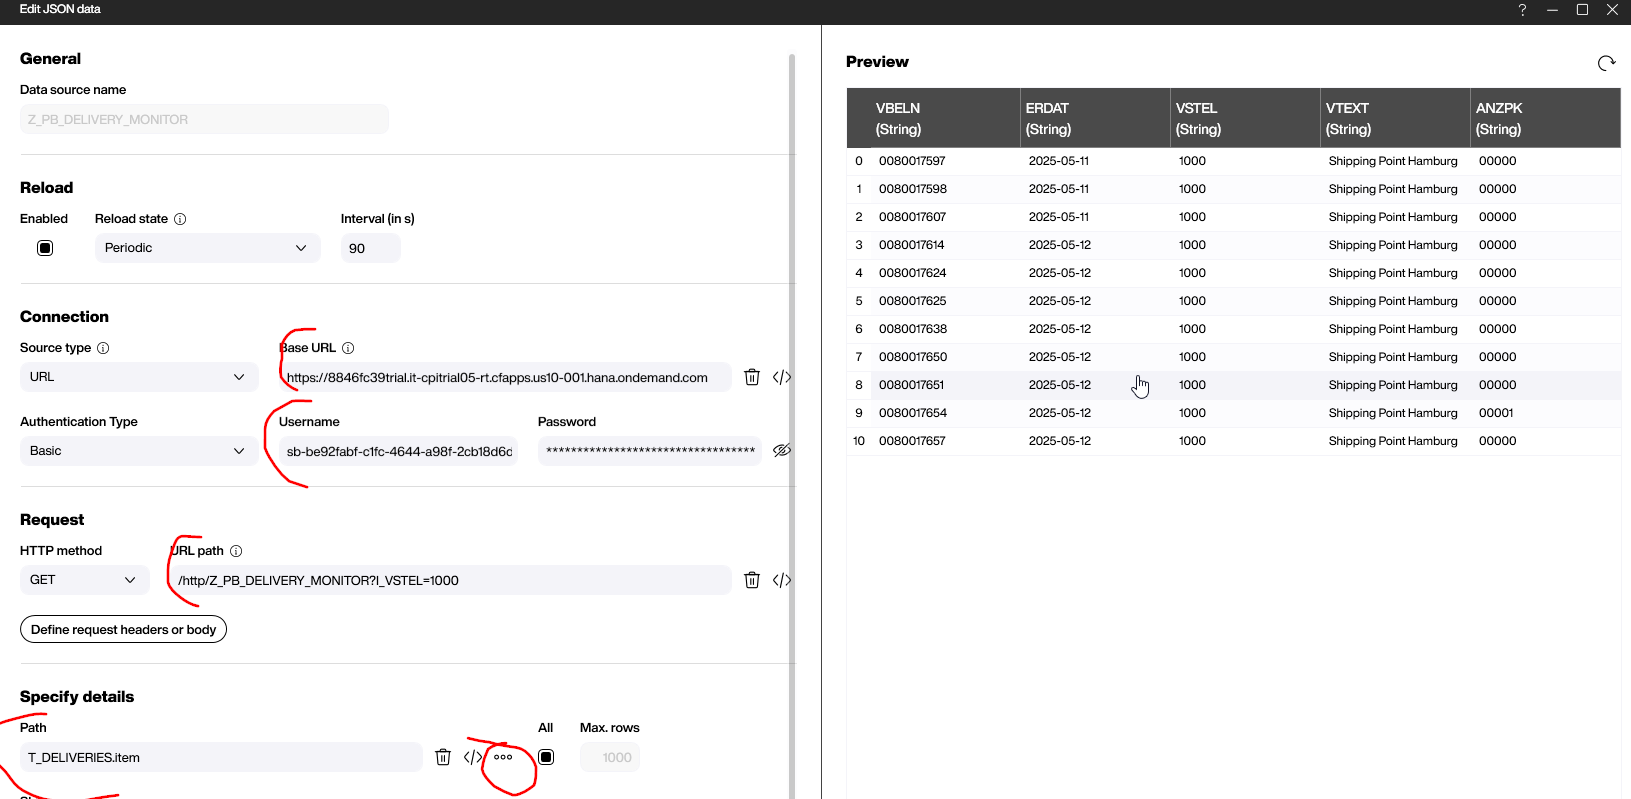
The Peakboard application
In Peakboard Designer, we create a new JSON data source. It makes a call to our integration flow, with one query parameter called I_VSTEL. To choose the right path to the table data within the JSON string, we click on the three dots. This opens up a helper that makes things a lot easier.
If the function module is more complicated, the path for processing the body may also be more complicated. But in our case, the main payload is simply the table of deliveries.
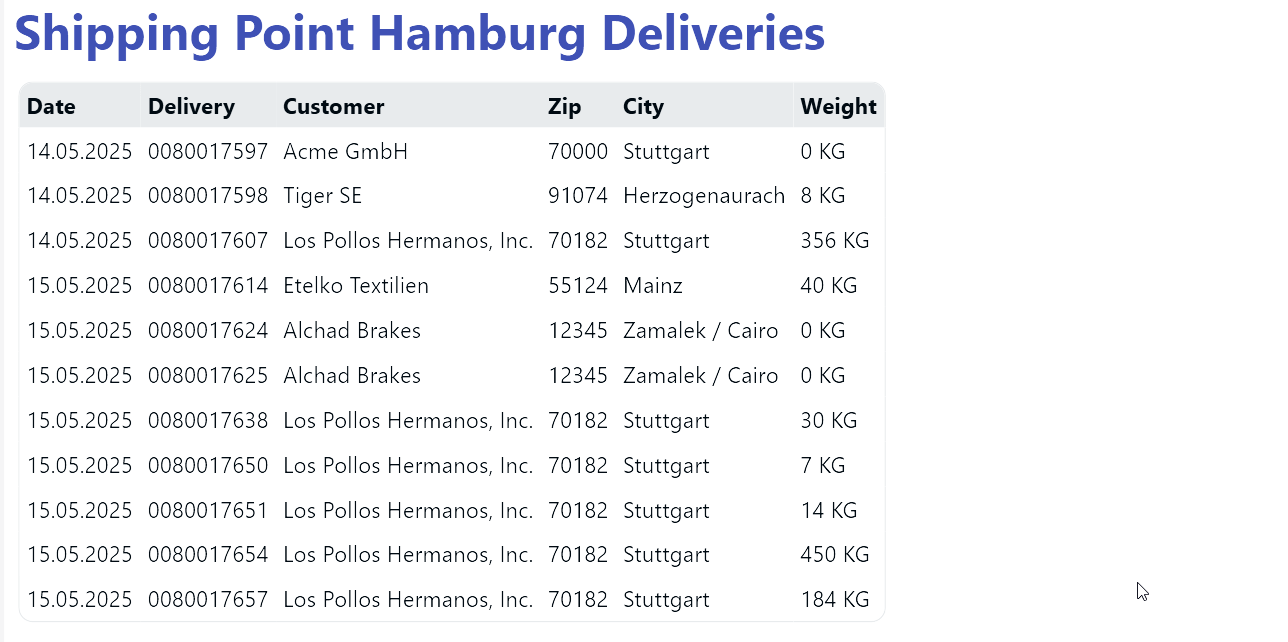
Result
We use a table control with some fancy formatting to present the data. This screenshot shows the final result of the Peakboard application: