In the first part of our ProGlove miniseries, we discussed the basics of integrating ProGlove scanners into Peakboard applications. We used both the USB and MQTT modes to get the scan event, along with some metadata. In the third part of the series we will build a full blown use case by handling a transfer order from SAP with ProGlove.
In this article, we’ll discuss some options for providing user feedback to the user performing a scan. This is especially useful for cases where the user doesn’t want to look at the screen all the time, but may need to if something goes wrong, in order to learn more about the scan. A typical use case is when a user is scanning all the products of an order:
- The user scans all the products.
- If there are any products that don’t belong to the order, the user gets negative feedback.
We will discuss two examples. The first only gives positive and negative feedback with an LED. The second provides more information: A storage bin and some attributes of the scanned product will show up on the scanner display.
Feedback by LED
The Mark 3 model is equipped with variable-color LEDs that provide user feedback. Giving feedback to the scanner via MQTT works in the same way as when submitting a scan event, but the direction and the JSON changes.
We’re sending our message to this topic:
Peakboard/gateway/PGGW402650394/feedback!
Peakboardis the configured main topic.gatewayis just a keyword because we’re addressing the gateway.PGGW402650394is the serial number of the gateway.feedback!is the event type we’re triggering.
To learn more, see the ProGlove Docs.
Here’s an example JSON string that’s sent to the scanner:
{
  "api_version": "1.0",
  "event_type": "feedback!",
  "event_id": "02114da8-feae-46e3-8b00-a3f7ea8672df",
  "time_created": 1546300800000,
  "device_serial": "M2MR111100928",
  "feedback_action_id": "FEEDBACK_POSITIVE"
}
There are two important attributes within the JSON:
device_serialmust be set to the serial number of the scanner we want to send the feedback to. This is important because there could be more than one scanner connected to the gateway.feedback_action_idis a constant that defines the light that needs to flash. In our example, we useFEEDBACK_POSITIVEfor the green light andFEEDBACK_NEGATIVEfor the red light.
In our demo environment, we place two buttons to showcase the feedback function:

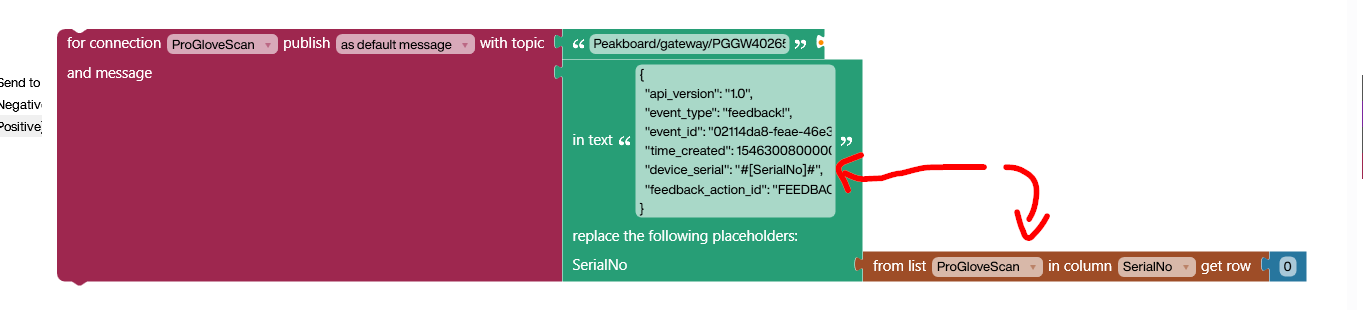
The MQTT message is sent with a single MQTT publish command. In the following screenshot, we send the JSON string to the topic from before, by using the existing MQTT connection, which refers to the data source we created in the first part of this series.
Then, we use a multiline string with placeholders. We exchange the placeholder #[SerialNo]# with the serial number from the last scan. We look this up from the first row in the data source.
The second button works exactly the same, but uses FEEDBACK_NEGATIVE in the JSON.
The following video shows how the scan of the canned tomatoes is presented on the screen. And then a positive and negative feedback is sent back to the scanner to light up the LEDs.
Feedback by display
Now, we’ll try out another ProGlove model: The Mark Display. It offers even more options for user feedback, because it comes with a display.
Setting the display content works similarly to setting the LEDs: We send a display! MQTT message to the gateway.
ProGlove offers different kinds of templates for displaying the message on the display. You can see these templates in the ProGlove templates documentation. In our case, we use a simple template called PG1, which has two variable fields, a header, and a body text.
The following JSON string shows an example of the display! command. Besides the name of the template and the serial number of the destination scanner, there are two variable fields we need to fill:
display_field_headeris the upper part of the display template.display_field_textis the lower part of the display template with a smaller font.
{
"api_version": "1.0",
"event_type": "display!",
"event_id": "21d22d49-efbe-4e0c-b109-2e9afb7acacc",
"time_created": 1546300800000,
"time_validity_duration": 0,
"device_serial": "MDMR000006406",
"display_template_id": "PG1",
"display_refresh_type": "DEFAULT",
"display_fields": [{
"display_field_id": 1,
"display_field_header": "Storage Unit",
"display_field_text": "R15"
}]
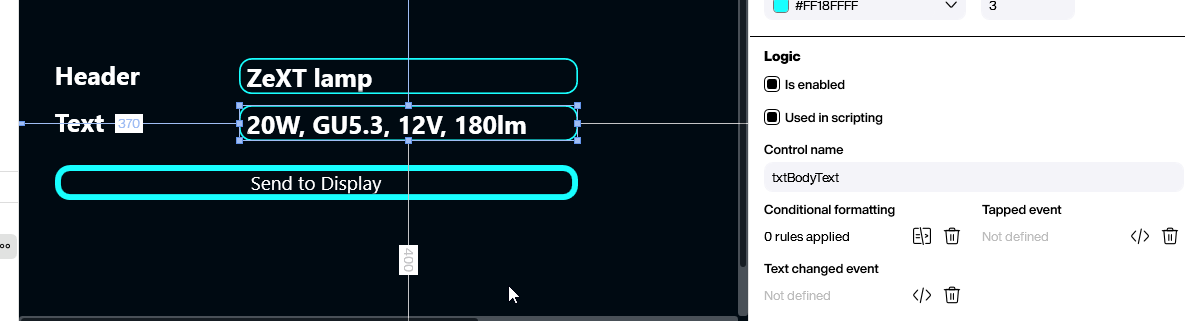
}Let’s switch to Peakboard Designer. In our test app, we use two dynamic text fields to define the values, and a button to initiate the process.
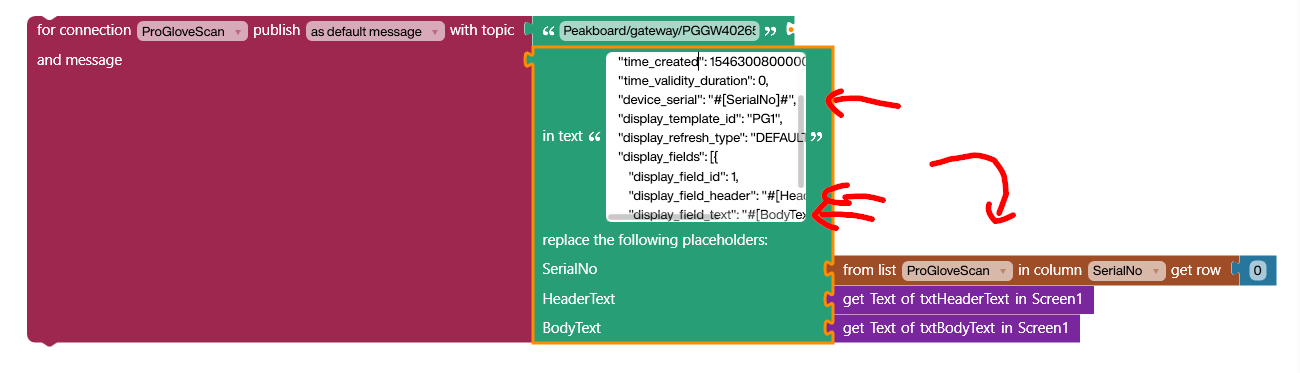
What happens behind the button is quite similar to our first example, but we now have three placeholders instead of one. These dynamically create the JSON string with the serial number and two dynamic display texts.
In the following video, you can see the final result. A barcode is scanned and the feedback is sent back to the scanner, to show it on the display.