A few weeks ago, we discussed how to print with Peakboard. We learned how to use the POS printer extension and how to use the simplified internal commands to send ESC/POS commands to the printer. In this article, we will deepen our understanding with the following:
- How to use the Bixolon SRP-Q300 printer
- How to print tables
- How to use pure ESC/POS commands, if a command is not available as a simplified command
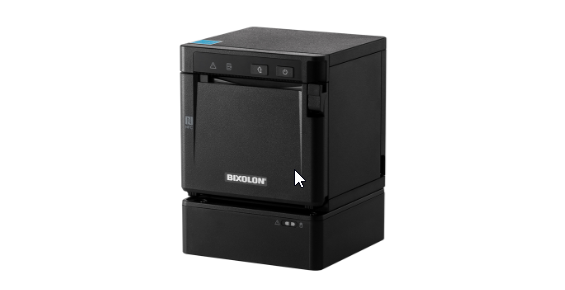
Bixolon SRP-Q300
The Bixolon SRP-Q300 printer we’re using today is a super lightweight 80mm POS printer. It’s typically used in the hospitality industry, to print receipts. So in today’s example, we’ll use the printer to print receipts for the Starpeak coffee shop.
The Bixolon printer doesn’t come with a web interface, but it can be easily configured using the function keys. To learn how to do that, see the user manual. Initially, the printer gets the IP address from the network’s DHCP server. So in most situations, no manual configuration is necessary.
Print a table
In our first article about printing, we explained that there are several ways to send commands to POS printers. The easiest way is to use Peakboard’s own simplified markup language, which is automatically translated to ESC/POS commands before being sent to the printer (see the full list of commands). Peakboard’s POS markup language is much easier to use than standard ESC/POS commands.
What we haven’t seen so far is how to print tables. To print a table, we need to embed an HTML-like definition into the POS commands:
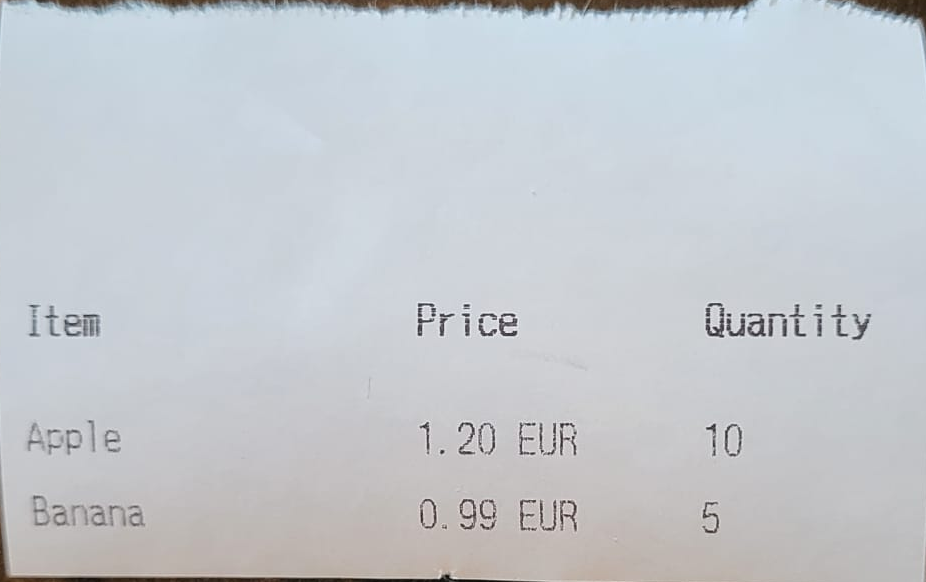
~(PosTable:<CommaSeparatedColumnsWith>:<ActualHTMLStyleTable>)~Let’s take a look at a concrete example with some LUA code. The following code initiates the printing process.
local table = [[
<tr>
    <th>Item</th>
    <th>Price</th>
    <th>Quantity</th>
</tr>
<tr>
    <td>Apple</td>
    <td>1.20 EUR</td>
    <td>10</td>
</tr>
<tr>
    <td>Banana</td>
    <td>0.99 EUR</td>
    <td>5</td>
</tr>
]]

local _ = data.MyPrinter.print("~(PosTable:20,14,14:" .. table .. ")~~(FullCutAfterFeed:2)~")
Here’s how it works:
- We build the HTML-like table.
- We call the
printfunction of the data source, based on the POS printer extension. The printer function takes two markup commands: One for the table with 3 columns, and one for the feed and cut of the paper.
Here’s what the result looks like:
Printing pure ESC/POS commands
Let’s discuss a completely different approach. The pre-defined POS markup commands might not be sufficient for our printing project, or maybe we already have an ESC/POS command set for a complex layout that we want to use. In that case, we can submit pure ESC/POS commands within the simplified POS markup commands, like this:
~(PureESCPOS: <MyPureCommands>)~Here’s a LUA example:
local ESC = "\x1B"
local LF = "\x0A"
local INIT = ESC .. "@"
local BOLD_ON = ESC .. "E" .. "\x01"
local BOLD_OFF = ESC .. "E" .. "\x00"
local DOUBLE_SIZE = ESC .. "!" .. "\x38"
local NORMAL_SIZE = ESC .. "!" .. "\x00"
local ALIGN_CENTER = ESC .. "a" .. "\x01"
local ALIGN_LEFT = ESC .. "a" .. "\x00"
local CUT = ESC .. "i"
local FEED_5 = ESC .. "d" .. "\x05"

local receipt = INIT ..
    DOUBLE_SIZE .. "STARPEAK COFFEE" .. LF .. NORMAL_SIZE ..
    "123 Main Street, Los Angeles, CA" .. LF ..
    "Tel: (123) 456-7890" .. LF ..
    "--------------------------------" .. LF ..
    "Date: 02/17/2025  14:30 PM" .. LF ..
    "Order: 00123" .. LF ..
    "--------------------------------" .. LF ..
    BOLD_ON .. "Item           Qty   Price" .. LF .. BOLD_OFF ..
    "Latte         x1   $4.50" .. LF ..
    "Cappuccino    x1   $4.75" .. LF ..
    "Blueberry Muffin x1  $3.25" .. LF ..
    "--------------------------------" .. LF ..
    BOLD_ON .. "Subtotal:           $12.50" .. LF ..
    "Tax (8%):          $1.00" .. LF ..
    "Total:             $13.50" .. LF .. BOLD_OFF ..
    "--------------------------------" .. LF ..
    "Payment: Credit Card" .. LF ..
    "Card #: **** **** **** 1234" .. LF ..
    "Approval: 456789" .. LF ..
    "--------------------------------" .. LF ..
    ALIGN_CENTER ..
    "Thank you for visiting Starpeak!" .. LF ..
    "www.peakboard.com" .. LF ..
    ALIGN_LEFT ..
    FEED_5 ..
    CUT

local _ = data.MyPrinter.print("~(PureESCPOS: " .. receipt .. ")~")
Here’s how it works:
- We build the ESC/POS commands by using plain text and hex commands. The hex commands for line feed and other formatting behavior is done with constants. This improves readability.
- We wrap the commands string with the
PureESCPOSmarkup command. - We send the wrapped command to the printer.
Here’s the result on paper, which already comes pretty close to a professional label:
Result and conclusion
Besides getting to know the beautiful Bixolon printer, we also learned how to print tables and how to use pure ESC/POS commands. It’s important to carefully consider when to use pure ESC/POS commands. Pure commands are hard to write and can get complicated fast. On the other hand, the built-in markup language is easy to use but potentially limiting.