Every Peakboard application is built around one or more screens. These screens are like the windows in a traditional desktop application. However, we sometimes want to have a modal window that forces the user to interact with it, before they can do anything else.
For example, we might want a modal window that forces the user read a warning and acknowledge that they have read it—before proceeding.
In Peakboard Designer, we can create a modal window by building a custom dialog. In this article, we’ll explain the best practices around custom dialogs.
Overview
The core idea is to build a custom dialog using multiple controls. But, we make the controls invisible, so the user doesn’t see them. Then, when we want the dialog to show up, we make the controls visible. Let’s go through this step by step with an example.
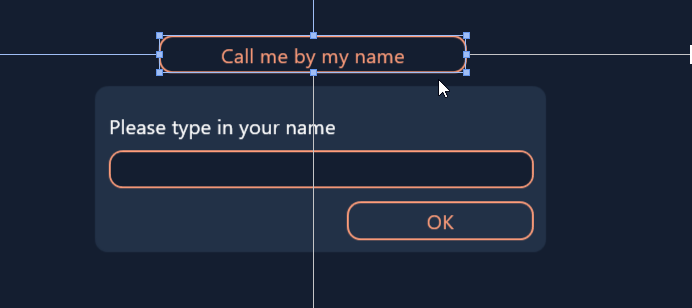
We’ll make a simple app that prompts the user to enter their name. Here’s what the finished app looks like:
Here’s how it works:
- The user clicks on the Call me by my name button.
- A dialog pops up and asks the user to enter their name.
- The user enters their name into the dialog and clicks OK.
- The dialog goes away.
- The user’s name is displayed.
Now, let’s build the app.
Add the controls
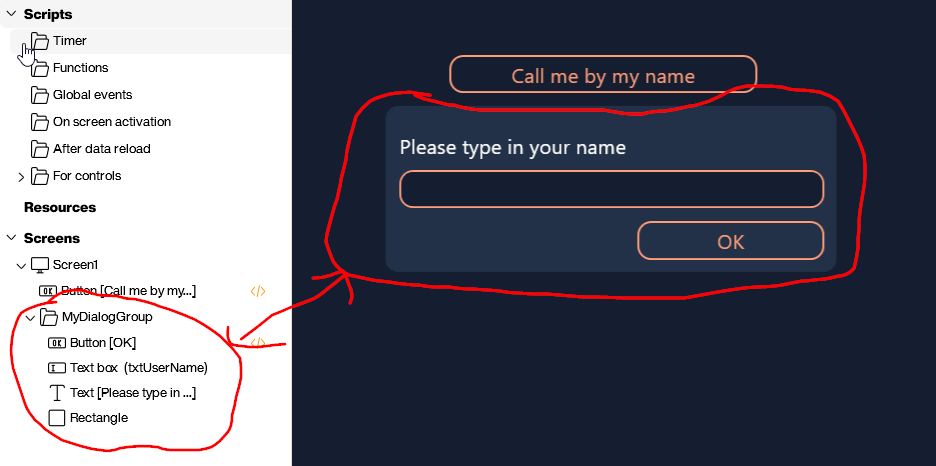
First, we add the following controls to the app:
- A button that initiates the modal dialog. We label it, Call me by my name.
- Controls for the dialog:
- A rectangle shape for the background of the dialog.
- A text box that prompts the user, Please type in your name.
- A text input where the user enters their name.
- A button for the user to submit their name, labelled OK.
Next, we group the dialog controls together, by doing the following:
- We drag and drop one control on top of another, in the control tree on the left side. This automatically creates a new control group.
- We drag the rest of the controls into the group.
- We rename the group to
MyDialogGroup.
Now, we can easily make the entire dialog visible and invisible.
Next, we right click the control group and select Hide.
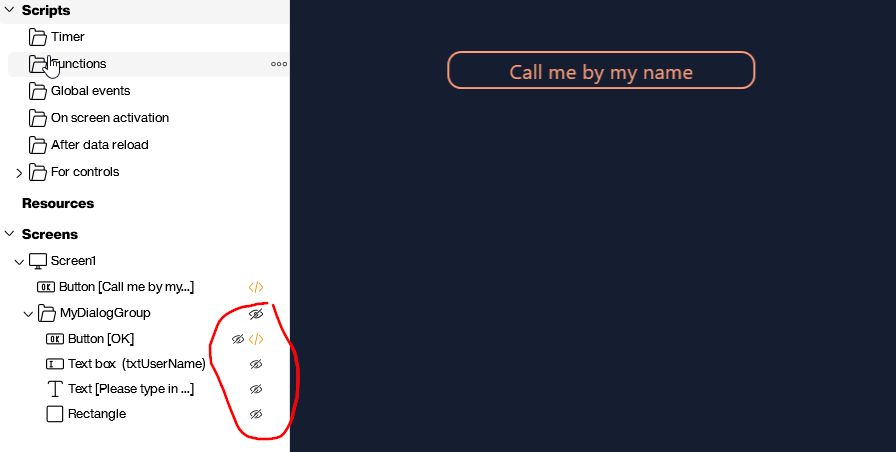
This makes the dialog invisible by default. We will use Building Blocks to make it visible.
Add the Building Blocks
We add two Building Blocks scripts—one for each button.
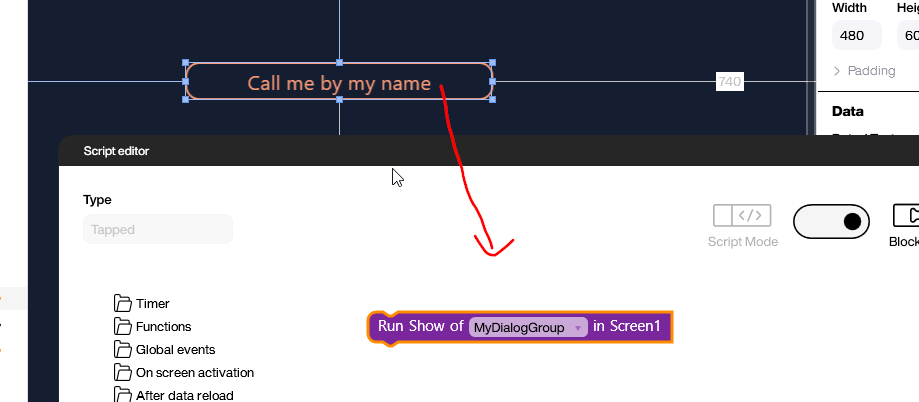
The Call me by my name button
The Call me by my name button initiates the modal dialog. So, we use a Building Block that makes MyDialogGroup visible, when the button is clicked:
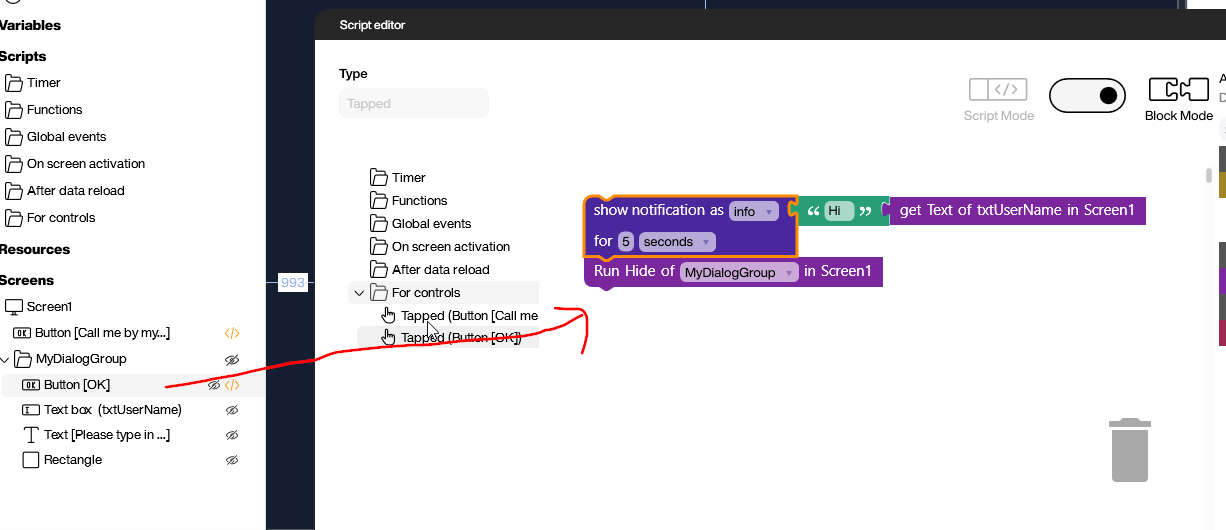
The OK button
The OK button does two things:
- Display the user’s name as a notification.
- Make the modal dialog hidden.
So, this is what the Building Blocks look like:
Result
Let’s take another look at the end result. With the techniques we showed off in this article, it’s easy to build all sorts of user input and alert dialogs in Peakboard!