On this blog, we often discuss how Peakboard application can communicate with hardware components that are used in manufacturing and logistics. In today’s article, we’ll take a detailed look at a pick-by-light system from Captron. Captron is a German manufacturer based in the beautiful state of Bavaria, Southern Germany.
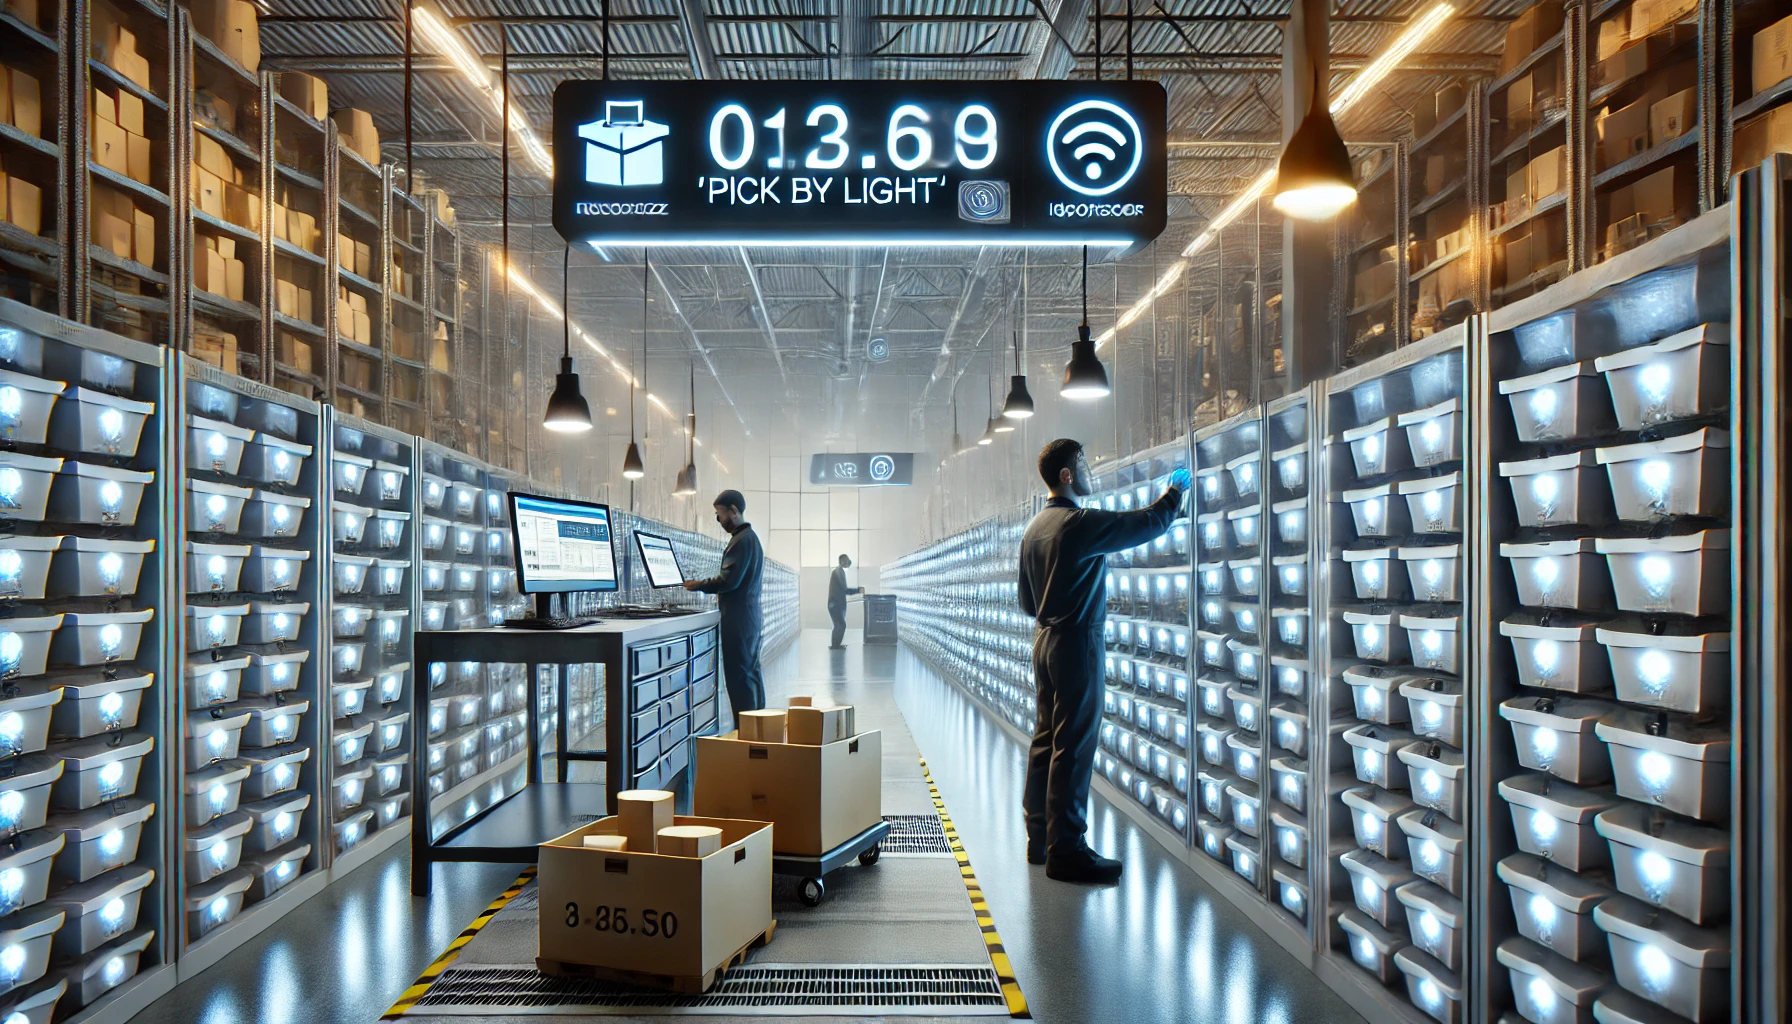
One of the PBL technologies Captron makes is an LED strip. This strip is mounted onto the racks of manufacturing warehouses and workplaces, to help the workers take items from the correct warehouse bin. You can see the system in action from the video on the Captron PBL page.
In this article, we will build a Peakboard application that controls these LED strips. Here’s how it works:
- The application takes in a table that contains the list of items to pick.
- The application lights up the LEDs next to the items that need to be picked.
- The worker picks an item and marks it as picked on the application. The application turns off the corresponding LEDs.
- The worker continues picking items until all LEDs are off.
You can view the complete process in the video at the bottom of this page.
Mount and configure the LED strip
The LED strips are mounted onto the warehouse racks and wired to a control unit, as shown in the following photo. The control unit can handle up to four strips.
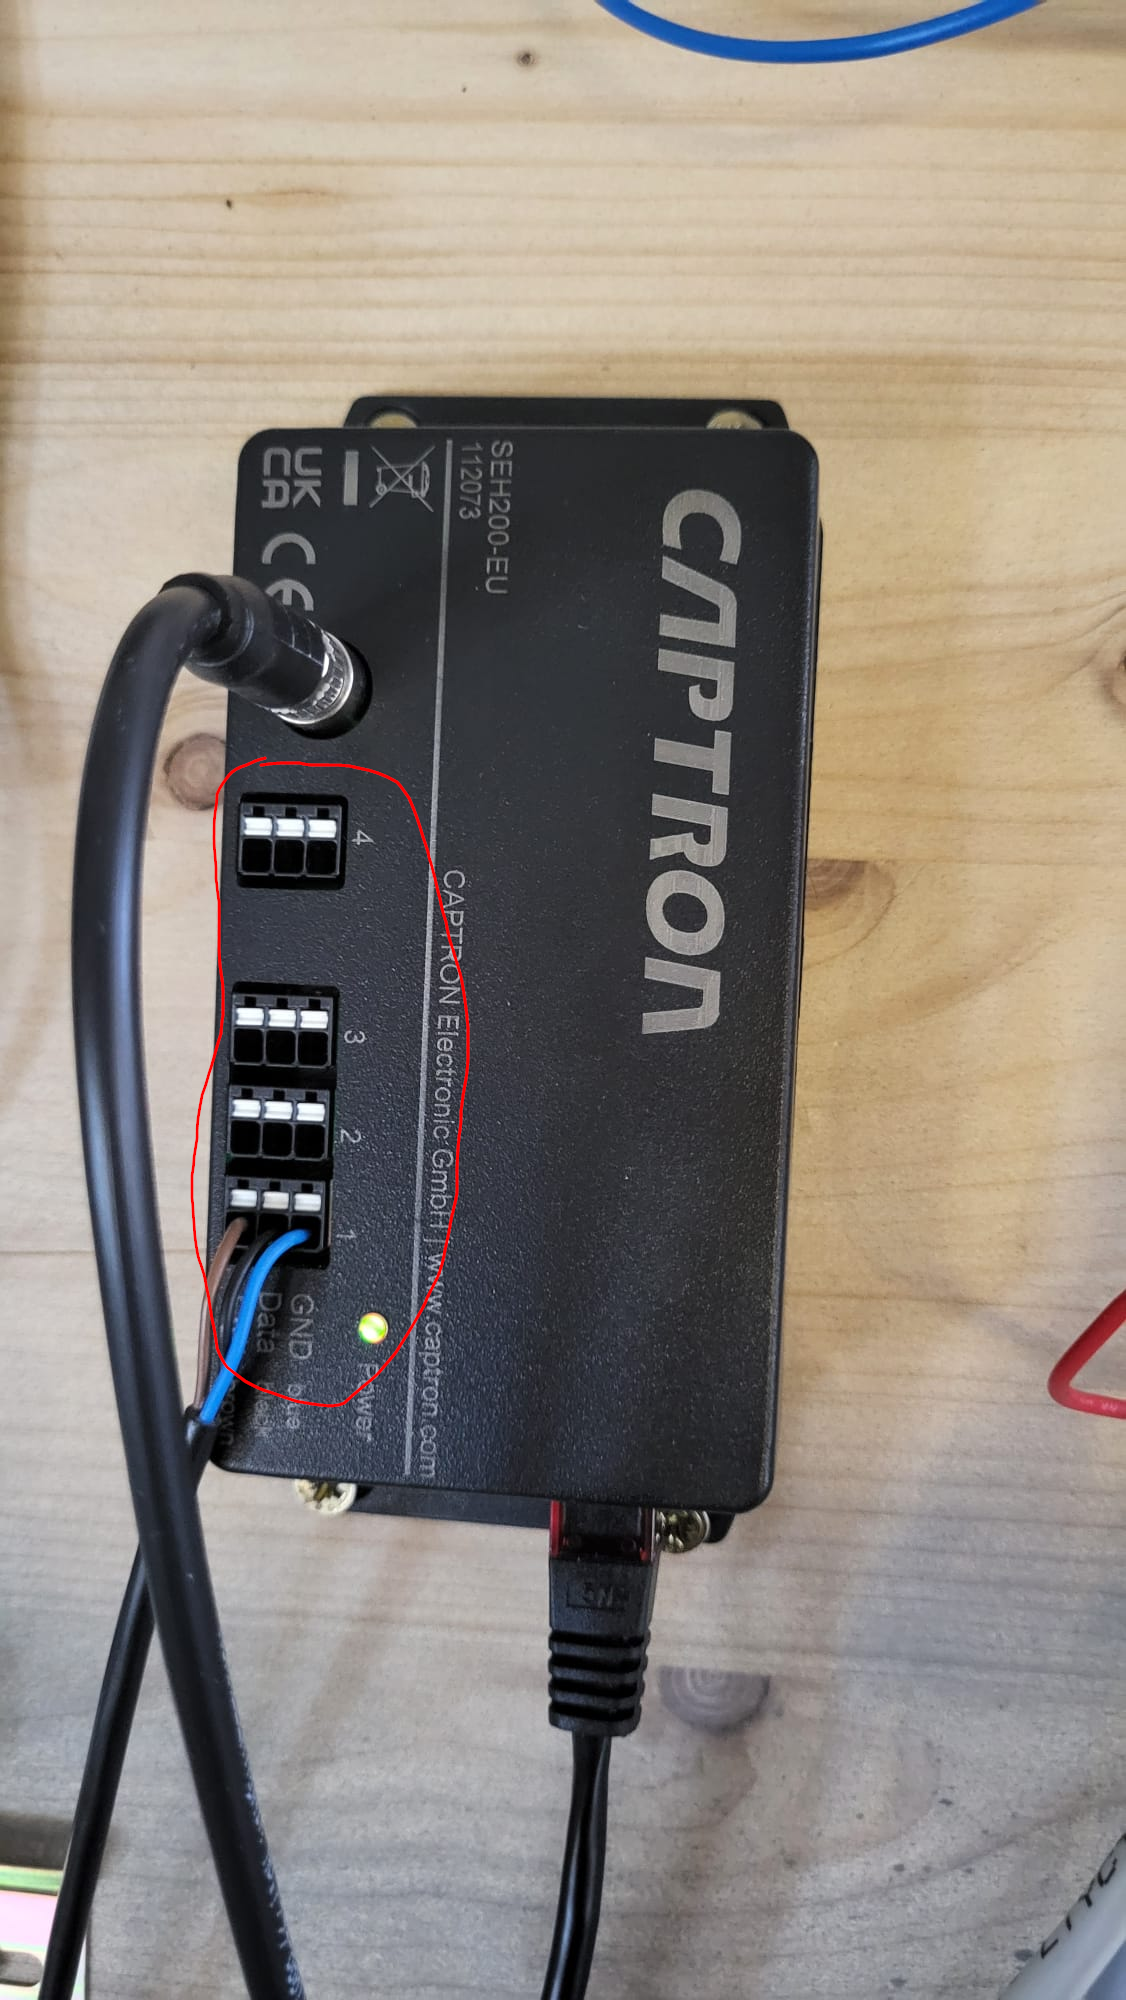
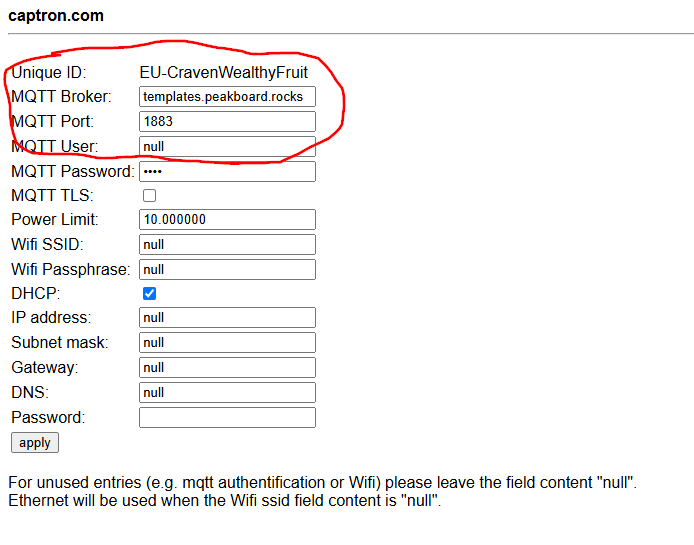
As soon as the control unit is connected to the local network, a simple web-based configuration page can be accessed through the browser. The only thing we need to configure is the connection to an MQTT broker. We also need to copy the Unique ID. We’ll need it later for the MQTT exchange.
Prepare the application
The first table we need contains the order lines, as shown in the following screenshot:
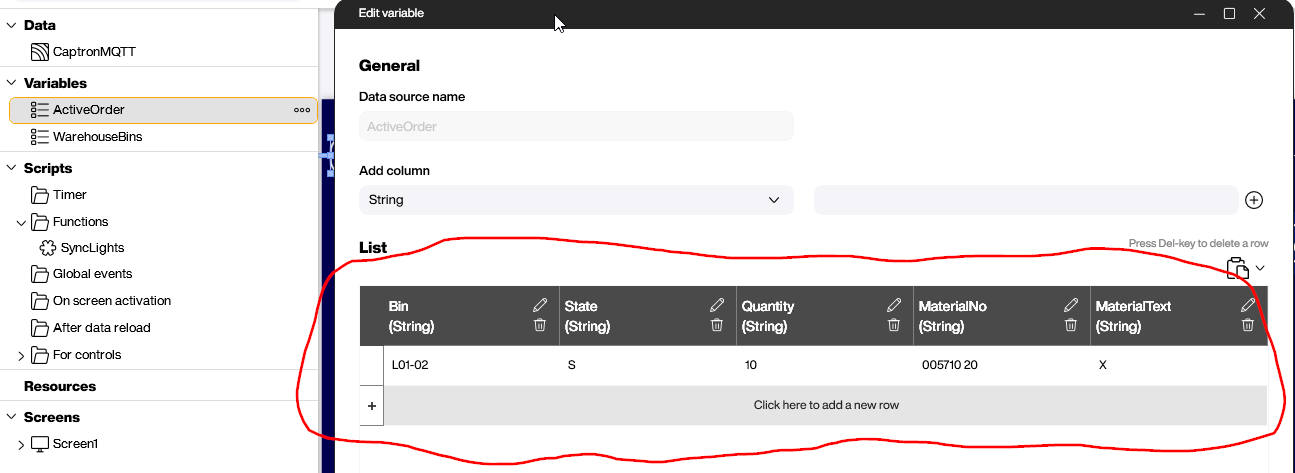
There are the typical columns, like material number, quantity, and the warehouse location or bin where the items are stored. Let’s assume this data structure has been filled by an ERP system. We won’t go through that process here, because we’ve covered it in previous articles (e.g. getting a transfer order from SAP).
For our example, we fill this table with random placeholder data as soon as the user clicks on the Launch New Order button, to keep things as simple as possible. To see the details, check out the PBMX.
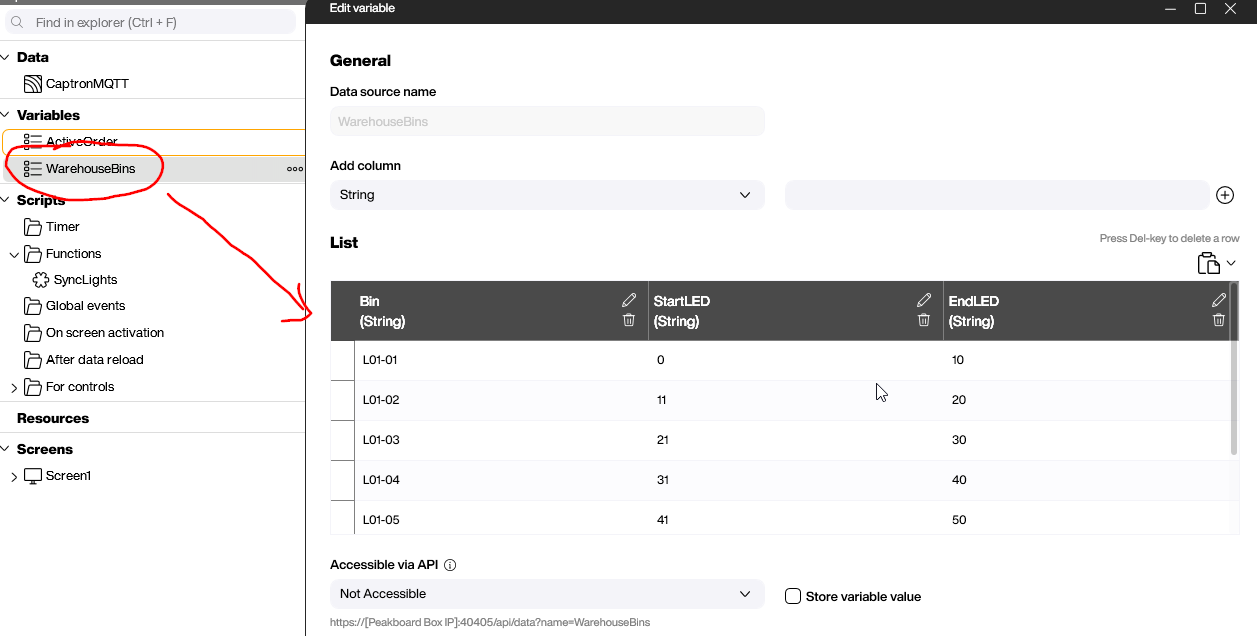
The second table we need contains the metadata of our warehouse rack. Each warehouse bin has a corresponding LED start and end number, which specify the range of LEDs underneath that bin. So, using this table, we can switch the LEDs on or off, as needed.
After this table is created during the set-up of the rack, it doesn’t need to be modified. There’s also the option of maintaining this metadata together with warehouse master data of the ERP system (like SAP or Business Central). But this depends on your use case and your ERP system.
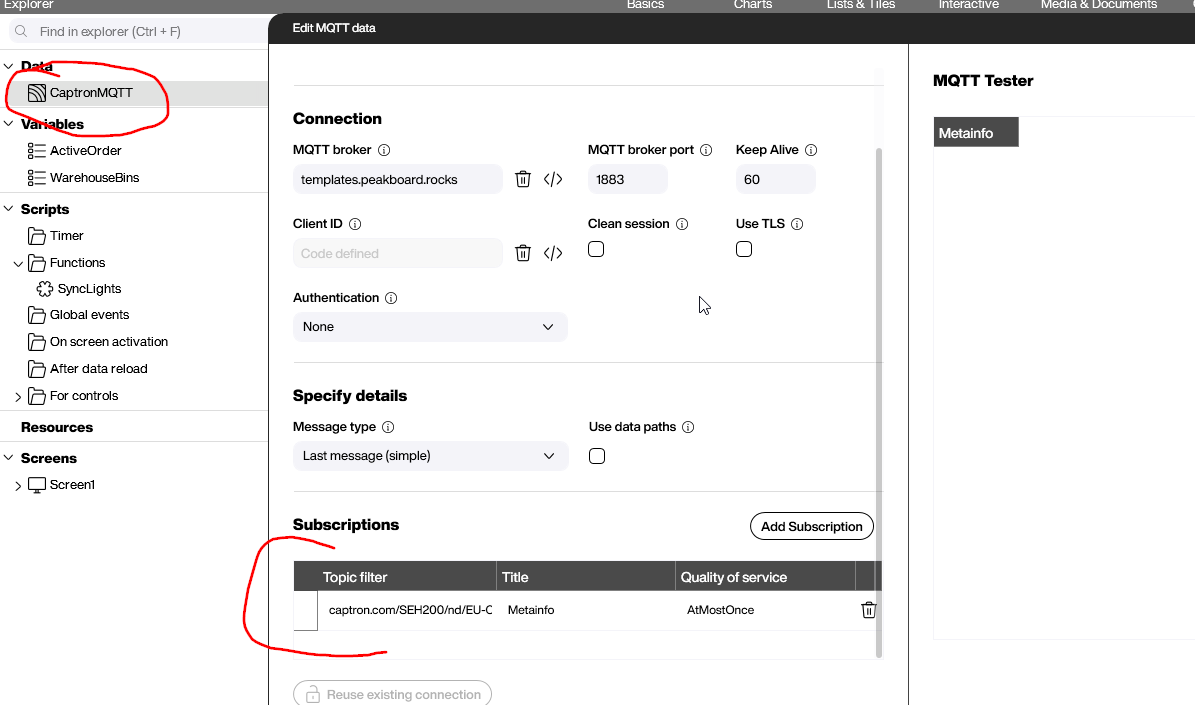
Our application has only one data source, which is the connection to the MQTT broker. We need this connection to send the command to switch the lights on and off. So, we subscribe to a dedicated MQTT node that represents the health status of the Captron PBL controller. This is the topic we subscribe to:
captron.com/SEH200/nd/EU-CravenWealthyFruit/Pub/MAMThe literal EU-CravenWealthyFruit is the Unique ID that we copied from the web interface. The health status is submitted in a JSON string, as described in the Captron PBL manual.
Build and send the light commands
The magic of this application happens in the SyncLights function. The MQTT command is a JSON string that is sent to this topic (notice the Unique ID appears here):
captron.com/SEH200/nd/EU-CravenWealthyFruit/Set/Data/LedStripHere’s an example command:
{ "Content": "/Set/Data/LedStrip",
  "LED_STRIP_1": {
    "Active": true,
    "Segments": [
      {
        "StartLED": 0,
        "StopLED": 10,
        "Effect": 1,
        "Colors": [ { "R": 0, "G": 150, "B": 0 } ]
      },
    ]
} }
As you can see, we need to specify which of the LED strips to send the command to. In this example, it’s LED_STRIP_1, which is the first LED strip.
We control the lights of the LED strip by using the Segments array. A segment is a group of consecutive LEDs on the LED strip.
We specify the range of LEDs of a segment by using StartLED and StopLED. In this example, we have a single segment that consists of the first ten LEDs (LEDs 0 to 10). The segment’s Effect is 1, which is a static light. The segment’s color is green (RGB value of 0,150,0).
Because Segments is an array, we can add additional segments by adding elements to the array.
Here’s the Building Blocks script that puts the JSON file together:
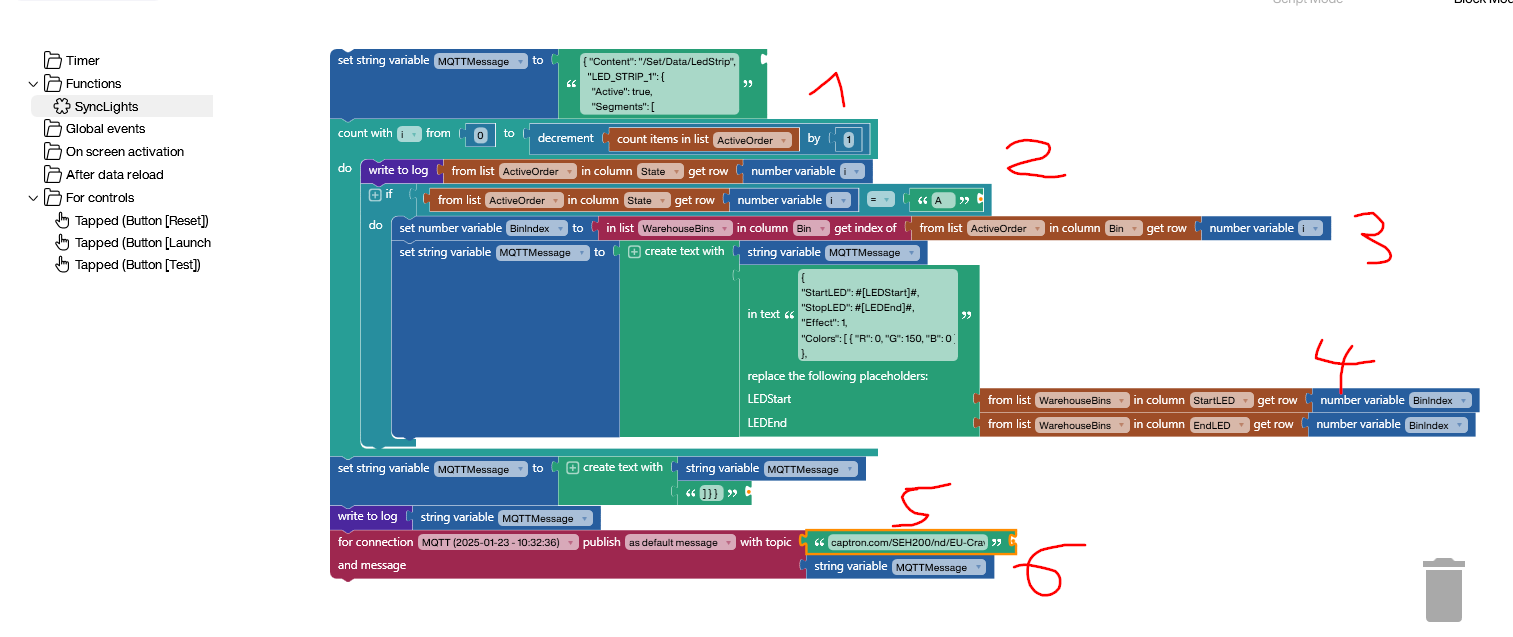
Here’s how it works:
- Begin the MQTT message with some static text.
- Loop over the order items from the order table. If the
Stateof an item isA, that means it’s active. For active items, we create a new segment to switch the light on. - We look up the index of the table entry in the warehouse bin table to get the bin number.
- We create the segment element by using a placeholder template and filling in the start and end LED. The start and end LED numbers are retrieved from the warehouse bin tables, according to the bin index.
- Close the JSON array.
- Send the JSON command to the MQTT broker.
Here’s the JSON with the placeholders in it:
{
"StartLED": #[LEDStart]#,
"StopLED": #[LEDEnd]#,
"Effect": 1,
"Colors": [ { "R": 0, "G": 150, "B": 0 } ]
},
The last thing we need to add is the Done button. In the list of order items, the user can hit Done to indicate that the item has been picked. In that case, we set the state of the item to D:

Result
In the following video, you can see the entire picking process. The order is initiated by pressing the Launch New Order button. The three items to pick are displayed, and the three corresponding warehouse bins are indicated by the LED strip. As soon as an item is marked as done by the user, the light switches off.