In this blog, we’ve discussed a few different ways to integrate sensors into a Peakboard application. We can find an overview of these articles in The hitchhiker’s guide to I/O devices.
In today’s article, we’ll take a look at the ADAM-6051 by Advantech. The ADAM-6051 is a compact, Ethernet-based I/O module that provides 12 digital input channels and 2 digital output channels, along with 2 built-in counters. It supports Modbus/TCP, MQTT, and SNMP protocols. In this article, we will walk through the basic steps of configuration and then primarily use the MQTT interface to build a demo dashboard that reads input states and controls output channels.
Configuration
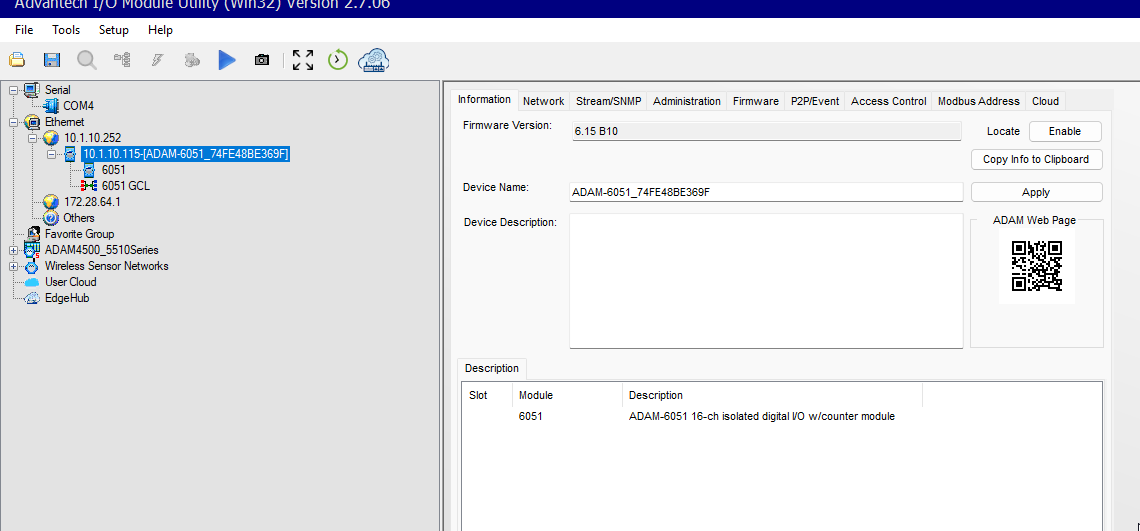
There are two ways to configure the device: via a web interface, like most other I/O adapters, and through a desktop tool. We will have a look at the desktop tool, which can be downloaded here. It requires a .NET runtime 2.0 to work, which feels a bit like a throwback to the 90s. After installation, we can right-click on the Ethernet node and choose Find Devices. Chances are high that it automatically discovers our ADAM device and adds it to the tree. On the right side, there are several configuration tabs.
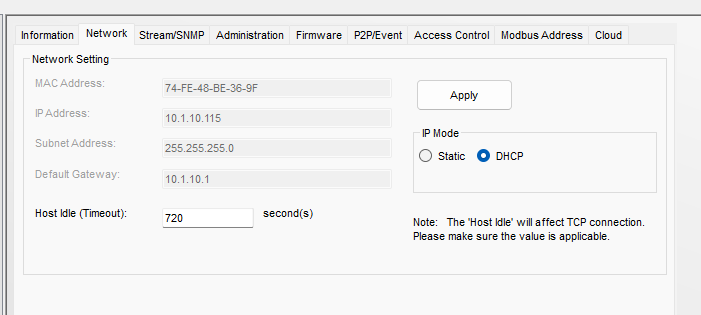
The first thing we need to check is whether the device should use a static IP address or obtain a dynamic IP address from DHCP. If we’re unsure about the right configuration for our network, we can ask the sys admin or simply try both options and see which one works.
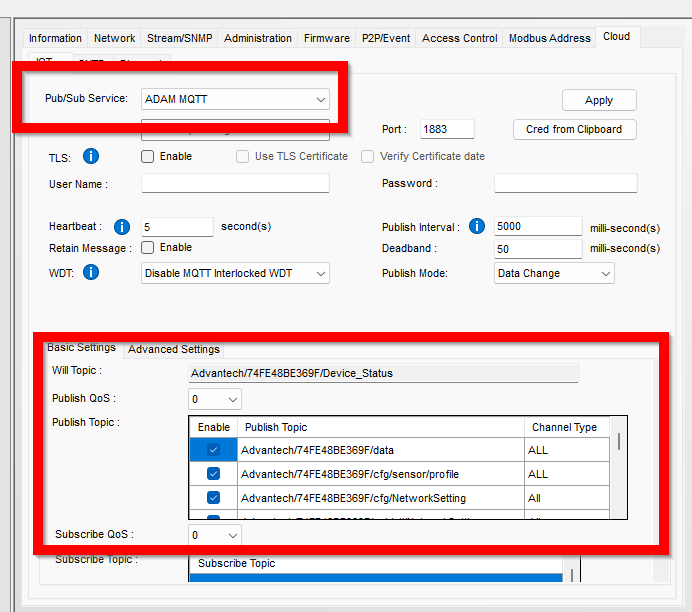
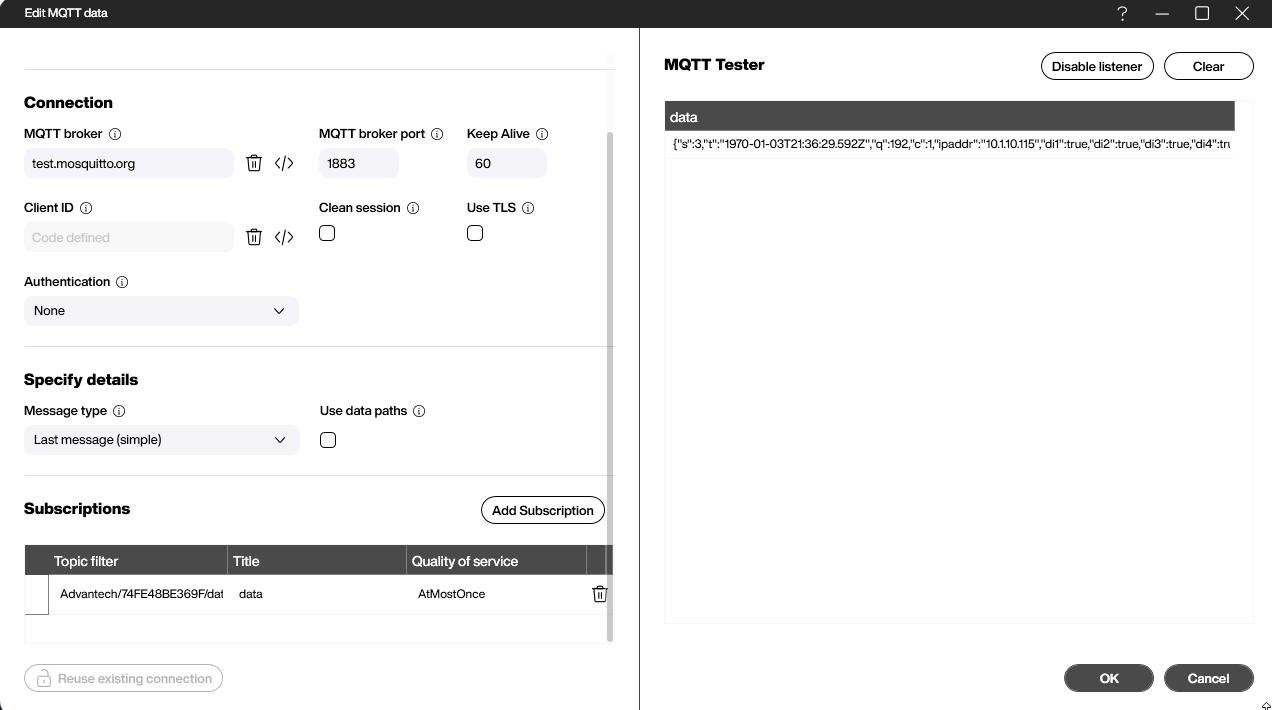
For the MQTT connection, we choose the Cloud tab, change the Service to MQTT, and fill in the address of our MQTT broker. It’s possible to adjust how and which MQTT topics are published when the I/O status changes. For our experimental purposes, the default mode works perfectly fine.
Let’s switch over to the Peakboard side. For the data source, we simply use a regular MQTT source and subscribe to the topic Advantech/74FE48BE369F/data, where 74FE48BE369F is the MAC address of our device. Every time the ADAM module publishes an update, it returns a JSON string that contains the values of all input and output channels along with some additional status information.
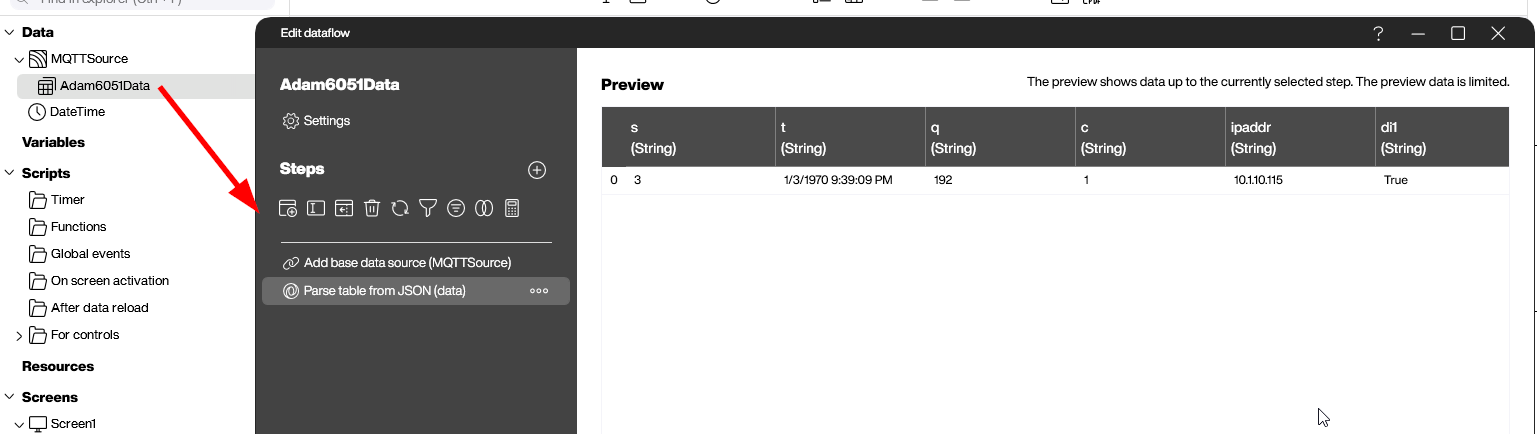
It’s not necessary to parse the JSON manually. We just add a dataflow that uses the Parse JSON activity to turn the raw payload into a usable Peakboard table with exactly one row and a column for each attribute. This way, we can bind individual channel values directly to visual elements on our canvas.
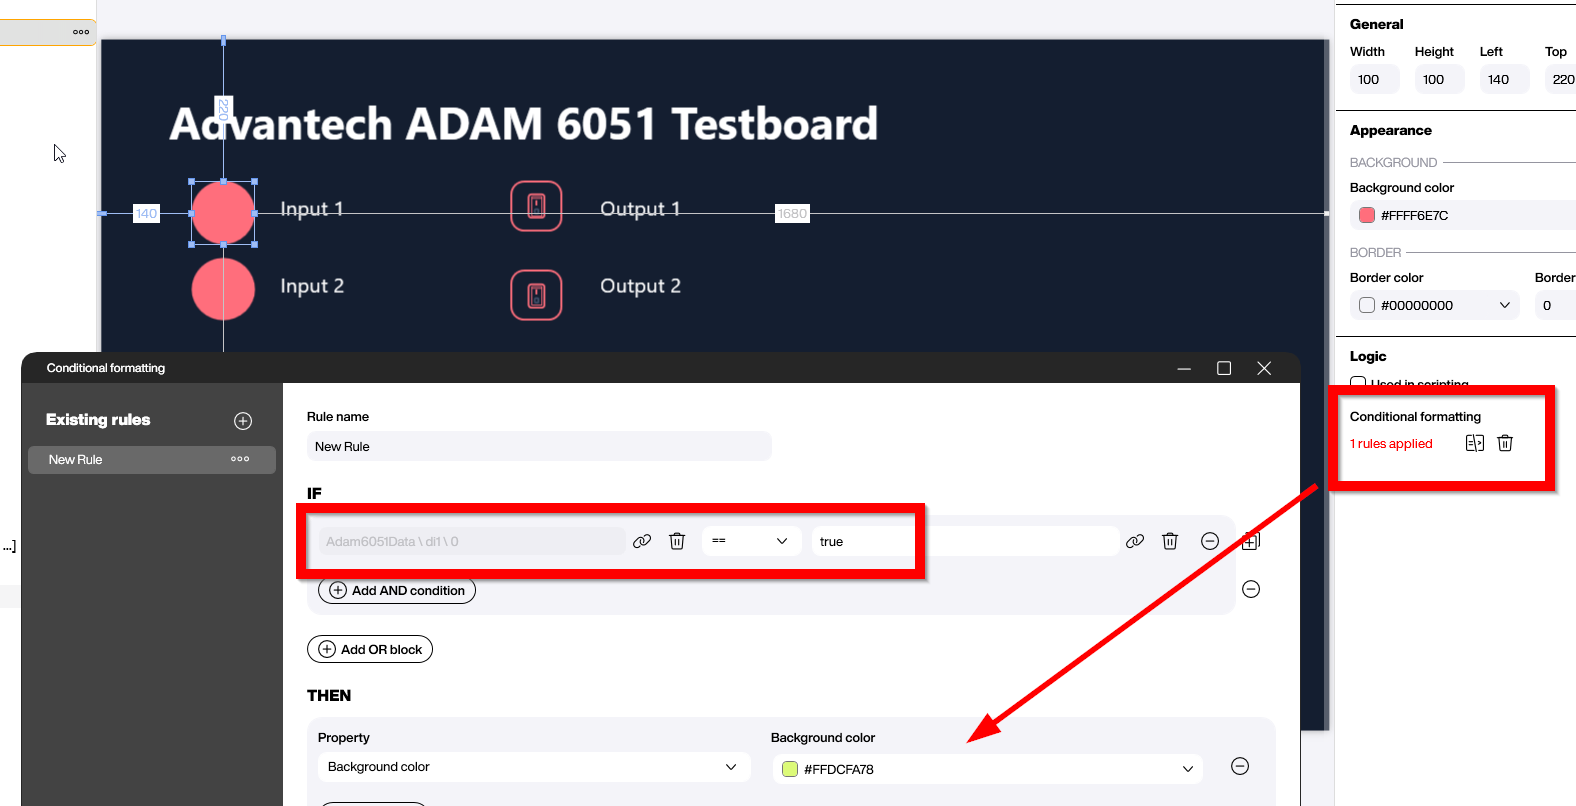
For our demo board, we use some conditional formatting to color the indicator bubbles red by default and switch them to green when the channel value is True. This gives us an immediate visual representation of which inputs are currently active.
Setting the output values
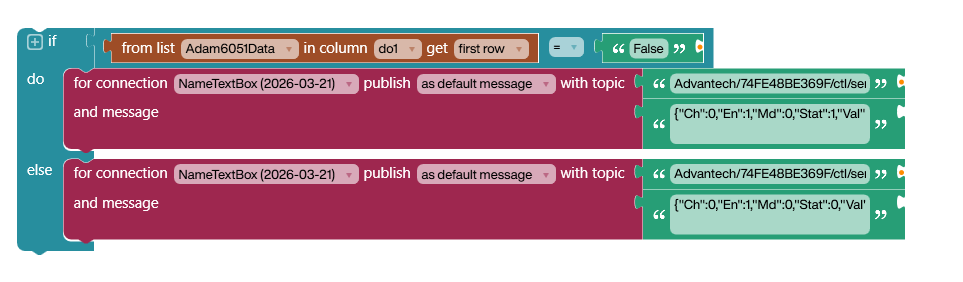
Setting the output channels is actually straightforward. The MQTT topic for a channel follows the pattern Advantech/<MAC>/ctl/sensor/do_value/<channel>. The tricky part is the JSON payload. For reasons only the Advantech engineers know, the JSON value to set the output to true is {"Ch":0,"En":1,"Md":0,"Stat":1,"Val":1,"PsCtn":0,"PsIV":0}. To change it back to false, we need to adjust both the Stat and the Val fields to {"Ch":0,"En":1,"Md":0,"Stat":0,"Val":0,"PsCtn":0,"PsIV":0}. The screenshot below shows the Building Blocks logic that we use to toggle the output:
Alternative to MQTT: Using Modbus
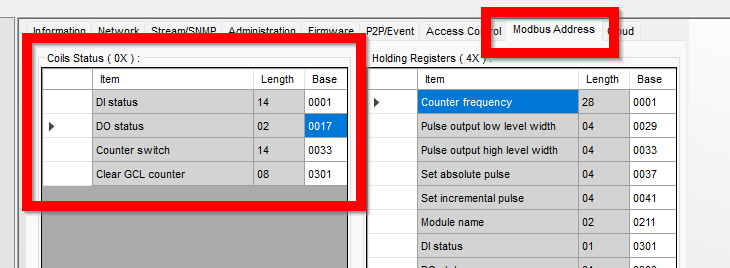
In case we don’t want to use MQTT — for example, because we don’t have an MQTT broker in place — we can easily use Modbus/TCP to communicate with our ADAM-6051 instead. The Modbus register addresses can be looked up in the Modbus tab of the admin tool. Let’s check the first output channel as an example. It shows that the output channels start with Base 17, which means we need to address the byte ordinal number 16 in the Peakboard data source (since Modbus addressing is zero-based).
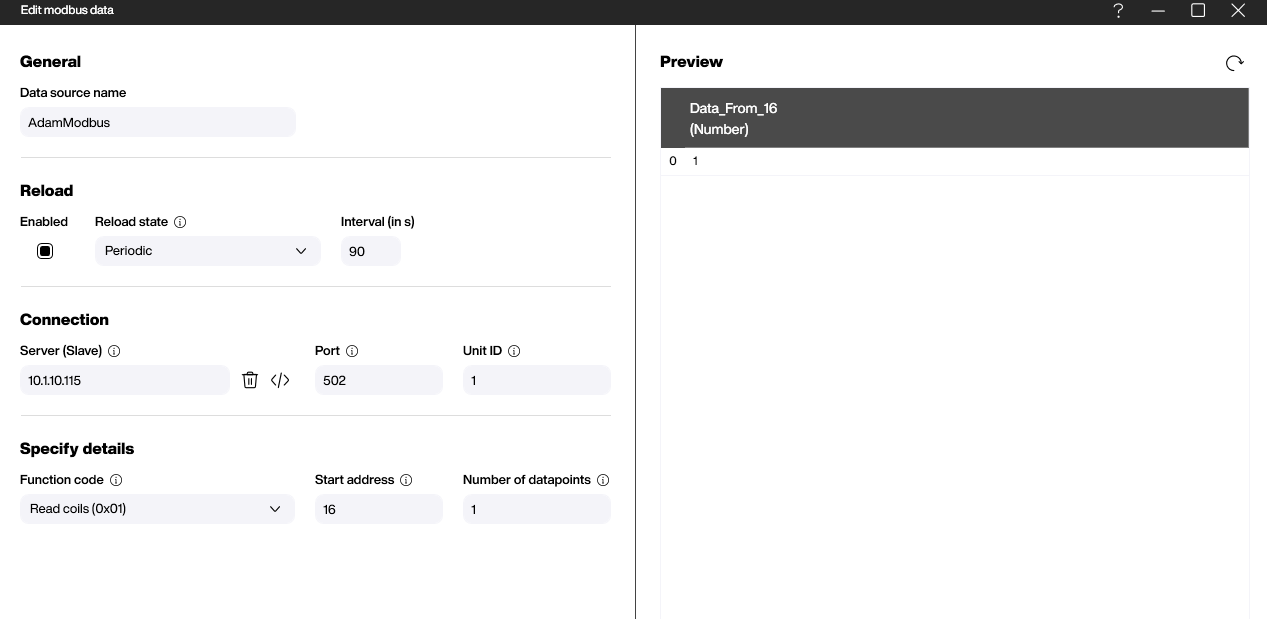
And here’s how the corresponding Modbus data source is configured in the Peakboard Designer. We simply point it to the IP address of our ADAM device and specify the register range we want to read.
Result
The video shows the final result in action. When we toggle the output through MQTT, the color of the button changes accordingly. This happens because setting the output value causes the ADAM device to publish a new MQTT message with the updated state, which in turn triggers the conditional formatting on our dashboard. So when the color actually changes, we can be confident that the device has received and confirmed the command — a nice built-in feedback loop.