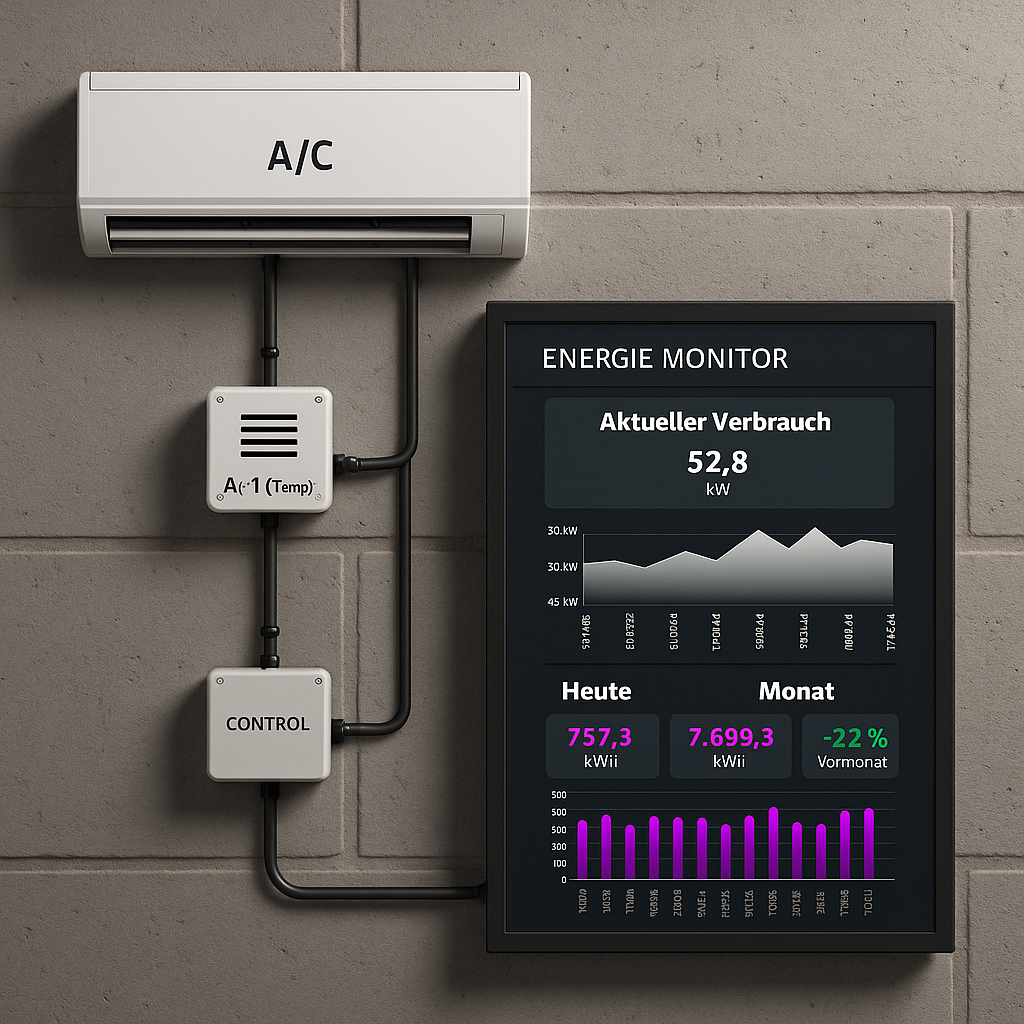
Peakboard version 4.1 introduced the new BACnet data source! BACnet (Building Automation and Control Network) is an open communication protocol designed for building automation systems. It’s widely used in large buildings, factories, and smart infrastructure, for centralized monitoring and control of energy systems. In this article, we’ll take a look at how to connect a Peakboard application to a BACnet device.
Set up test environment
First, let’s assume that we don’t have access to a BACnet-capable device, or that the devices we do have access to are not meant for testing purposes. So, we need to set up a BACnet test environment that lets us experiment.
To do this, we use Yet Another BACnet Explorer (YABE). YABE is an open-source tool for connecting to and exploring BACnet devices. However, it also comes with three different simulators that expose BACnet endpoints for testing.
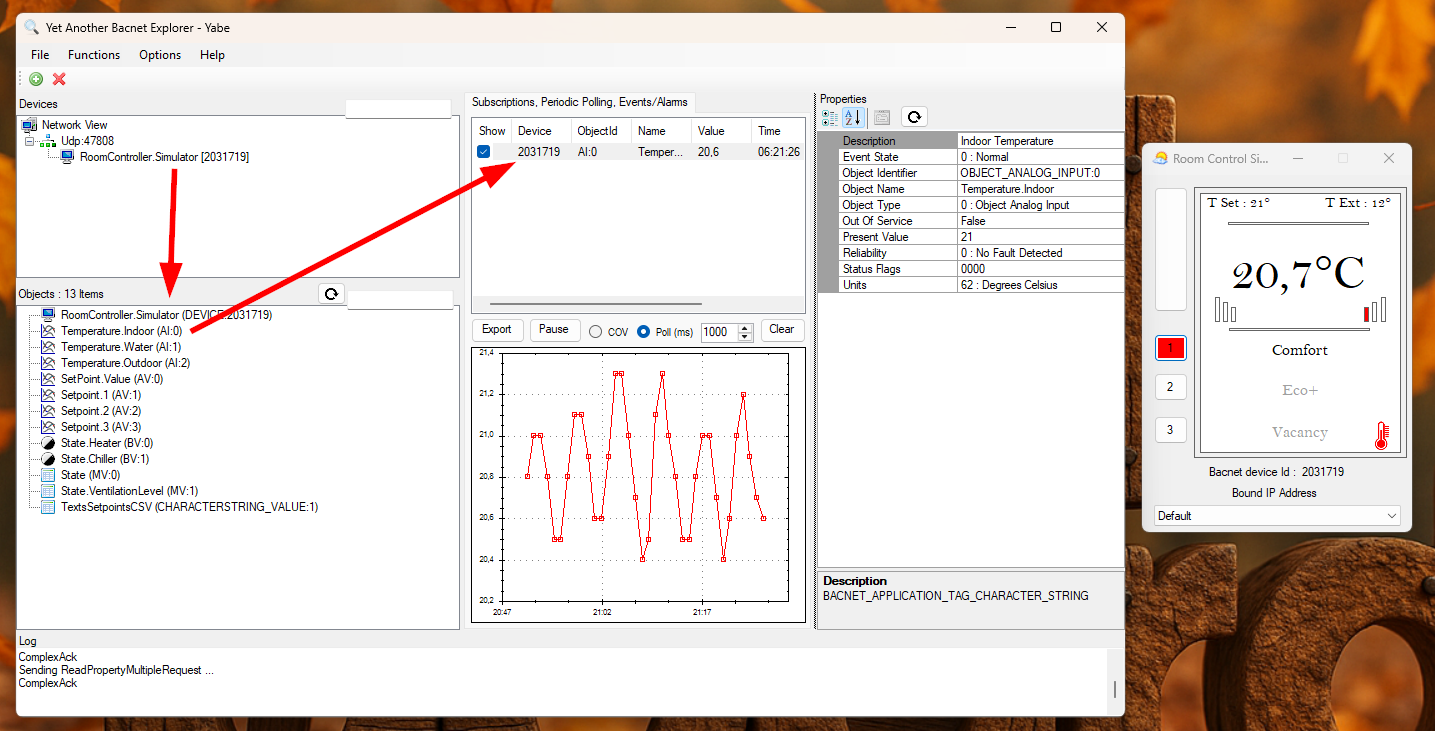
For our example, we’ll use the room controller simulator. It simulates a heating/cooling system. We go to Options > User commands and launch it. Soon after, YABE automatically finds the simulated device and lists all of its properties in the bottom-left pane. You can subscribe to specific properties, and you can track subscribed properties in the top-middle pane.
Here, you can see the YABE explorer on the left and the simulator on the right:
Create the Peakboard app
Now that our test environment is set up, let create the Peakboard app!
Add the BACnet data source
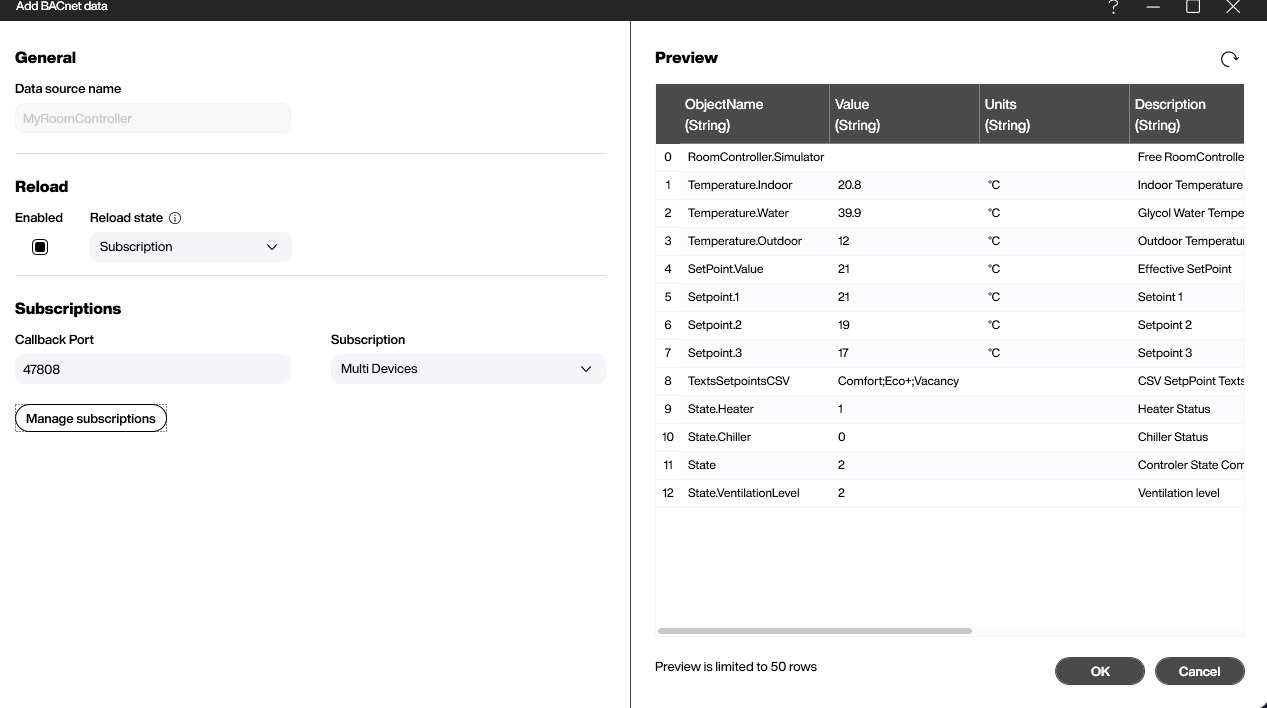
First, we add a new BACnet data source. This data source uses a publish-subscribe pattern. This means that the data source subscribes to the BACnet device and waits for the device to send data. Because of this, we set Reload State to Subscription.
The callback port is set to 47808 by default, and there’s usually no need to change it.
To connect to our BACnet device, we have two options:
- We set Subscriptions to Single Device and we manually enter the IP address, port, and BACnet device ID of our BACnet device.
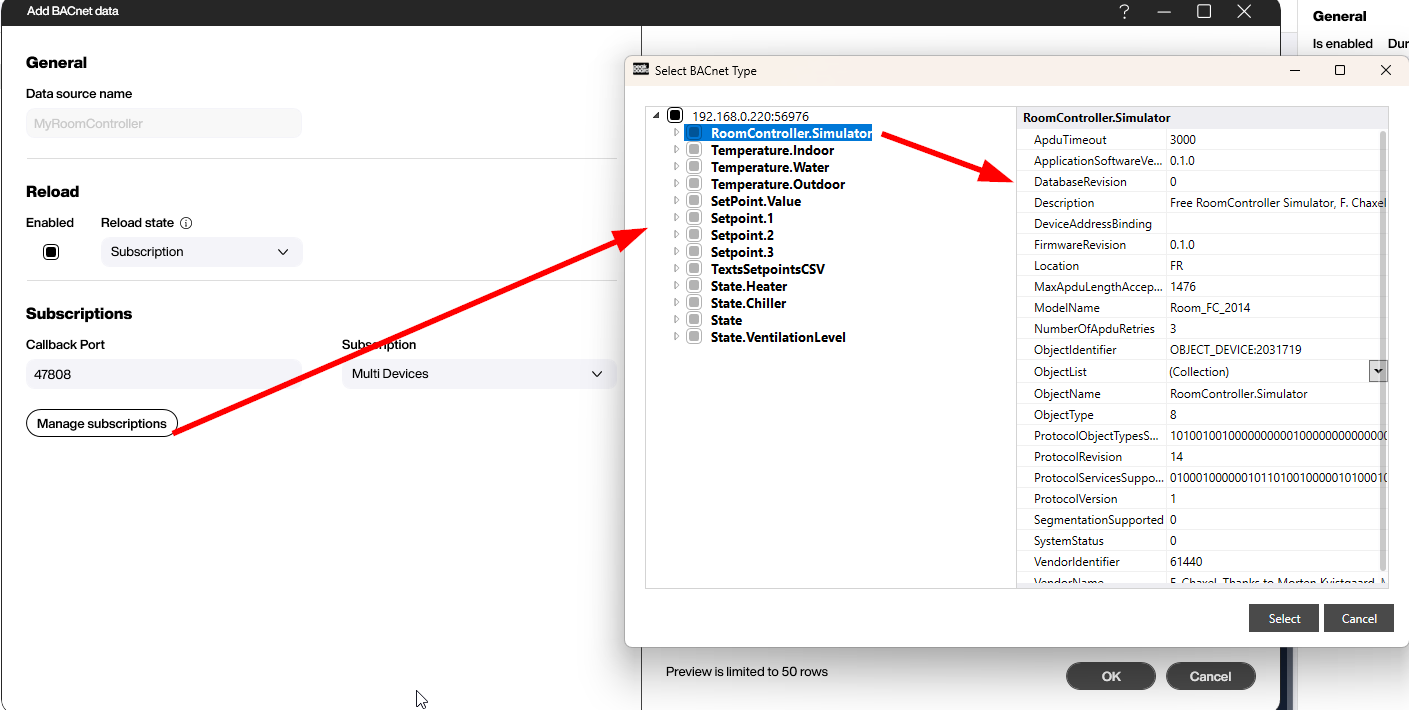
- We set Subscriptions to Multi Devices and we use the subscriptions manager to scan the network automatically. Then, we select the properties that we want to subscribe to.
The Multi Devices option is usually the right choice (even if we only have one device), because it’s easier to use. So, we set Subscriptions to Multi Devices and we click Manage subscriptions. Then, we select all the properties of our simulated device.
After setting the subscription, we click the refresh button and verify that the preview window now contains data from the simulated device:
Add a data flow
The data source’s output is formatted as a table, where the ObjectName column contains the name of the property. Note that the order of the rows is random—each time the device sends new data, the order can change. So for example, Temperature.Indoor might be row 2 right now, but later it could be row 6.
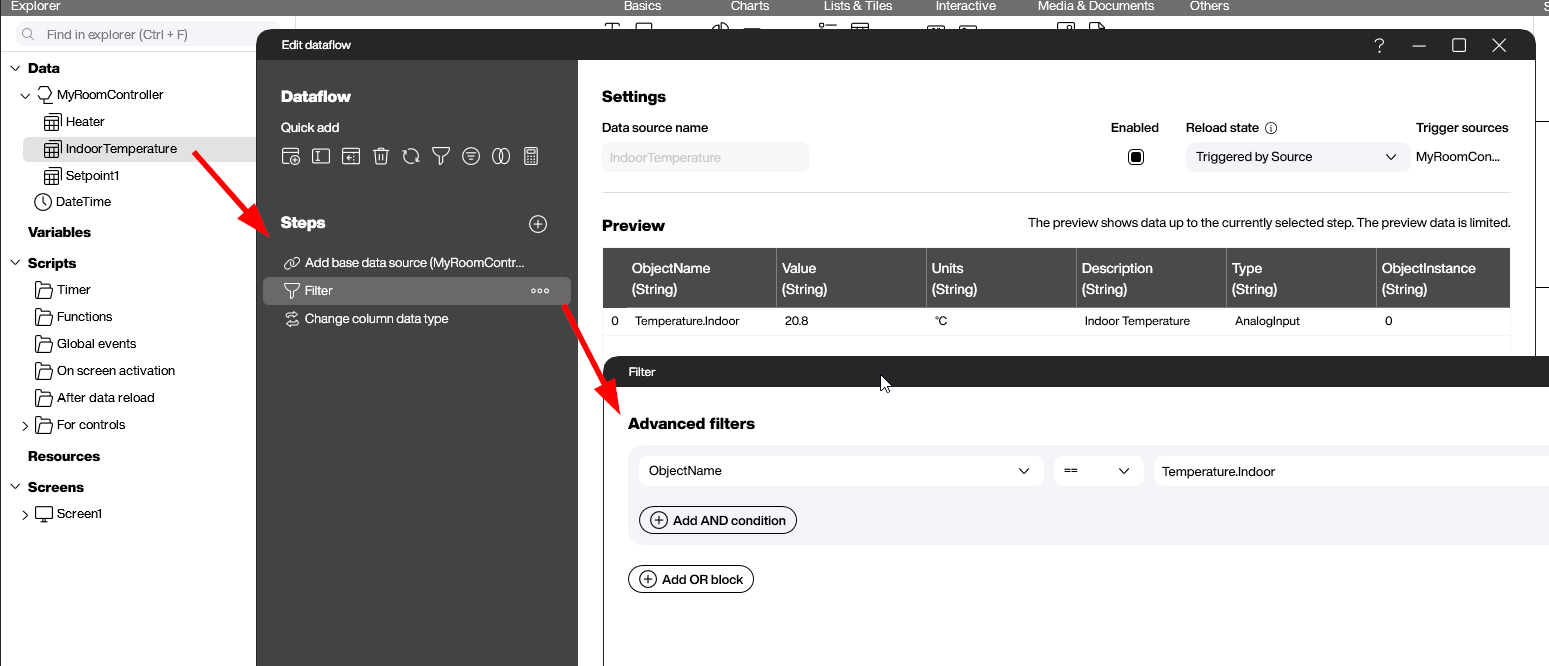
This means that we can’t use row numbers to get specific properties. So instead, we’ll create data flows that filter for the properties we want, using the ObjectName column. Each data flow corresponds to a single property.
Here’s what the data flow for the indoor temperature looks like. You can see that we filter for ObjectName == Temperature.Indoor. We also adjust the data type of the Value column to Number, because we know that the temperature is a number and not a string.
We add another data flow for Setpoint1. This is the temperature that the room is set to, on the device. We’ll need it later.
Show the current temperature
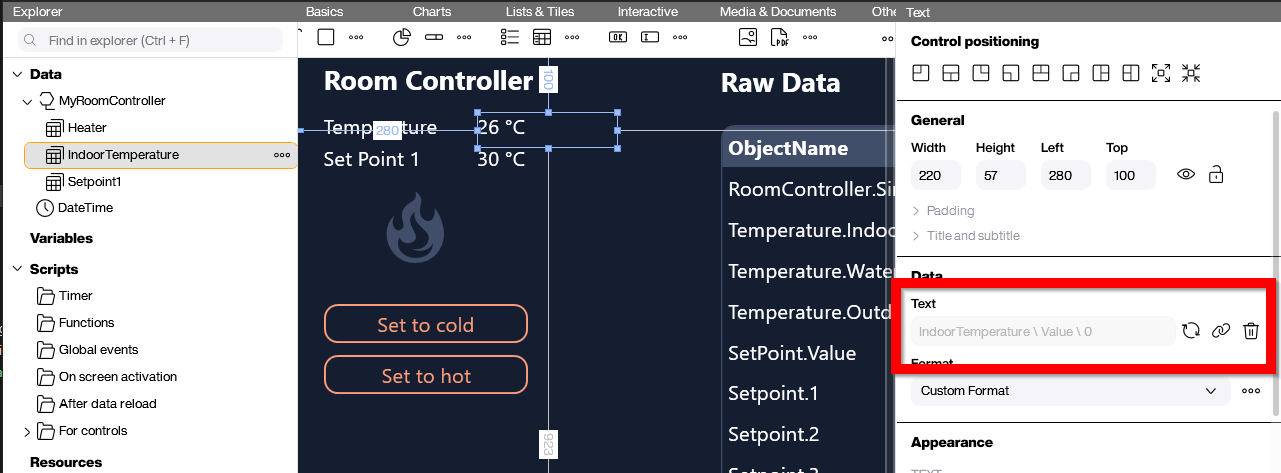
Now that we have all the data handling done, all that’s left is the dashboard. We add a text control to display the current temperature. We bind this text control to our data flow from earlier.
Write to the BACnet device
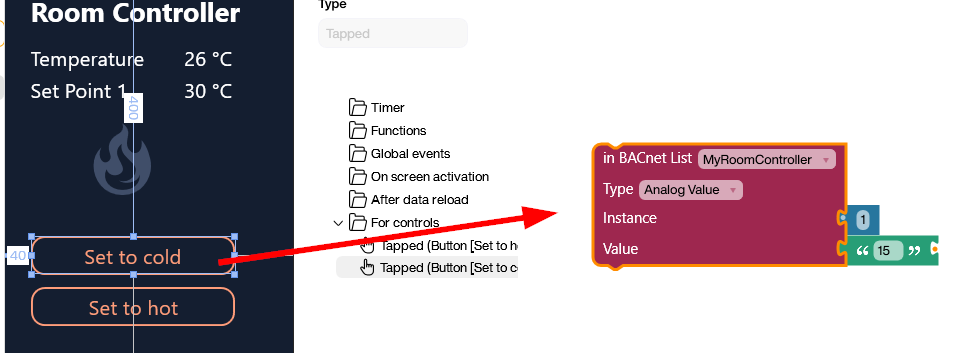
Next, we create a button that sets the room temperature to 15°C. To make it functional, we create a Building Blocks script for it.
The script uses the BACnet data source to send a command back to the BACnet device. We select the property we want to modify, the data type, the instance ID, and the new value. To figure out what to choose for the data type and instance ID, look at the data source’s preview window, where the sample data has all the information.
Finally, we add a very similar button for setting the temperature to 30°C.
Result
This video shows our final app in action! Besides the controls we went over, you can see that we also list out all the properties in a table control, to show the raw data. As you can see, the values change simultaneously. And when we click the temperature-setting buttons, the temperature in the simulator on the right updates accordingly.